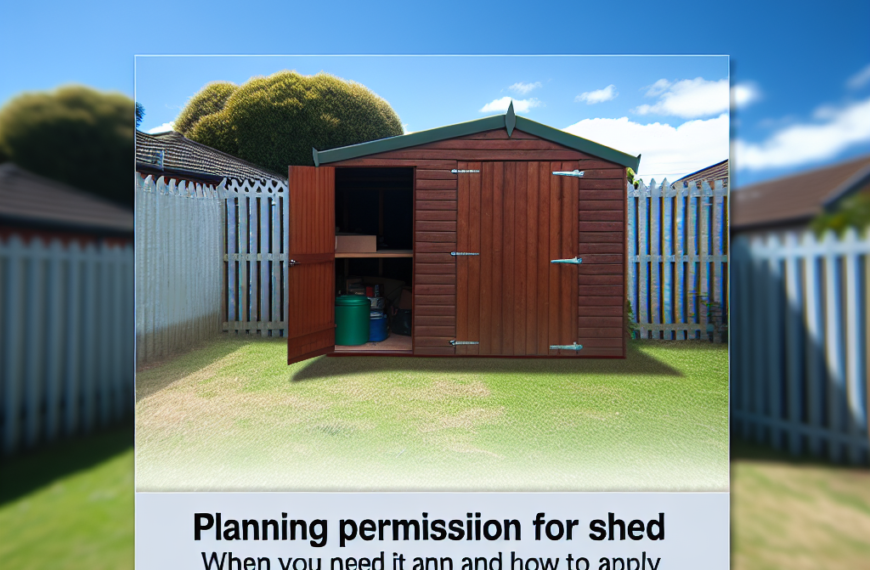
A garden shed is more than just a storage unit; it’s a versatile extension of your home, offering dedicated space for tools, garden equipment, outdoor furniture, or even serving as a potting shed, workshop, or quiet retreat. While many homeowners consider purchasing a pre-built shed, the thought of embarking on a do-it-yourself (DIY) build can seem daunting. However, with the right approach and, crucially, the right easy to build garden shed plans, constructing your own shed can be a remarkably straightforward and incredibly rewarding project, even for those with limited construction experience.
This comprehensive guide will demystify the process of building a garden shed, focusing specifically on plans and techniques that prioritize simplicity and ease of construction. We’ll delve into the compelling reasons to choose the DIY route, walk you through essential pre-build considerations, help you select the perfect beginner-friendly plans, list the necessary tools and materials, provide a general step-by-step construction overview, and offer invaluable tips to ensure your project is a resounding success. Get ready to transform your backyard with a functional and beautiful shed, built with your own hands.
Why Build Your Own Garden Shed? The Benefits of DIY
Deciding to build your own garden shed rather than buying a pre-fabricated one offers a multitude of advantages, particularly when focusing on easy-to-implement plans. The primary driver for many DIYers is often cost, but the benefits extend far beyond just saving money.
- Significant Cost Savings: This is arguably the most compelling reason. The cost of materials for a DIY shed is typically a fraction of what you’d pay for a comparable pre-built shed or for professional installation. Labor costs are completely eliminated, and by sourcing your own materials, you have control over the budget.
- Complete Customization: Pre-built sheds come in standard sizes and styles. When you build your own, you have the freedom to design a shed that perfectly fits your specific needs and aesthetic preferences. Need extra headroom for tall tools? Want a specific window placement for better light? Desire a unique color or siding material? All of this is possible with a DIY approach.
- Sense of Accomplishment and Pride: There’s an undeniable satisfaction that comes from stepping back and admiring something you’ve built with your own hands. A DIY shed is a tangible testament to your effort and skill, providing a rewarding sense of achievement.
- Learning New Skills: Building a shed is an excellent opportunity to expand your DIY repertoire. You’ll gain practical experience in framing, measuring, cutting, fastening, and possibly roofing and siding installation. These newfound skills can then be applied to other home improvement projects.
- Quality Control: When you build it yourself, you control the quality of the materials and the craftsmanship. You can select durable, long-lasting lumber and ensure every joint is secure and every screw is properly driven. This often results in a more robust and longer-lasting structure than some budget-friendly pre-built options.
- Perfect Fit for Your Space: Whether you have an awkward corner or a narrow strip of land, building your own shed allows you to tailor its dimensions precisely to the available space in your garden, optimizing its utility and integration into your landscape.
Essential Considerations Before You Begin: Planning Your Easy Shed Project
Before you even think about cutting the first piece of lumber, thorough planning is paramount. This initial phase sets the stage for a smooth and successful project, preventing costly mistakes and ensuring your shed meets all your requirements.
Define Your Shed’s Purpose
What will your shed primarily be used for? This seemingly simple question dictates many critical decisions. Will it be:
- A simple storage solution for lawnmowers and garden tools?
- A dedicated potting shed with benches and natural light?
- A small workshop for woodworking or crafts?
- A combination of storage and workspace?
The purpose will inform the required size, the type and number of windows, the need for shelving or workbenches, and even the type of door (single, double, sliding).
Choose the Ideal Location
Selecting the right spot for your shed is crucial for its longevity and usability. Consider:
- Accessibility: Can you easily get tools and materials to and from the shed? Is it convenient for its intended use?
- Drainage: Avoid low-lying areas where water collects. A well-drained site prevents foundation issues and rot.
- Sunlight and Shade: If it’s a potting shed, you’ll want ample sunlight. For general storage, a shadier spot might reduce heat buildup.
- Proximity to Utilities: Will you need electricity or water? Plan for these connections if necessary, and ensure they are safely routed.
- Level Ground: While you’ll level the site, starting on relatively flat ground simplifies foundation work.
Understand Local Regulations and Permits
This is a non-negotiable step. Before buying a single piece of lumber, contact your local municipal building department or zoning office. Requirements vary widely by location, but common considerations include:
- Size Restrictions: There might be limits on the maximum size of an accessory structure without a permit.
- Setbacks: Regulations often specify how close a structure can be to property lines.
- Height Restrictions: Maximum allowable height for sheds.
- HOA Rules: If you live in a community with a Homeowners Association, they may have additional rules regarding shed size, style, and materials.
Ignoring permit requirements can lead to fines, forced demolition, or difficulty selling your home later. When looking for easy to build garden shed plans, ensure they comply with your local regulations, or be prepared to adapt them.
Set a Realistic Budget
Outline your budget early. This includes not just the primary materials (lumber, roofing, siding, foundation materials) but also fasteners, hardware (hinges, latches), paint or stain, and any tools you might need to purchase or rent. Having a clear budget helps in selecting plans and materials that are financially feasible.
Select Your Materials Wisely
For an “easy to build” project, material choice can simplify the process significantly:
- Wood: Pressure-treated lumber is essential for any components in contact with the ground or exposed to moisture (skids, floor joists). For framing, common untreated lumber (e.g., spruce-pine-fir) is standard. For siding, options like T1-11 plywood, pre-primed engineered wood panels, or even simple overlapping boards can be easy to work with.
- Roofing: Asphalt shingles are common and relatively easy to install. Metal roofing panels can be even faster for simple gable roofs.
- Foundation: Concrete blocks or gravel pads are often the easiest and most cost-effective for smaller sheds.
Choosing the Right Easy-to-Build Shed Plan
The core of an “easy to build” project lies in the plan itself. Not all shed plans are created equal, and some are specifically designed with simplicity and beginner-friendliness in mind. This is where your investment in time pays off.
Where to Find Easy Plans
- Online DIY Websites: Many reputable home improvement and DIY sites offer free or low-cost shed plans. Look for sites that provide clear diagrams, step-by-step instructions, and material lists.
- Specialized Shed Plan Sites: Websites dedicated solely to shed plans often have a wide variety, categorizing them by skill level or complexity.
- Books and Magazines: Older resources can still be goldmines for simple, time-tested shed designs.
- Hardware Store Kits: While not “plans” in the traditional sense, pre-cut shed kits offer the ultimate ease, as all pieces are cut to size and ready for assembly. This is often the most expensive option, but also the fastest.
What Makes a Plan “Easy”?
When evaluating plans, look for these characteristics that denote ease of construction:
- Clear, Detailed Instructions: The best plans don’t just tell you what to do, but how to do it, often with accompanying text and visuals.
- Comprehensive Material and Cut Lists: A precise list of all materials (lumber dimensions, hardware types) and exact cutting dimensions for each piece saves immense time and reduces waste.
- Step-by-Step Diagrams/Illustrations: Visual aids are crucial, showing how components fit together from foundation to roof.
- Simple Joinery: Plans that rely on straightforward butt joints secured with screws or nails are much easier than those requiring complex dados or mortise-and-tenon joints.
- Common Lumber Sizes: Plans that use readily available, standard lumber dimensions (e.g., 2x4s, 2x6s) simplify material acquisition.
- Smaller Footprint: Generally, smaller sheds are easier to build than large ones, requiring less material and less complex framing.
- Simple Roof Design: A single-slope (lean-to) or basic gable roof (A-frame) is significantly easier to frame and shingle than gambrel or hip roofs.
- Minimal Specialized Tools: Plans that can be executed with basic power tools (circular saw, drill) are ideal for beginners.
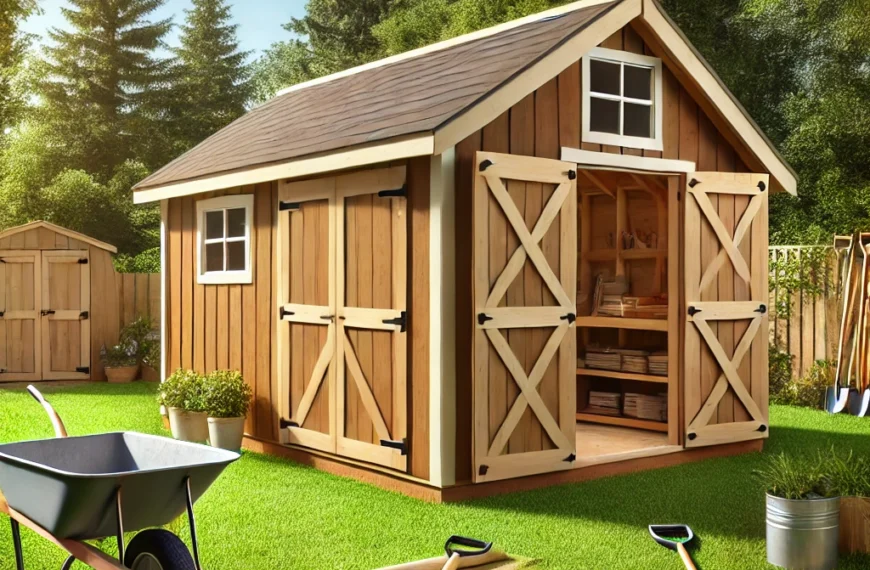
For first-timers, a lean-to shed (single sloping roof, often built against an existing structure or fence) or a small, simple gable shed (classic A-frame roof) are excellent starting points. They use common framing techniques and are forgiving.
Tools and Materials: Gearing Up for Your Shed Build
Having the right tools and materials readily available before you start is crucial for efficiency and safety. While some projects require specialized equipment, many easy shed plans can be built with a relatively basic set of tools.
Essential Tools
Invest in quality versions of these if you don’t already own them; they’ll serve you well for many future DIY projects:
- Measuring Tape: A 25-foot tape is standard.
- Pencil and Permanent Marker: For marking cuts and measurements.
- Speed Square: Invaluable for marking accurate 90-degree and 45-degree cuts, and checking squareness.
- Level: A 4-foot level is ideal for walls and foundations. A smaller torpedo level is also handy.
- Circular Saw: Your primary cutting tool for lumber and sheet goods. Ensure it has a sharp blade suitable for wood.
- Drill/Driver: A cordless drill with various bits (pilot holes, driving screws) is indispensable.
- Hammer: For setting nails or light demolition.
- Utility Knife: For cutting roofing felt, vapor barrier, etc.
- Caulk Gun: For sealing gaps and joints.
- Safety Gear: Always wear safety glasses, hearing protection, and work gloves. A dust mask is also advisable when cutting.
Helpful (But Not Essential) Tools
- Miter Saw: Speeds up accurate crosscuts for framing.
- Jigsaw: Useful for cutting curves or intricate shapes, though less critical for simple sheds.
- Nail Gun (Brad or Framing): Significantly speeds up fastening, but requires an air compressor.
- Impact Driver: Similar to a drill but with more torque for driving long screws.
- Clamps: Hold pieces securely while you fasten them.
Key Materials
Your chosen plans will provide a detailed list, but generally, you’ll need:
- Lumber:
- Pressure-treated (PT) lumber: For skids (if using), floor joists, and any wood directly contacting the ground.
- Framing lumber: 2x4s, 2x6s (for walls, floor joists, rafters), based on your plan’s specifications.
- Trim lumber: For fascia, corner boards, door/window trim.
- Sheet Goods:
- Plywood or OSB (Oriented Strand Board): For floor decking, wall sheathing, and roof sheathing.
- Siding material: T1-11 plywood, SmartSide panels, cedar siding, etc.
- Roofing Materials:
- Roofing felt (underlayment): Provides a moisture barrier.
- Asphalt shingles or metal roofing panels: Your chosen top layer.
- Drip edge: Metal flashing installed along roof edges.
- Fasteners:
- Deck screws: Exterior-grade, corrosion-resistant screws (e.g., galvanized, coated). Ideal for most framing.
- Common nails or framing nails: If using a hammer or nail gun.
- Roofing nails: Short, wide-headed nails for shingles.
- Hardware:
- Door hinges and latch/handle.
- Window hardware (if applicable).
- Foundation Materials:
- Gravel or crushed stone: For a level base.
- Concrete blocks or pre-cast piers: For supporting the shed frame off the ground.
- Finishing Materials:
- Exterior paint or wood stain: To protect the wood and enhance appearance.
- Exterior caulk: For sealing gaps and preventing water intrusion.
Step-by-Step Guide to Building Your Easy Garden Shed
While specific plans will vary, the general sequence of building an easy garden shed follows a logical progression. This overview provides a framework that most beginner-friendly plans will adhere to.
1. Site Preparation and Foundation
A solid, level foundation is non-negotiable for a durable shed. Skipping this step leads to twisted walls, sagging floors, and potential rot.
- Clear the Area: Remove all debris, rocks, roots, and vegetation from the shed footprint, plus an extra 1-2 feet around the perimeter for working space.
- Level the Site: Use a shovel, rake, and a long straightedge with a level to ensure the ground is as flat as possible. For minor slopes, you can compensate with your foundation materials.
- Install the Foundation:
- Gravel Pad: Lay down landscaping fabric to prevent weed growth, then spread 4-6 inches of compacted gravel. This provides excellent drainage.
- Concrete Blocks/Piers: Place concrete blocks (solid or cap blocks) on top of the gravel pad, spaced according to your plan’s floor joist layout. Ensure all blocks are perfectly level with each other and in proper alignment. This creates a sturdy, elevated base for the shed’s skids or floor frame.
- Skids: For easy sheds, pressure-treated 4x4s or 4x6s are often laid directly on the leveled gravel or concrete blocks. These skids run the length of the shed and support the floor frame. Ensure they are perfectly parallel and level.
2. Floor Framing
The floor is the base of your shed, providing stability and a surface to build upon.
- Assemble the Perimeter: Cut your rim joists and end joists (or headers) to length from pressure-treated lumber. Assemble them into a rectangular frame on your leveled skids or foundation blocks. Ensure the frame is perfectly square (measure diagonals – they should be equal). Secure with deck screws.
- Install Floor Joists: Cut and install the interior floor joists, spaced according to your plan (typically 16 or 24 inches on center). Use metal hangers or screw through the rim joists into the ends of the joists for strong connections.
- Attach Floor Decking: Lay your plywood or OSB floor decking over the joists. Start with one full sheet in a corner, ensuring it aligns with the frame. Screw the decking down every 6-8 inches into the joists and perimeter frame. Use exterior-grade screws. Leave a small gap (1/8 inch) between sheets for expansion.
3. Wall Framing
This is where your shed starts to take shape. Building wall sections flat on the floor is easier and safer than trying to frame them upright.
- Cut Wall Components: Cut all studs, top plates, bottom plates, and header pieces to the exact dimensions specified in your plans. Double-check measurements.
- Assemble Wall Sections: Lay out the bottom plate and top plate parallel to each other on the floor. Insert the common studs, king studs, jack studs, and headers for door/window openings between them. Use a speed square to ensure everything is square.
- Fasten Walls: Securely fasten the studs to the plates using screws or nails, following your plan’s instructions (e.g., two screws per joint). Repeat for all four walls.
- Raise and Secure Walls: With help if possible, carefully raise each wall section onto the floor decking. Align the bottom plate of the wall with the edge of the floor frame. Fasten the bottom plate to the floor decking and joists with screws.
- Plumb and Brace: Use your level to ensure each wall is perfectly plumb (vertical). Temporarily brace the walls using diagonal scraps of lumber screwed to the top plate and the floor, keeping them upright and square.
- Connect Walls: Secure the corners where walls meet by screwing through the end studs of one wall into the face of the perpendicular wall’s end stud. Install double top plates, overlapping the corners to tie the walls together and provide a strong base for the roof.
4. Roof Framing
For easy sheds, a simple gable (A-frame) or lean-to roof is most common.
- Cut Rafters: Use your plans to determine the exact angle and length for your rafters. If you have a miter saw, it makes these angled cuts much easier. Cut all identical rafters.
- Install Ridge Board (Gable Roof): If it’s a gable roof, temporarily support the ridge board (the horizontal beam at the peak) at the correct height.
- Attach Rafters: Install the rafters, one pair at a time, from the top plate up to the ridge board. Secure them with screws or hurricane ties. Ensure proper spacing (typically 16 or 24 inches on center).
- Install Roof Sheathing: Lay plywood or OSB sheathing over the rafters. Start at the bottom edge of the roof and work your way up, staggering joints. Screw the sheathing securely to every rafter.
5. Roofing
The roof protects your shed from the elements.
- Install Drip Edge: Fasten metal drip edge along the bottom edges of the roof deck first, then along the rake edges (sloping sides).
- Lay Underlayment: Roll out roofing felt or synthetic underlayment over the sheathing, starting from the bottom edge and overlapping layers as you work upwards. Secure with staples or cap nails.
- Install Shingles or Metal Panels: Follow the manufacturer’s instructions for your chosen roofing material. For shingles, start with a starter course, then lay full courses, ensuring proper overlap and exposure. Use roofing nails. For metal panels, ensure panels overlap correctly and fasten with self-tapping screws.
- Install Ridge Cap (Gable Roof): For shingled roofs, install shingle caps over the ridge.
6. Siding
Siding protects the walls and gives your shed its finished look.
- Cut Siding Panels: Cut your chosen siding material to fit each wall section, accounting for door and window openings.
- Install Siding: Start at a corner and work your way around. If using large panels like T1-11, align them carefully and fasten to every stud with appropriate nails or screws (e.g., galvanized nails for wood siding). Ensure a small gap at the bottom for drainage.
- Install Corner Trim: Cover the vertical seams at the corners with trim boards for a neat, finished appearance.
7. Door and Windows
Your plans will specify how to build or install these.
- Install Pre-hung Units: If using pre-hung doors or windows, simply follow the manufacturer’s instructions for installation into your framed openings.
- Build Custom Door: Many easy shed plans call for simple, site-built doors from plywood or T1-11 and internal bracing. Attach hinges and a latch.
- Trim Out: Install trim around door and window openings, both inside and out, to cover gaps and provide a finished look.
8. Finishing Touches
- Paint or Stain: Apply exterior-grade paint or stain to protect all exposed wood surfaces from UV damage and moisture. Don’t forget the inside of the door.
- Caulk: Seal any gaps or seams where water could penetrate (e.g., around windows, door frames, where siding meets trim).
- Shelving and Storage: Install shelving, hooks, and other interior storage solutions to maximize your shed’s utility.
- Ramp (Optional): If you’re storing wheeled items like a lawnmower, build a simple ramp for easy access.
Tips for a Smooth and Successful Easy Shed Build
Beyond the step-by-step process, a few key tips can make your DIY shed project significantly easier and more enjoyable.
- Measure Twice, Cut Once: This old adage is true for a reason. Double-checking your measurements before cutting saves materials, time, and frustration.
- Read Ahead: Before starting a new step, read the next few steps in your plans. Understanding the overall flow helps prevent errors and ensures you have all necessary materials ready.
- Work Safely: Always wear appropriate personal protective equipment (PPE) – safety glasses, hearing protection, and gloves. Be mindful of power tools, use them correctly, and keep your workspace clean to prevent tripping hazards.
- Enlist Help: While many steps can be done solo, having an extra set of hands for raising walls, lifting heavy sheet goods, or installing long rafters makes the job safer and much faster.
- Don’t Rush: Take your time. Building a shed is a project, not a race. Rushing leads to mistakes and compromises on quality.
- Stay Organized: Keep your tools tidy and your materials sorted. Label cut pieces if necessary. A well-organized workspace is more efficient and safer.
- Check for Square and Plumb Frequently: As you build, regularly check that your frame is square and your walls are plumb. Small errors early on can compound into big problems later.
- Consider Future Needs: Even if you don’t plan to add electricity now, consider running conduit or leaving a pathway for future wiring. Think about ventilation (vents near the roof peak help air circulation).
- Don’t Be Afraid to Ask: If you get stuck, look for online tutorials, consult DIY forums, or even ask a knowledgeable friend or hardware store employee for advice.
- Weather Protection: If your project will span several days, cover any exposed wood with tarps overnight or during rain to prevent warping and water damage.
Building your own garden shed, even with easy-to-follow plans, is a significant undertaking that offers immense rewards. We’ve explored why the DIY route is so appealing, from the significant cost savings and unparalleled customization to the deep sense of accomplishment that comes with creating a functional structure with your own hands. We’ve guided you through the critical planning stages, emphasizing the importance of defining purpose, choosing the right location, and, crucially, understanding local regulations and permits to ensure your project is compliant and hassle-free.
The journey from an empty patch of ground to a fully functional garden shed begins with selecting the right easy to build garden shed plans – plans that are clear, detailed, and designed for simplicity. We’ve also armed you with a comprehensive list of essential tools and materials, ensuring you’re well-equipped before you start. Our step-by-step overview has demystified the construction process, from preparing the site and laying the foundation to framing, roofing, siding, and adding those all-important finishing touches.
Ultimately, building your own garden shed isn’t just about creating a storage space; it’s about investing in your property, honing your skills, and enjoying the satisfaction of a job well done. With careful planning, the right easy-to-build garden shed plans, a steady hand, and a little patience, you too can transform your backyard and enjoy the benefits of a custom-built shed for years to come. So, gather your plans, ready your tools, and embark on this fulfilling DIY adventure!
