Building a large shed is a significant undertaking, far more complex than assembling a small garden storage unit. It’s an investment in your property, providing invaluable space for everything from workshops and home offices to vehicle storage and extensive equipment organization. However, the success and longevity of such a structure hinge entirely on one critical component: detailed large shed plans. These aren’t just rough sketches; they are comprehensive blueprints that guide every step of the construction process, ensuring safety, efficiency, and the ultimate functionality of your new space. This article will delve into why detailed plans are indispensable, what key elements they must include, how to choose the right design, and what to expect throughout the planning and building journey, empowering you to embark on your large shed project with confidence and precision.
Why Detailed Large Shed Plans Are Non-Negotiable
Embarking on the construction of a large shed without detailed plans is akin to setting sail without a map – you might get somewhere, but it’s unlikely to be your intended destination, and the journey will be fraught with unnecessary risks and inefficiencies. For a structure of significant size, comprehensive plans move from being a convenience to an absolute necessity, providing foundational benefits that impact every aspect of the project.
Ensuring Structural Integrity and Safety
The primary reason for meticulous planning is safety. A large shed, unlike a small utility box, needs to withstand substantial environmental forces. Detailed large shed plans account for critical factors such as snow load, wind resistance, seismic activity (if applicable), and the overall dead and live loads the structure will bear. This involves precise calculations for:
- Foundation Design: Determining the appropriate type of foundation (e.g., concrete slab, pier and beam, skid) based on soil conditions, shed size, and local frost lines, ensuring it can adequately support the entire structure without settling or cracking.
- Framing Specifications: Detailing the exact dimensions, spacing, and fastening methods for floor joists, wall studs, rafters, and trusses. This includes specifying the correct lumber sizes and grades to prevent sagging floors, collapsing walls, or a failing roof.
- Connection Details: Indicating where specific fasteners, hurricane ties, or structural connectors are required to ensure the shed remains intact under extreme weather conditions.
Ignoring these details can lead to a shed that is not only unstable but potentially dangerous, risking property damage or, worse, personal injury.
Optimizing Material Usage and Cost Efficiency
One of the most immediate benefits of detailed plans is the ability to create an accurate and comprehensive material list. This precision directly translates into significant cost savings by:
- Minimizing Waste: Knowing exactly how many boards of what length, sheets of plywood, or pounds of nails you’ll need reduces over-ordering and the subsequent waste of unused materials. This is particularly crucial for large projects where excess material can quickly inflate costs.
- Accurate Budgeting: With a precise material list, you can obtain accurate quotes from suppliers, allowing for a realistic project budget and preventing unexpected expenses mid-build.
- Efficient Purchasing: Detailed plans enable bulk purchases for certain materials, potentially leading to volume discounts. They also allow for staged deliveries, ensuring materials arrive when needed, reducing storage issues on site.
Without plans, you’re likely to make numerous trips to the hardware store, often buying more than needed or discovering you’ve bought the wrong items, leading to frustrating delays and increased expenditure.
Streamlining the Construction Process
Detailed large shed plans serve as a roadmap for the entire construction process, guiding builders through each phase systematically. This organizational clarity provides several advantages:
- Reduced Errors: Every cut, every angle, every connection is clearly marked, significantly reducing the chances of costly mistakes and rework.
- Faster Completion: With a clear sequence of steps and precise measurements, builders can work more efficiently, minimizing downtime spent on figuring out what comes next or how to solve unforeseen problems.
- Improved Communication: If you’re hiring contractors or working with friends, the plans provide a universal language, ensuring everyone is on the same page regarding the project’s specifications and goals.
A well-planned build is a smooth build, saving time and frustration for everyone involved.
Navigating Permits and Regulations
For a large shed, especially one exceeding a certain square footage or height, building permits are almost always required. Local municipalities have specific zoning laws, setback requirements, and building codes that must be adhered to. Detailed plans are absolutely essential for the permit application process:
- Demonstrating Compliance: Plans show how your proposed shed meets local structural, fire safety, and environmental regulations. Without them, your application will likely be rejected.
- Expediting Approval: Clear, professional plans make it easier for building inspectors to review and approve your project, potentially speeding up the permit issuance.
- Avoiding Fines and Demolition: Building a large structure without the necessary permits, or failing to meet code, can result in significant fines, mandated changes, or even the forced demolition of your shed.
A little upfront planning saves a lot of headaches and potential legal troubles down the line.
Ensuring Functionality and Future Adaptability
Detailed large shed plans allow for thoughtful consideration of the shed’s intended purpose and potential future uses. They provide an opportunity to integrate features vital for functionality:
- Optimal Layout: Planning for door and window placement, interior partitions, workbenches, shelving, and storage solutions to maximize the utility of the space.
- Utility Integration: Designing for electrical wiring, lighting, ventilation, and plumbing if needed, ensuring these are seamlessly incorporated from the outset rather than being awkward afterthoughts.
- Future Expansion: Considering if the shed might need to be expanded or repurposed later, and designing it with adaptable elements.
This foresight ensures your large shed is not just a building, but a highly functional and adaptable extension of your living or working space.
Essential Elements of Comprehensive Large Shed Plans
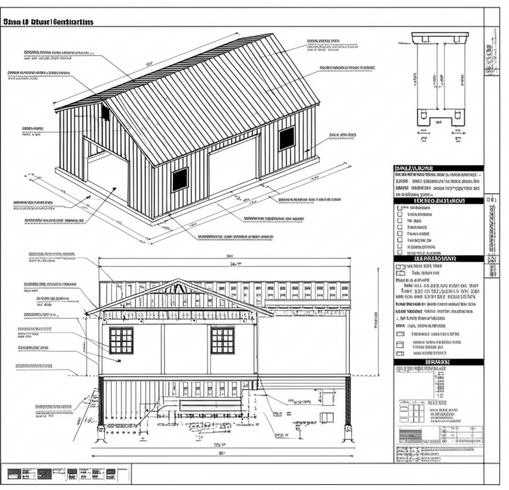
When you’re dealing with detailed large shed plans, you’re looking at far more than just a floor plan. These comprehensive documents typically include a series of drawings and lists, each serving a critical purpose in guiding the construction from concept to completion. Understanding these components is key to appreciating the depth of planning involved.
Site Plan and Orientation
The site plan shows where the shed will be located on your property relative to existing structures, property lines, and easements. It’s crucial for:
- Setback Compliance: Ensuring the shed meets local zoning requirements for distance from property boundaries.
- Drainage: Planning for proper water runoff away from the foundation.
- Sunlight and Access: Optimizing for natural light, and ensuring easy access for vehicles or equipment.
Foundation Plans
The foundation is the bedrock of your shed’s stability. Detailed plans will specify:
- Type of Foundation: Whether it’s a concrete slab (reinforced with rebar, detailed with dimensions and thickness), pier and beam (showing pier locations, footing sizes, and beam specifications), or a robust skid foundation (detailing skid dimensions and connection points).
- Dimensions and Excavation: Precise measurements for the foundation footprint and any necessary excavation depths.
- Vapor Barriers and Insulation: Details for moisture control and thermal performance, especially if the shed will be insulated or conditioned.
Floor Framing Plans
These plans detail the structural components that support the shed’s floor.
- Joist Layout: Showing the size (e.g., 2×8, 2×10), spacing (e.g., 16″ on center), and span of floor joists.
- Beams and Headers: Locations and dimensions of support beams and any necessary headers around floor openings (e.g., for trapdoors).
- Bridging and Blocking: Details on how joists are stabilized to prevent twisting and increase load-bearing capacity.
- Subfloor Material: Specifying the type and thickness of plywood or OSB for the subfloor.
Wall Framing Plans
These are the blueprints for the vertical structure of your shed, outlining every piece of lumber that forms the walls.
- Stud Layout: Showing the size (e.g., 2×4, 2×6) and spacing (e.g., 16″ or 24″ on center) of wall studs.
- Headers and Sills: Detailed dimensions for the strong horizontal members (headers) above door and window openings, and the sills below them.
- Top and Bottom Plates: Specifications for the horizontal lumber at the top (double top plate for strength) and bottom of the walls.
- Corner and Intersecting Wall Details: How walls connect and form strong corners.
- Wall Heights: Exact vertical measurements from bottom plate to top plate.
Roof Framing Plans
The roof structure is critical for protecting the shed from the elements and handling snow or wind loads. Plans will include:
- Rafter or Truss Design: Dimensions, angles, and spacing of rafters or pre-manufactured trusses. This includes crucial details like bird’s mouth cuts for rafters.
- Ridge Board/Beam: Specifications for the top horizontal member where rafters meet.
- Overhangs and Fascia: Dimensions for roof overhangs for protection and aesthetic fascia boards.
- Roof Pitch: The steepness of the roof, measured as rise over run (e.g., 6/12 pitch).
- Sheathing: Type and thickness of plywood or OSB for the roof deck.
- Ventilation: Details for soffit and ridge vents to prevent heat and moisture buildup.
Exterior Finishes and Details
While often seen as cosmetic, these details are integral to the shed’s durability and aesthetics.
- Siding Details: Type of siding (e.g., T-111, lap siding, metal), installation method, and trim details around windows and doors.
- Roofing Material: Specification of shingles, metal roofing, or other materials, including underlayment details.
- Window and Door Schedules: Listing the types, sizes, and locations of all windows and doors.
- Exterior Trim: Details for corner boards, soffits, and fascia trim.
Interior Layouts and Utility Rough-ins (Optional but Recommended for Large Sheds)
For large sheds intended for specific uses (workshop, office), interior planning is vital.
- Partitions and Walls: If the shed will have separate rooms or defined areas.
- Built-ins: Plans for workbenches, shelving units, or storage cabinets.
- Electrical Plans: Locations of outlets, switches, light fixtures, and the main electrical panel.
- Plumbing Plans: If a sink or toilet is included, showing water supply and drain lines.
- Insulation Details: Specifying types and R-values for walls, floor, and ceiling.
Material List and Cut List
These are invaluable for procurement and efficient construction.
- Material List: A comprehensive list of every item needed, from lumber dimensions to nails, screws, roofing, siding, windows, doors, and hardware, including quantities.
- Cut List: Specific lengths for each piece of lumber to minimize waste and speed up cutting.
Elevation Drawings and Cross-Section Details
These drawings provide different perspectives and internal views.
- Elevation Drawings: Front, rear, and side views with overall dimensions and heights, showing the finished appearance.
- Cross-Section Details: Cut-away views that illustrate how different components fit together (e.g., how the wall framing connects to the foundation, or how the roof rafter joins the wall top plate). These are crucial for understanding complex connections.
Together, these elements form a robust set of detailed large shed plans, transforming a complex project into a manageable series of precise steps.
Choosing the Right Large Shed Type and Design
The “right” large shed isn’t just about size; it’s about a design that perfectly aligns with your needs, your property, and local regulations. Before even looking at specific blueprints, you need to clearly define the shed’s primary purpose and consider its visual impact.
Purpose-Driven Design
The functionality of your large shed dictates much of its design. Consider:
- Storage: If it’s primarily for storage, will it house vehicles (cars, boats, RVs), heavy machinery, bulk items, or seasonal equipment? This affects door sizes (garage doors versus standard entry doors), floor reinforcement, and interior layout (shelving, overhead storage).
- Workshop: A workshop requires ample natural light (windows), sufficient head room, robust flooring for heavy tools, dedicated space for workbenches, and possibly integrated dust collection or ventilation systems. Electrical planning is paramount here.
- Home Office/Studio: This type of shed needs more attention to insulation, climate control, soundproofing, and a comfortable interior environment. Aesthetics, natural light, and a connection to nature often play a larger role.
- Multi-purpose: Many large sheds serve several functions. Designing distinct zones within the shed for different activities (e.g., a storage bay and a separate workspace) requires thoughtful layout.
Thinking through daily use scenarios will help crystallize critical design features.
Common Large Shed Styles
The architectural style of your shed impacts its aesthetics, functionality, and sometimes, even its cost and ease of construction. Some popular styles suitable for large sheds include:
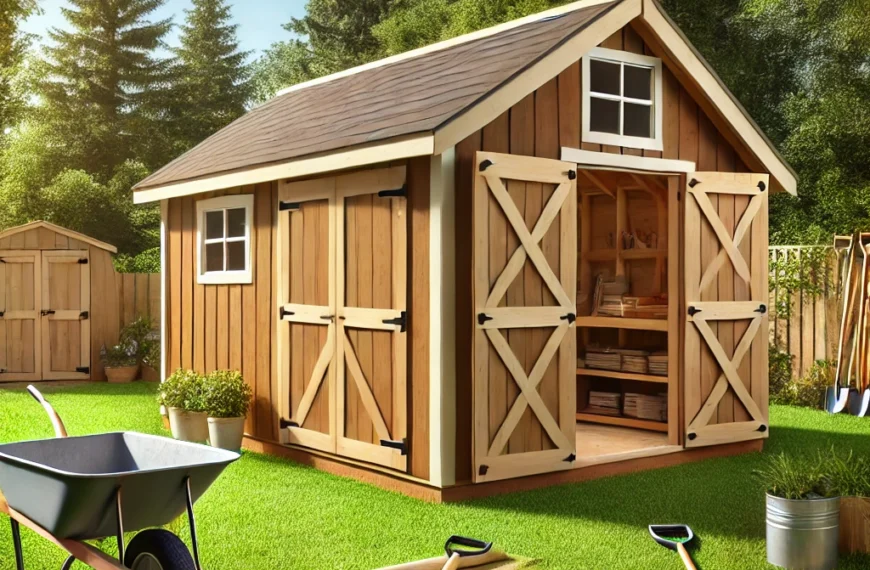
- Gable Roof Shed: This is the most common and versatile style, featuring two sloping sides that meet at a ridge. It’s relatively easy to build, offers good headroom, and blends well with most residential architecture. Its simple structure makes it cost-effective for larger footprints.
- Gambrel Roof (Barn Style) Shed: Recognized by its distinctive two-sloped roof on each side, the gambrel design maximizes overhead space and is ideal for sheds requiring a loft for extra storage or even a second-story workspace. It offers a classic barn aesthetic and significant internal volume, making it popular for vehicle storage or extensive workshops.
- Saltbox Roof Shed: Featuring an asymmetrical roof with one side longer than the other, the saltbox offers a unique, historical look. While less common for very large sheds, it can be a stylish choice that also provides practical benefits like enhanced runoff on the longer side.
- Skillion or Lean-to Roof Shed: Characterized by a single-sloped roof. While often smaller and attached to an existing structure, a standalone skillion roof can be designed for large, modern sheds, offering a sleek look and good drainage in one direction. It’s often simpler to frame.
- Custom Designs: For unique needs or challenging sites, a custom design may be the best approach. This allows for specific dimensions, integration of unique features (e.g., large roll-up doors, specific window types), and perfect alignment with your home’s architecture.
Size Considerations: How Big is “Large”?
The definition of “large” varies, but for shed plans, it generally refers to structures that exceed the typical small backyard shed (e.g., 8×10 or 10×12). Common large shed sizes that usually necessitate detailed plans and often permits include:
- 10×20 to 12×24 feet: Excellent for significant storage or a dedicated workshop.
- 16×20 to 16×30 feet: Can accommodate larger vehicles, extensive equipment, or serve as a substantial multi-purpose space.
- 20×30 feet and up: Approaching the size of a small garage, these require garage-style doors and extensive structural considerations, often mimicking residential construction.
When determining size, always plan for slightly more space than you currently think you need. Sheds tend to fill up quickly!
Aesthetics and Integration
A large shed becomes a prominent feature on your property. Consider:
- Matching Architecture: Does the shed’s style, siding, and roofing complement your main house?
- Landscaping Integration: How will the shed fit into your existing landscape? Will you need to add pathways, planting beds, or screening?
- HOA and Neighborhood Rules: Some homeowners’ associations or local ordinances have specific rules regarding shed size, placement, and exterior finishes to maintain neighborhood aesthetics.
A well-chosen design not only meets your functional needs but also enhances your property’s overall appeal and value.
Navigating the Permitting and Site Preparation Process
Before any lumber is cut or a shovel hits the ground, two crucial phases must be completed: securing the necessary permits and meticulously preparing your chosen site. Overlooking these steps can lead to significant delays, added costs, or even legal complications.
Understanding Local Regulations and Obtaining Permits
For large sheds, it’s highly probable you’ll need a building permit. The specific requirements vary significantly by location (city, county, or even within different zones of the same city). Here’s what to investigate:
- Zoning Laws: These dictate where on your property you can build, including setback requirements (minimum distance from property lines, other structures, and sometimes public easements). They may also specify maximum heights, sizes, or even exterior materials for accessory structures.
- Building Codes: These are the technical standards for construction, ensuring structural integrity, safety, and health. Large sheds often fall under similar codes as small residential structures regarding foundations, framing, electrical, and sometimes plumbing. Codes cover aspects like snow load ratings, wind resistance, and egress.
- Homeowners’ Association (HOA) Rules: If your property is part of an HOA, they likely have their own set of rules regarding shed size, style, color, and placement. Obtain their approval in addition to municipal permits.
- Permit Application Process:
- Research: Contact your local planning or building department early in the process. Ask about requirements for large sheds, necessary documentation, and associated fees.
- Documentation: You will almost certainly need your detailed large shed plans, including site plans, foundation plans, framing details, and elevations. Some jurisdictions might require engineering stamps for larger or more complex designs.
- Review Period: Be prepared for a review period, which can range from a few days to several weeks, depending on the complexity of your plans and the workload of the department.
- Inspections: Once the permit is issued, various inspections will be required at different stages of construction (e.g., foundation, framing, final inspection). Ensure you understand and schedule these as necessary.
The golden rule: Do not start construction before obtaining all necessary permits. Building without them can result in fines, the need to modify or demolish the structure, and difficulty selling your property in the future.
Site Assessment and Preparation
Once you have your plans and permits in hand, preparing the building site is the next critical step. Proper site preparation ensures a stable foundation, prevents future issues, and streamlines the construction process.
- Site Selection: Reconfirm your chosen location, considering:
- Topography: Is the ground level? If not, how much excavation or fill will be required? A sloped site will require more complex foundation work.
- Soil Type: Understanding your soil (clay, sand, loam) impacts drainage and the stability of your foundation. Poor soil may require additional compaction or different foundation techniques.
- Drainage: Observe how water drains naturally during rainfall. You want water to drain away from the shed’s foundation, not towards it. You may need to create a slight grade or install a French drain.
- Sun Exposure: Consider how sun path affects interior temperature and natural light.
- Utility Lines: Mark the location of any underground utility lines (water, sewer, gas, electrical, communication) before any excavation. Call 811 (in the US) to have these marked professionally.
- Accessibility: Ensure there’s enough space for material delivery and construction access.
- Clearing and Grubbing:
- Remove Obstacles: Clear the entire shed footprint, plus a comfortable working perimeter, of any trees, stumps, large rocks, bushes, or debris.
- Remove Topsoil: For most large shed foundations (especially concrete slabs), you’ll need to remove the organic topsoil layer to reach stable subsoil.
- Leveling and Grading:
- Rough Grade: Use shovels, rakes, and potentially heavy equipment (like a bobcat) to achieve a relatively level base for your foundation.
- Fine Grade and Compaction: For concrete slabs, this involves bringing in and compacting granular fill (gravel, crushed stone) to create a perfectly level and stable base. For pier and beam foundations, ensuring each pier location is correctly positioned and leveled is crucial.
- Foundation Layout:
- Squaring the Footprint: Once the site is cleared and roughly leveled, precisely lay out the shed’s foundation dimensions using string lines and stakes. Use the 3-4-5 rule or diagonal measurements to ensure perfect squareness.
- Marking Key Points: Mark all critical points as per your detailed plans, such as footing locations, pier centers, or the perimeter of a slab form.
Thorough site preparation creates the optimal conditions for a successful build, ensuring your large shed starts on a solid and enduring footing.
Step-by-Step Construction with Detailed Plans
With permits secured and your site meticulously prepared, you’re ready to translate your detailed large shed plans from paper to reality. This is where the precision of your blueprints truly shines, guiding you through each construction phase. Adhering strictly to these plans is paramount for safety, structural integrity, and a professional finish.
1. Foundation Construction
This is the literal groundwork for your shed, directly following your foundation plans.
- Skid Foundation: If using treated lumber skids, ensure they are perfectly level and properly spaced on compacted gravel pads or concrete blocks. Secure them with appropriate anchors to the ground if needed for wind uplift.
- Pier and Beam Foundation: Dig footings to the specified depth and width, ensuring they extend below the frost line. Pour concrete for the footings, then set your piers (concrete blocks or poured concrete columns) to the exact height and spacing indicated on the plans. Install the beams on top of the piers, making sure they are perfectly level and secured.
- Concrete Slab Foundation: This is the most involved. After site preparation, construct your formwork accurately to the slab dimensions. Lay down a vapor barrier, then install rebar or wire mesh as specified in the plans for reinforcement. Finally, pour and finish the concrete, ensuring it’s level and sloped slightly away from the planned shed walls for drainage. Allow adequate curing time.
Inspection Point: For most large shed projects, a foundation inspection will be required by your local building department before you proceed to framing.
2. Floor Framing
Once your foundation is complete and cured, you move to the floor structure, guided by your floor framing plans.
- Sill Plate Installation: If using a concrete slab, install a treated lumber sill plate directly onto the cured concrete, using anchor bolts embedded in the slab or expansion bolts. Ensure a sill sealer or gasket is used between the concrete and wood to prevent moisture transfer.
- Rim Joists and Beams: Cut and assemble the rim joists (the outer perimeter of the floor frame) and any interior support beams according to the dimensions and locations on the plans.
- Floor Joists: Install the floor joists at the specified spacing (e.g., 16″ or 24″ on center). Use hangers for connections to beams and proper fasteners. Ensure all joists are straight and level.
- Bridging or Blocking: Install bridging (solid or cross bracing) between joists at specified intervals to prevent twisting and stiffen the floor.
- Subfloor Installation: Lay down the subfloor sheeting (typically 3/4″ tongue-and-groove OSB or plywood) perpendicular to the joists. Glue and screw or nail the subfloor securely, leaving expansion gaps as recommended by the manufacturer.
3. Wall Framing
This phase is where your shed begins to take shape, guided by the wall framing plans.
- Cutting Components: Precisely cut all studs (common studs, king studs, jack studs, cripple studs), top plates (single and double), and bottom plates to the exact lengths specified in your cut list. Cut headers and sills for all window and door openings.
- Assembling Walls: On the flat subfloor, assemble each wall section individually. Lay out the stud locations on the top and bottom plates according to your plans. Assemble door and window rough openings accurately.
- Raising and Bracing: Carefully raise each framed wall section into position on the subfloor. Secure the bottom plate to the floor frame using screws or nails. Use temporary bracing to ensure the walls are perfectly plumb (vertical) and square to the foundation.
- Connecting Walls: Securely fasten adjacent wall sections together at corners and intersections, often by overlapping and nailing the top plates. Ensure the double top plate overlaps at corners for maximum strength.
Inspection Point: A framing inspection is typically required after walls are up, but before exterior sheathing is applied, to verify adherence to code and plans.
4. Roof Framing
The roof structure is next, protecting your shed and defining its silhouette, following your roof framing plans.
- Setting Trusses or Rafters:
- Trusses: If using pre-manufactured trusses, lift and set them one by one at the specified spacing. Temporarily brace them plumb and square, then permanently fasten them to the wall’s top plates with appropriate connectors.
- Rafters: Cut all rafters, ridge board, and collar ties to the precise angles and lengths from your plans. Erect the ridge board first, then install rafters at the specified spacing, securing them with bird’s mouth cuts at the top plate and hurricane ties. Install collar ties at the specified height.
- Roof Sheathing: Install plywood or OSB sheathing over the rafters or trusses, starting from the bottom edge and working your way up. Stagger joints and use appropriate fasteners. Leave small expansion gaps between sheets.
- Overhangs and Fascia: Install fascia boards along the rafter tails for a finished edge and soffits (if applicable) for ventilation.
5. Exterior Finishes
With the structure framed, you move to weatherproofing and aesthetics.
- Roofing Underlayment: Apply a roofing felt or synthetic underlayment over the roof sheathing, overlapping correctly to shed water. Install drip edge along the roof edges.
- Roofing Material: Install your chosen roofing material (shingles, metal, etc.) according to manufacturer instructions and your plans.
- Window and Door Installation: Install windows and doors into their framed openings, ensuring they are plumb, level, and square. Properly flash and seal around all openings to prevent water intrusion.
- Siding Installation: Apply your chosen siding material (e.g., T-111, lap siding, vinyl, metal) over a house wrap or sheathing, following manufacturer guidelines and your plans for overlaps and fastening.
- Exterior Trim: Install corner boards, trim around windows and doors, and any other decorative elements as detailed in your plans.
6. Interior Work (Optional but recommended for large sheds)
For large sheds intended for specific uses, interior finishes are crucial.
- Insulation: If the shed will be conditioned, install appropriate insulation in walls, ceiling, and floor cavities.
- Electrical Rough-in: Run electrical wiring, install electrical boxes for outlets and switches, and pull wires to the main panel location, all according to electrical plans. (This often requires a separate electrical inspection).
- Plumbing Rough-in: If applicable, run water supply and drain lines.
- Interior Sheathing/Drywall: Install plywood, OSB, or drywall for interior walls and ceiling.
- Flooring: Install finished flooring (e.g., concrete sealant, vinyl, wood).
- Built-ins: Construct and install workbenches, shelving, or cabinets.
Final Inspection: Once the shed is substantially complete, a final inspection will be required by the building department to ensure all aspects meet code requirements and the approved plans.
Following your detailed large shed plans meticulously at each step is not just about convenience; it’s about building a safe, durable, and functional structure that will serve your needs for many years to come.
Conclusion
The journey of building a large shed, from initial concept to a fully functional structure, is a rewarding endeavor that significantly enhances your property’s utility and value. As we’ve explored, the cornerstone of this entire process is the reliance on detailed large shed plans. These comprehensive blueprints are far more than mere suggestions; they are the essential guides that dictate the safety, structural integrity, and long-term durability of your investment.
We began by understanding why these plans are absolutely non-negotiable, highlighting their critical role in ensuring safety, optimizing material usage, streamlining the construction process, simplifying permit acquisition, and guaranteeing the shed’s ultimate functionality. Without detailed plans, you risk costly errors, potential safety hazards, and the frustration of a project that doesn’t meet your expectations.
Subsequently, we delved into the rich content of what truly constitutes comprehensive plans. From precise site and foundation blueprints to intricate floor, wall, and roof framing diagrams, and extending to exterior finishes, material lists, and crucial cross-section details, each element plays a vital part in providing a clear, step-by-step roadmap for construction. This level of detail empowers you to execute each phase with precision and confidence.
We then discussed the importance of choosing the right shed type and design, emphasizing that functionality should drive style. Whether you envision a robust workshop, expansive storage for vehicles, or a tranquil home office, the design must align with its purpose while seamlessly integrating with your property’s aesthetics and adhering to local regulations.
Finally, we navigated the critical pre-construction phases: securing permits and preparing your site. This proactive planning, including understanding local zoning laws and meticulously assessing and leveling your chosen location, sets the stage for a smooth and compliant build. We also provided a step-by-step overview of the construction process, underscoring how detailed plans guide every nail, every cut, and every assembly, ensuring adherence to design and structural standards.
In essence, building a large shed is a complex project, but one that is entirely achievable with the right preparation and guidance. By investing time in acquiring and understanding detailed large shed plans, you are not just buying blueprints; you are purchasing peace of mind, efficiency, and the assurance of a high-quality, long-lasting structure. Embrace the planning phase, follow your detailed guide, and you will undoubtedly enjoy the immense benefits of a perfectly built large shed for decades to come.
