
Are you an avid DIY enthusiast, a professional craftsman, or simply someone who needs dedicated space for projects, hobbies, or storage? The dream of a large, functional workshop shed is a common one, offering unparalleled utility and the satisfaction of a truly personalized space. While the idea of building such a structure might seem daunting, embarking on a DIY large workshop shed project is a rewarding endeavor that can save you significant costs compared to hiring professionals. This comprehensive guide will delve deep into the world of DIY large workshop shed plans, providing you with the essential knowledge, considerations, and practical steps needed to turn your vision into a robust, functional reality. From initial planning and foundation work to framing, finishing, and optimizing your interior, we’ll cover everything you need to know to construct a durable and efficient workshop that serves your needs for years to come.
Why Build a Large Workshop Shed? The Ultimate Space Solution
The decision to build a large workshop shed often stems from a fundamental need for more space – space that a typical garage or basement simply cannot provide. A dedicated workshop offers numerous advantages that extend far beyond mere storage. Firstly, it provides a clean, organized, and permanent environment for your tools, machinery, and ongoing projects. This centralization minimizes clutter in your home and ensures that your valuable equipment is protected from the elements and potential theft.
Secondly, a workshop is a sanctuary for creativity and productivity. Whether you’re woodworking, metalworking, crafting, or pursuing automotive repairs, having a designated area allows you to immerse yourself in your tasks without interruptions or the constant need to set up and tear down. This leads to greater efficiency and enjoyment of your hobbies. Furthermore, a large shed can be designed with specific functions in mind, such as heavy-duty electrical wiring for power tools, robust workbenches, ample natural light, and climate control, all tailored to your unique requirements. It can even serve as a home office, a potting shed, or a quiet retreat, adding significant value and versatility to your property. Investing in a DIY build also means you control every aspect of the design, ensuring it perfectly aligns with your aesthetic preferences and practical needs, while potentially increasing your property value.
Planning Your Dream Workshop: Key Considerations Before You Build
Before you even think about lifting a hammer, meticulous planning is paramount for any successful DIY large workshop shed project. This initial phase will dictate the scope, cost, and ultimate functionality of your structure. Start by defining the primary purpose of your workshop. Will it house large machinery? Do you need extensive storage for lumber? Is climate control essential for sensitive projects? The answers will inform your size and design choices.
1. Location, Location, Location:
Consider the best spot on your property. Factors include:
- Accessibility: Can you easily get materials, vehicles, or large projects in and out?
- Sunlight: Maximize natural light for energy efficiency and comfort.
- Drainage: Choose an elevated spot or ensure proper grading to prevent water accumulation around the foundation.
- Proximity to Utilities: Think about connecting electricity, water, or even internet if needed.
- Noise and Neighbors: Position it to minimize disturbance to yourself and others.
2. Size and Layout:
Measure your intended equipment, consider future acquisitions, and plan for ample circulation space. A common mistake is building too small. Think about workflow: where will raw materials enter, where will projects be assembled, and where will finished products exit? Sketch out a floor plan, including windows, doors, and potential work zones.
3. Local Zoning and Building Codes:
This is a critical, non-negotiable step. Contact your local municipal planning department. They will inform you about:
- Permit Requirements: Many large structures require building permits and inspections.
- Setback Requirements: Minimum distances from property lines, other structures, or septic systems.
- Height Restrictions: Limits on how tall your shed can be.
- Foundation Requirements: Specifics for frost lines and load-bearing capacity.
- Electrical Codes: If you plan to run power to your shed.
Ignoring these regulations can lead to costly fines, forced demolition, or difficulties when selling your property.
4. Budgeting:
Create a detailed budget, encompassing materials (lumber, roofing, siding, concrete, insulation, electrical), tools you might need to buy or rent, permit fees, and a contingency fund (typically 10-20% of the total budget) for unexpected costs. Research material prices thoroughly.
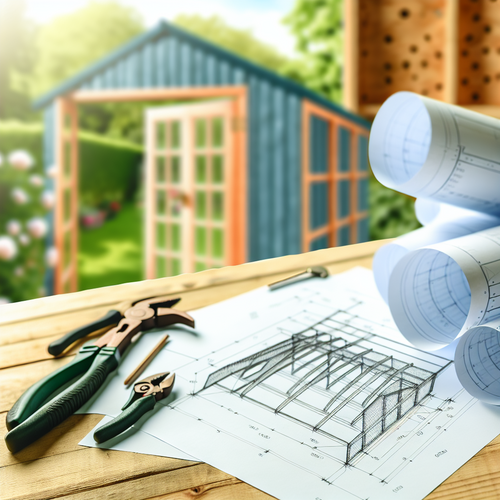
Choosing the Right DIY Plans: Your Blueprint for Success
The right set of DIY large workshop shed plans is your most valuable asset, transforming a complex undertaking into a manageable series of steps. While experienced builders might draw up their own, most DIYers benefit immensely from professionally designed plans. When selecting plans, look for the following characteristics:
- Detailed Blueprints and Schematics: Clear, labeled drawings from multiple angles, including floor plans, elevations, cross-sections, and foundation details.
- Comprehensive Material List: An itemized list of all lumber, fasteners, roofing, siding, doors, windows, and other components, often with quantities. This is invaluable for budgeting and purchasing.
- Step-by-Step Instructions: Easy-to-follow, logical instructions that break down the build into manageable phases, ideally with accompanying diagrams or photos.
- Cut Lists: Precise measurements for every piece of lumber, minimizing waste and errors.
- Foundation Options: Plans that offer different foundation types (e.g., concrete slab, pier and beam) to suit various soil conditions and preferences.
- Scalability and Customization Options: Some plans offer variations in size or design elements, allowing you to tailor them further.
- Reviews and Support: Look for plans with positive reviews from other DIY builders. Some designers offer customer support or have online communities where you can ask questions.
You can find plans online from various sources, including dedicated plan websites, woodworking magazines, and even some hardware store chains. Weigh the cost of plans against the potential savings in material waste and frustration from unclear instructions. Remember, good plans are an investment that pays dividends in accuracy and peace of mind.
Essential Building Materials for Durability and Longevity
The quality and type of materials you choose will significantly impact the durability, longevity, and overall cost of your large workshop shed. Investing in appropriate materials upfront will save you headaches and costly repairs down the line.
- Foundation:
- Concrete: For a slab foundation, you’ll need concrete mix (or ready-mix delivery), rebar or wire mesh for reinforcement, and vapor barrier.
- Gravel and Piers: If opting for a pier-and-beam foundation or a gravel base, you’ll need crushed gravel, concrete tubes (Sonotubes), rebar, and concrete for piers, plus pressure-treated lumber for beams and floor joists.
- Framing:
- Lumber: Primarily dimensional lumber (e.g., 2x4s, 2x6s, 2x8s) for walls, roof trusses/rafters, floor joists, and headers. Ensure it’s straight, true, and adequately sized for structural integrity. Pressure-treated lumber is essential for any wood in contact with the ground or concrete.
- Sheathing: OSB (Oriented Strand Board) or plywood for wall and roof sheathing, providing structural rigidity and a base for siding and roofing.
- Fasteners: A variety of nails (common, framing, roofing) and screws (deck screws, exterior-grade wood screws) designed for exterior use to resist corrosion. Hurricane ties and joist hangers may also be required for structural connections.
- Roofing:
- Asphalt Shingles: Common, affordable, and relatively easy to install. Requires roofing felt (underlayment), drip edge, and roofing nails.
- Metal Roofing: Durable, long-lasting, and often easier to install on larger roofs. Comes in panels with specific fasteners.
- Other Options: Wood shakes, clay tiles, or rubber membranes are also possibilities, depending on aesthetics and budget.
- Siding:
- Wood Siding: Plywood T1-11, cedar, or engineered wood products offer a classic look but require more maintenance (painting/staining).
- Vinyl Siding: Low maintenance, durable, and available in various colors.
- Metal Siding: Extremely durable, low maintenance, and often used for larger utility buildings.
- Fiber Cement: A durable, fire-resistant option that mimics wood but with less maintenance.
- Doors and Windows: Choose exterior-grade doors and windows that are secure, energy-efficient, and sized appropriately. Consider double doors or a roll-up door for easy access for large items.
- Insulation: Batt insulation (fiberglass or mineral wool) for walls and ceilings, or rigid foam board for increased thermal performance.
- Vapor Barrier: Essential for preventing moisture migration, especially in insulated walls and floors.
- Electrical Components: If you’re adding power, you’ll need wiring, outlets, switches, light fixtures, a circuit breaker panel, and conduit (if required by code).
Laying the Foundation: A Critical First Step for Stability
The foundation is literally the bedrock of your large workshop shed; its integrity is paramount to the entire structure’s stability and longevity. A poorly constructed foundation can lead to costly issues like uneven floors, cracked walls, and moisture problems. There are several common foundation types suitable for sheds, each with its advantages:
- Concrete Slab Foundation:
This is arguably the most common and robust option for large workshops. It provides a solid, level floor that’s ideal for heavy machinery and can resist moisture from below if a proper vapor barrier is included.
- Site Preparation: Clear the area, remove topsoil, and level the ground.
- Gravel Base: Lay down a layer of compacted gravel (typically 4-6 inches) for drainage and to prevent frost heave.
- Vapor Barrier: Install a heavy-duty polyethylene sheet over the gravel to block moisture.
- Formwork: Build a perimeter form using lumber to contain the concrete. Ensure it’s perfectly level and square.
- Reinforcement: Place rebar or wire mesh within the form to add tensile strength to the concrete, preventing cracks.
- Pouring and Finishing: Pour the concrete, spread it evenly, and finish the surface. Allow ample curing time (days to weeks) before building on it.
- Pier and Beam Foundation:
This option elevates the shed off the ground, which is excellent for ventilation and in areas prone to minor flooding. It’s often preferred on uneven terrain.
- Dig Footings: Dig holes below the frost line for concrete piers.
- Pour Piers: Fill holes with concrete, often using Sonotubes for uniform columns.
- Attach Piers to Beams: Secure pressure-treated beams to the piers using anchor bolts or post bases.
- Install Floor Joists: Lay pressure-treated floor joists across the beams, topped with subflooring.
- Gravel Base:
While simpler, a gravel base is generally only suitable for smaller, lighter sheds. For a “large workshop shed,” a robust concrete slab or pier and beam is highly recommended for stability and durability, especially if you plan to store heavy equipment. A gravel base can serve as a suitable sub-base for a concrete slab, but rarely as the sole foundation for a large structure.
Regardless of the type, proper drainage around the foundation is crucial. Grade the soil away from the shed to divert rainwater, and consider adding a French drain if water pooling is a concern.
Framing the Structure: Building the Bones of Your Workshop
Framing is where your workshop shed truly begins to take shape. This stage involves assembling the skeleton of your structure – the floor, walls, and roof. Accuracy here is paramount, as errors in framing will compound and create difficulties in subsequent steps like installing siding or hanging doors. Always double-check measurements and ensure everything is plumb, level, and square.
1. Floor Framing:
If using a pier and beam foundation, start by building the floor frame. This involves laying out the perimeter band joists and then installing the interior floor joists, spaced according to your plans (typically 16 or 24 inches on center). Use metal joist hangers for strong connections. Once the frame is complete, secure your subfloor (typically 3/4-inch plywood or OSB) to the joists using screws and construction adhesive. If you have a concrete slab, the slab itself serves as your floor, and you’ll typically attach the bottom plate of your wall framing directly to the concrete with anchor bolts.
2. Wall Framing:
Walls are typically built flat on the subfloor or slab and then tilted into place.
- Cut Components: Cut studs, top plates, bottom plates, and headers to the precise lengths specified in your plans.
- Assemble Walls: Lay out the bottom plate and the two top plates (double top plate for strength). Mark the stud locations, including king studs, jack studs, and headers for all window and door openings.
- Nail Together: Nail the studs between the bottom and top plates. Install headers and cripple studs for openings.
- Sheathing: Apply the wall sheathing (OSB or plywood) to the framed walls while they are still flat. This adds rigidity and makes it easier to lift. Leave openings for windows and doors.
- Raise Walls: With help, carefully tilt each wall section into its upright position.
- Secure Walls: Fasten the bottom plate of each wall to the subfloor or concrete slab. Connect adjacent walls at the corners. Ensure walls are plumb using a level and temporarily brace them until the roof is framed.
3. Roof Framing:
The roof can be framed using either trusses or stick-built rafters.
- Roof Trusses: Pre-fabricated trusses are engineered to bear specific loads and are generally easier and faster to install, especially for larger spans. They are lifted into place and secured to the top plates of the walls.
- Stick-Built Rafters: If your plans call for it, you’ll cut and assemble individual rafters, a ridge board, and collar ties. This method offers more flexibility for complex roof designs or adding a loft. Each rafter needs precise cuts (bird’s mouth cut at the wall and plumb cut at the ridge) and careful calculation of pitch and overhangs.
Once the main roof structure is in place, apply roof sheathing (OSB or plywood) to provide a continuous surface for the roofing material.
Roofing and Siding: Protecting Your Investment from the Elements
Once the framing is complete, installing the roofing and siding becomes your priority. These elements are crucial for protecting your workshop from moisture, pests, and extreme temperatures, ensuring its longevity and usability.
1. Roofing Installation:
The choice of roofing material depends on your budget, desired lifespan, and aesthetic preferences.
- Asphalt Shingles:
The most common choice for sheds.
- Drip Edge: Install metal drip edge along the eaves and rake edges to direct water away.
- Underlayment: Roll out roofing felt or synthetic underlayment over the roof sheathing, starting from the bottom up, overlapping according to manufacturer specifications. This provides an additional moisture barrier.
- Starter Course: Lay a starter shingle course along the eaves.
- Shingle Application: Apply subsequent shingle courses, overlapping them to ensure proper water shedding and staggering the cuts to prevent water ingress. Follow manufacturer instructions for nailing patterns and exposure.
- Ridge Cap: Install special ridge cap shingles along the peak of the roof.
- Metal Roofing:
Highly durable and long-lasting, often easier to install on larger, simpler roofs.
- Underlayment: Apply a specialized underlayment compatible with metal roofing.
- Panels: Install large metal panels, typically secured with screws that have rubber washers to prevent leaks. Start from one end and work across, overlapping panels as directed.
- Trim and Flashing: Install ridge caps, gable trim, and flashing around any penetrations (e.g., vents).
2. Siding Installation:
Siding provides both protection and aesthetic appeal.
- Preparation: Ensure all wall sheathing is properly installed and any window/door flashing is in place. Consider adding a house wrap (e.g., Tyvek) over the sheathing for an extra layer of moisture and air barrier, especially if insulating.
- Wood Siding (e.g., T1-11, Lap Siding): Cut panels or boards to fit, ensuring proper alignment. Start from the bottom and work your way up, overlapping as needed. Use appropriate exterior-grade fasteners. Requires periodic painting or staining for maintenance.
- Vinyl Siding: Relatively low maintenance. Install starter strips, then snap panels into place, working from the bottom up. Use specific vinyl siding nails, ensuring they are not driven too tight to allow for expansion and contraction. Install corner posts, J-channels around openings, and fascia trim.
- Fiber Cement Siding: Durable and fire-resistant. It’s heavy and requires special tools for cutting, but offers excellent longevity and a paintable surface.
Always follow the manufacturer’s installation guidelines for both roofing and siding materials to ensure proper performance and warranty validity.
Doors, Windows, and Ventilation: Functionality and Comfort
The right doors, windows, and ventilation strategy are essential for the functionality, comfort, and security of your large workshop shed. They dictate access, natural light, and air quality.
1. Doors:
Consider the size and type of door based on what you’ll be moving in and out.
- Single Entry Door: Standard exterior door for human access. Ensure it’s sturdy and secure.
- Double Doors: Ideal for moving larger items like lawnmowers, ATVs, or sheet goods. They open wide to provide ample clearance.
- Overhead/Roll-up Door: Best for vehicle access (tractors, cars) or very large equipment. Requires specific framing and installation.
All doors should be exterior-grade, weather-sealed, and installed with proper flashing to prevent water intrusion. Security is also a major concern; opt for robust locks.
2. Windows:
Windows provide natural light, reducing the need for artificial lighting during the day.
- Placement: Position windows to maximize natural light where you’ll be working, while also considering privacy and security.
- Types: Double-pane windows offer better insulation. Styles like casement or awning windows can be good for ventilation.
- Installation: Install windows according to manufacturer instructions, ensuring they are plumb, level, and properly flashed and sealed to prevent leaks.
3. Ventilation:
Good ventilation is critical in a workshop to remove dust, fumes, heat, and moisture. Poor ventilation can lead to health issues, tool rust, and uncomfortable working conditions.
- Passive Ventilation:
- Soffit and Ridge Vents: Work together to create a continuous airflow, allowing hot air to escape at the ridge and cooler air to enter at the soffits. Essential for attic spaces.
- Gable Vents: Louvered vents installed in the gable ends of the shed promote cross-ventilation.
- Active Ventilation:
- Exhaust Fans: Essential if you’ll be doing dusty work (woodworking) or using chemicals/paints that produce fumes. Position them to draw air from the dirty area and expel it outside.
- HVAC: For a truly comfortable year-round workshop, consider a mini-split HVAC system for heating and cooling.
Combine these strategies for effective airflow. For example, openable windows in conjunction with an exhaust fan can create a strong cross-breeze.
Internal Fit-Out: Optimizing Your Workspace for Productivity
Once the exterior of your large workshop shed is complete, the internal fit-out transforms it from a shell into a highly functional workspace. This is where you tailor the space to your specific needs, maximizing efficiency and comfort.
1. Flooring:
While a concrete slab is a durable base, consider additional flooring options for comfort and specialized tasks.
- Sealers/Epoxy Coatings: Protect the concrete from stains and wear, and make it easier to clean.
- Rubber Mats: Provide anti-fatigue cushioning in standing work areas.
- Interlocking Tiles: Can add comfort and a finished look, and are easy to replace if damaged.
2. Insulation:
Insulating your workshop is crucial for year-round comfort and energy efficiency, especially if you plan to heat or cool the space.
- Walls and Ceiling: Install batt insulation (fiberglass or mineral wool) between wall studs and ceiling joists.
- Vapor Barrier: Essential on the warm side of the insulation to prevent moisture condensation within the wall cavities.
- Rigid Foam: Can be used under concrete slabs or on walls for higher R-value in compact spaces.
3. Electrical Wiring and Lighting:
A well-planned electrical system is vital for power tools, lighting, and charging stations.
- Layout: Map out where you need outlets (consider 20-amp circuits for power tools), switches, and lighting fixtures. Plan for dedicated circuits for high-draw machinery.
- Main Panel: Determine if you need a sub-panel in the shed or if you can extend circuits from your house’s main panel (consult an electrician).
- Lighting: Combine ambient lighting (e.g., LED shop lights, fluorescent fixtures) with task lighting over workbenches. Maximize natural light with windows and skylights.
- Professional Help: Unless you are a licensed electrician, it is highly recommended to hire a professional for wiring, especially for the connection to the main power supply, to ensure safety and compliance with local codes.
4. Workbenches and Storage Solutions:
Custom-built or modular storage will help keep your workshop organized and efficient.
- Workbenches: Design sturdy workbenches at appropriate heights for your tasks. Consider built-in vises, dog holes, and integrated storage. Multiple work surfaces for different tasks can be beneficial.
- Shelving and Cabinetry: Open shelving for frequently used items, closed cabinets for dust-sensitive tools or hazardous materials. Utilize vertical space.
- Tool Storage: Wall-mounted pegboards, French cleat systems, tool chests, and rolling carts can keep tools organized and accessible.
- Material Storage: Racks for lumber, sheet goods, and pipes. Dedicated bins for fasteners and small parts.
5. Heating and Cooling:
Depending on your climate and usage, consider environmental controls.
- Space Heaters: For occasional heating needs.
- Wood Stoves: A cost-effective heating option if safely installed and permitted.
- Mini-Split Systems: Efficient and provide both heating and cooling for year-round comfort.
Proper planning of the interior layout will ensure your large workshop shed is not just a building, but a highly productive and enjoyable space.
Permits, Regulations, and Safety: Don’t Skip These Crucial Steps
Building a large workshop shed, especially one over a certain size or with electrical/plumbing, almost invariably requires navigating local permits and regulations. Ignoring these can lead to significant problems, including fines, demolition orders, and issues when selling your property. Furthermore, prioritizing safety throughout the build process is non-negotiable.
1. Permits and Inspections:
- Local Building Department: Your first stop. They will outline all necessary permits (e.g., building permit, electrical permit) and explain zoning bylaws (setbacks, height restrictions, maximum coverage).
- HOA Rules: If you live in a community with a Homeowners Association, check their specific architectural guidelines and approval processes before you even design.
- The Process: Typically involves submitting your plans, paying fees, and scheduling inspections at various stages (e.g., foundation, framing, electrical, final). Ensure all work passes inspection before moving to the next phase. This ensures your shed meets structural and safety standards.
2. Safety During Construction:
Building a large structure involves inherent risks. Adhere to strict safety protocols:
- Personal Protective Equipment (PPE): Always wear safety glasses, hearing protection, gloves, sturdy footwear, and a hard hat when necessary.
- Tool Safety: Read and understand all power tool manuals. Use appropriate guards, keep blades sharp, and never operate tools while fatigued or distracted.
- Ladder Safety: Use stable ladders, ensure they are properly secured, and maintain three points of contact. Avoid overreaching.
- Heavy Lifting: Get help for heavy lifting. Use proper lifting techniques to protect your back. Consider renting equipment like a telehandler for lifting heavy trusses if applicable.
- Electrical Safety: Be extremely cautious around live wires. Turn off power at the main breaker before working on circuits. Hire a licensed electrician for all main connections.
- Site Organization: Keep your workspace clean and free of debris to prevent trips and falls.
- Weather Conditions: Avoid working in high winds, heavy rain, or extreme temperatures that could compromise safety or material integrity.
3. Long-Term Safety in the Workshop:
Once built, ensure your workshop remains a safe environment:
- Fire Prevention: Install smoke detectors and carbon monoxide detectors. Keep a fire extinguisher readily accessible. Store flammable liquids in approved containers.
- Ventilation: Ensure adequate ventilation for dust and fumes.
- Electrical Maintenance: Regularly inspect cords and outlets for damage. Don’t overload circuits.
- First-Aid Kit: Keep a well-stocked first-aid kit on hand.
Prioritizing permits and safety not only ensures compliance but also protects your investment, your health, and the well-being of anyone who uses the workshop.
Tools You’ll Need for the Build
Building a large workshop shed requires a comprehensive set of tools. While some specialized items might be rented, having a good collection of basic hand tools and essential power tools will make the process much smoother and more efficient. Here’s a breakdown of commonly needed tools:
Essential Hand Tools:
- Tape Measure: At least 25-foot, preferably two.
- Framing Square & Speed Square: For marking and ensuring square cuts and layouts.
- Level: Various sizes (2-foot, 4-foot, and a torpedo level) for ensuring plumb and level surfaces.
- Claw Hammer: A good quality framing hammer.
- Utility Knife: For cutting house wrap, roofing felt, etc.
- Chalk Line: For marking long, straight lines.
- Caulking Gun: For sealants and adhesives.
- Wrenches & Sockets: For fasteners and bolts.
- Pry Bar/Crowbar: For adjustments and demolition.
- Safety Glasses, Hearing Protection, Gloves: Absolutely essential PPE.
Essential Power Tools:
- Circular Saw: A workhorse for cutting lumber and sheet goods.
- Miter Saw (Chop Saw): Highly recommended for precise angle cuts on framing lumber.
- Drill/Driver: Cordless preferred for versatility. Essential for driving screws and drilling pilot holes.
- Impact Driver: Excellent for driving long fasteners quickly.
- Reciprocating Saw (Sawzall): Useful for rough cuts, demolition, or cutting openings.
- Nail Gun (Framing Nailer, Roofing Nailer, Finish Nailer): While not strictly necessary (you can hand-nail), nail guns dramatically speed up framing, sheathing, and roofing. A good air compressor will be needed if using pneumatic nailers.
- Jigsaw: For curved cuts or intricate openings.
- Router: For edge profiling or joinery if doing finer interior work.
Specialized/Rental Tools (depending on your project):
- Concrete Mixer or Bull Float: If pouring a large slab.
- Plate Compactor: For compacting gravel bases.
- Transit Level/Laser Level: For precise site leveling and foundation layout.
- Drywall Lift: If installing drywall on ceilings.
- Scaffolding: For safe access to high areas of the roof or walls.
Investing in quality tools, or carefully planning rentals, will make your DIY build more enjoyable, efficient, and ultimately, safer.
Common Challenges and How to Overcome Them
Even with meticulous planning, DIY large workshop shed builds can present unforeseen challenges. Anticipating these can help you mitigate their impact and keep your project on track.
- Budget Overruns: Material costs fluctuate, and unexpected issues arise.
- Solution: Build in a 10-20% contingency fund into your budget. Shop around for materials, consider used tools or rentals, and stick to your plans to avoid costly changes.
- Weather Delays: Rain, snow, or extreme heat can halt progress.
- Solution: Check forecasts regularly. Protect exposed materials with tarps. Try to schedule major exterior work during optimal weather windows.
- Miscalculations and Errors: Measurement mistakes or incorrect cuts are common.
- Solution: “Measure twice, cut once” is a golden rule. Double-check all measurements. When in doubt, cut slightly long and trim down. Don’t rush.
- Material Sourcing and Delivery: Delays or incorrect orders can set you back.
- Solution: Order materials well in advance, especially specialized items. Confirm delivery dates and quantities upon arrival. Inspect materials for damage immediately.
- Physical Demands: Building a large structure is physically demanding.
- Solution: Don’t attempt to lift heavy items alone. Recruit friends or family for help with raising walls or placing trusses. Take breaks, stay hydrated, and know your limits.
- Permit and Inspection Hurdles: Navigating bureaucracy can be frustrating.
- Solution: Be proactive. Familiarize yourself with local codes early. Be polite and prepared for inspections, and address any issues promptly.
- Feeling Overwhelmed: A large project can seem daunting.
- Solution: Break the project down into smaller, manageable tasks. Focus on completing one phase at a time. Celebrate small victories. Don’t be afraid to ask for help or consult online forums/experts if you get stuck.
Patience, persistence, and a problem-solving mindset are your best tools when faced with challenges.
Maintaining Your Workshop Shed for Longevity
Building your large workshop shed is a significant achievement, but its longevity and continued functionality depend on regular maintenance. A proactive approach will protect your investment and keep your workspace in top condition for decades.
- Exterior Checks (Annually or Bi-Annually):
- Roof: Inspect for missing, cracked, or curled shingles. Check for damage around flashing, vents, and penetrations. Clean gutters and downspouts to ensure proper water drainage. Clear any debris (leaves, branches) from the roof surface.
- Siding: Look for cracks, warping, rot, or insect damage. Re-caulk any gaps around windows, doors, and trim. If you have painted or stained wood siding, plan for reapplication every 3-7 years depending on exposure.
- Foundation: Check for cracks, settling, or moisture issues. Ensure grading around the shed still directs water away from the base.
- Doors and Windows: Lubricate hinges and locks. Check weather stripping and seals for deterioration and replace if necessary to prevent drafts and leaks.
- Interior Checks (Regularly):
- Moisture: Check for any signs of water intrusion on walls, ceiling, or floor (stains, mold, musty odors). Address the source immediately.
- Pest Control: Look for signs of insect or rodent activity. Seal any small entry points. Keep the interior clean and free of food sources.
- Electrical: Inspect cords, outlets, and light fixtures for damage. Ensure connections are secure and no overloaded circuits. Test smoke and CO detectors.
- Ventilation: Clean filters on exhaust fans. Ensure passive vents are clear of obstructions.
- Tool and Equipment Maintenance:
- Keep your tools clean, sharp, and rust-free.
- Follow manufacturer guidelines for maintaining machinery.
- Store hazardous materials properly and safely.
Regular, routine checks and addressing minor issues as they arise will prevent them from becoming major, costly problems. Your workshop is a valuable asset; treat it like one.
Building a large workshop shed from DIY plans is an ambitious yet incredibly rewarding project. It offers the unique opportunity to create a space perfectly tailored to your needs, fostering productivity, creativity, and organization. From the initial spark of an idea to the final coat of paint, every step requires careful consideration, diligent execution, and a commitment to quality. We’ve explored the myriad benefits, crucial planning stages, essential materials, and the step-by-step process from laying a robust foundation to optimizing the interior. Remember the importance of securing the necessary permits, adhering to safety protocols, and committing to ongoing maintenance to ensure your investment stands strong for decades. By embracing the challenge and approaching each phase with patience and precision, you’ll not only construct a highly functional and durable workshop but also gain invaluable skills and the immense satisfaction of having built your dream space with your own hands. Now, armed with this comprehensive guide, it’s time to turn those DIY large workshop shed plans into a tangible reality.


