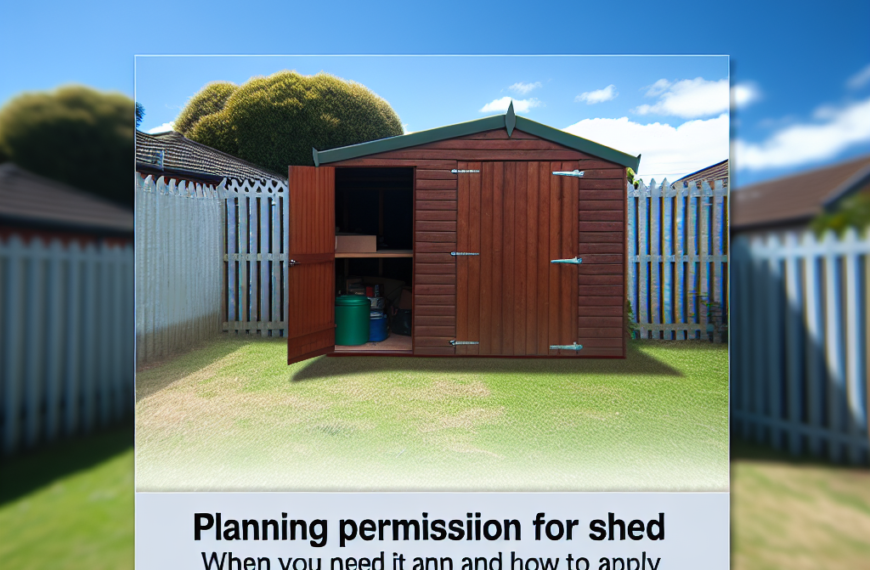
In any garden, whether sprawling or compact, finding efficient and aesthetically pleasing storage solutions is a perpetual challenge. Tools, fertilizers, potting mixes, outdoor toys, and even seasonal decorations often accumulate, leading to clutter and disorganization. This is where a small garden shed becomes an invaluable asset. Far more than just a storage box, a well-planned small shed can be a dedicated space for your gardening endeavors, a secure home for your equipment, and even a charming focal point in your backyard oasis. This comprehensive guide will delve into everything you need to know about small garden shed plans, from the initial considerations and various design options to the practicalities of building, maximizing space, and ensuring the longevity of your new garden companion.
Why Choose a Small Garden Shed?
The decision to build or buy a small garden shed is often driven by a fundamental need for organization, but the benefits extend far beyond mere tidiness. For many homeowners, especially those with limited outdoor space, a small shed offers a perfect balance of utility and practicality without overwhelming the landscape.
- Space Efficiency: A primary advantage of a small shed is its minimal footprint. Unlike larger structures that can dominate a yard, a compact shed (often ranging from 4×6 feet to 8×10 feet) can fit into tight corners, alongside existing fences, or discreetly integrate into a garden bed, leaving ample room for other outdoor activities.
- Dedicated Storage: It provides a single, organized location for all your gardening tools, lawn care equipment, hoses, pots, and soil bags. This centralization prevents tools from being left out, exposed to the elements, or scattered across the yard.
- Protection from Elements and Theft: Storing your valuable tools and equipment indoors protects them from rain, sun, snow, and extreme temperatures, extending their lifespan. A secure shed also deters casual theft, offering peace of mind.
- Enhanced Garden Aesthetics: A well-designed small shed can significantly boost your garden’s visual appeal. With the right choice of materials, paint color, and decorative elements, it can complement your home’s architecture and become a charming garden feature rather than just a utilitarian structure.
- Cost-Effectiveness: Generally, small sheds require less material and labor than their larger counterparts, making them a more budget-friendly option for homeowners. This applies whether you’re purchasing a kit, hiring a builder, or undertaking a DIY project.
- Easier Permitting: In many municipalities, smaller structures fall under less stringent building code requirements or may even be exempt from permits, simplifying the construction process. Always check local regulations, but a small shed often presents fewer bureaucratic hurdles.
- Versatility: While typically used for storage, a small shed can also serve as a compact potting shed, a quiet retreat for reading, a secure place for children’s outdoor toys, or even a mini workshop for small projects.
Choosing a small garden shed is a smart solution for optimizing your outdoor space, protecting your belongings, and adding functional beauty to your property.
Essential Considerations Before You Build
Before you even begin looking at small garden shed plans, a thoughtful planning phase is crucial. This initial groundwork will save you time, money, and potential headaches down the line, ensuring your shed perfectly meets your needs and complies with local regulations.
- Define Its Purpose: What will primarily be stored in your shed?
- Gardening tools and supplies: You might need shelving, hooks, and a potting bench.
- Lawnmower and large equipment: Requires wider doors and a clear path.
- Outdoor furniture/seasonal items: Needs open floor space.
- A dedicated potting shed: Requires windows for light, good ventilation, and a workbench.
- Bicycles/sports equipment: May need vertical storage solutions.
Understanding its primary function will guide your choice of size, door type, and interior layout.
- Choose the Right Location: The placement of your shed is vital for functionality and longevity.
- Accessibility: Is it easy to get to from your garden and house? Consider pathing.
- Drainage: Avoid low-lying areas where water collects. Ensure proper runoff away from the shed’s foundation.
- Sunlight: Direct sunlight can prevent mold and keep the interior dry. However, too much sun on certain materials can cause fading or warping.
- Level Ground: A stable, level foundation is non-negotiable for structural integrity.
- Proximity to Utilities: If you plan on electricity or water, consider proximity to existing lines.
- Aesthetics: How will the shed look in your garden? Will it block views or create unwanted shade?
- Research Local Regulations and Permits: This is perhaps the most critical step. Zoning laws, building codes, and homeowners’ association (HOA) rules vary widely by location.
- Permit Requirements: Many small sheds are exempt if they are below a certain size (e.g., 100-120 sq ft), but always verify.
- Setback Requirements: How far must the shed be from property lines, other structures, or even your house?
- Height Restrictions: Some areas have limits on the maximum height of accessory structures.
- HOA Rules: HOAs often have specific guidelines on shed size, material, color, and placement.
Failing to comply can lead to fines or forced demolition.
- Set Your Budget: Your budget will influence your material choices, whether you build it yourself, buy a kit, or hire a professional. Factor in:
- Materials: Lumber, roofing, siding, hardware, foundation materials.
- Tools: If you’re DIYing, do you have the necessary tools or will you need to buy/rent them?
- Labor: If hiring a contractor.
- Foundation Costs: Can vary significantly depending on type.
- Finishing Touches: Paint, shelving, hooks, landscaping around the shed.
- Choose Your Materials: The choice of materials impacts durability, maintenance, cost, and aesthetics.
- Wood: Classic, customizable, requires regular sealing/painting. Options include cedar (rot-resistant), pine (cheaper, needs treatment), T-111 (siding with grooves), or oriented strand board (OSB) and plywood for sheathing.
- Metal: Durable, low maintenance, but can be prone to condensation and may not be as aesthetically pleasing for all gardens.
- Plastic/Resin: Lightweight, weather-resistant, easy to assemble (often from kits), but less durable in extreme weather and less customizable.
Thoroughly addressing these considerations upfront will provide a solid framework for choosing or creating the perfect small garden shed plan.
Popular Small Garden Shed Designs and Their Benefits
Small garden sheds come in a variety of styles, each offering distinct advantages in terms of aesthetics, functionality, and ease of construction. Understanding these common designs will help you select the one that best suits your needs and complements your garden’s character.
- Lean-To Shed:
- Description: Characterized by a single-sloping roof that typically “leans” against an existing structure, such as your house wall or a fence.
- Benefits: Ideal for very small spaces or narrow side yards. It utilizes an existing wall for support, reducing material and construction complexity. Highly discreet and blends well with the main dwelling.
- Typical Sizes: Very compact, often 4×4 ft, 4×6 ft, or 3×8 ft.
- Gable Shed (A-Frame):
- Description: The most common and recognizable shed design, featuring a classic inverted “V” shaped roof (two sloping sides meeting at a ridge) with triangular walls (gables) at each end.
- Benefits: Excellent for shedding rain and snow, making it suitable for various climates. The pitched roof allows for some overhead storage or a small loft inside. Offers a timeless, traditional look that fits most architectural styles.
- Typical Sizes: Popular choices include 6×8 ft, 8×10 ft, or 8×12 ft, offering a good balance of storage and footprint.
- Saltbox Shed:
- Description: Features an asymmetrical gable roof, with one side of the roof being much longer than the other, extending downwards to create a unique profile.
- Benefits: Provides good protection from prevailing winds and rain, as the longer roof side can be oriented towards the weather. Offers more headroom on one side and a lower profile on the other, which can be useful for fitting under eaves or alongside fences. Distinctive, charming aesthetic.
- Typical Sizes: Similar to gable sheds, often 6×8 ft or 8×10 ft.
- Gambrel Shed (Mini-Barn):
- Description: Recognizable by its barn-like roof, which has two different slopes on each side, creating a broader, more voluminous upper section.
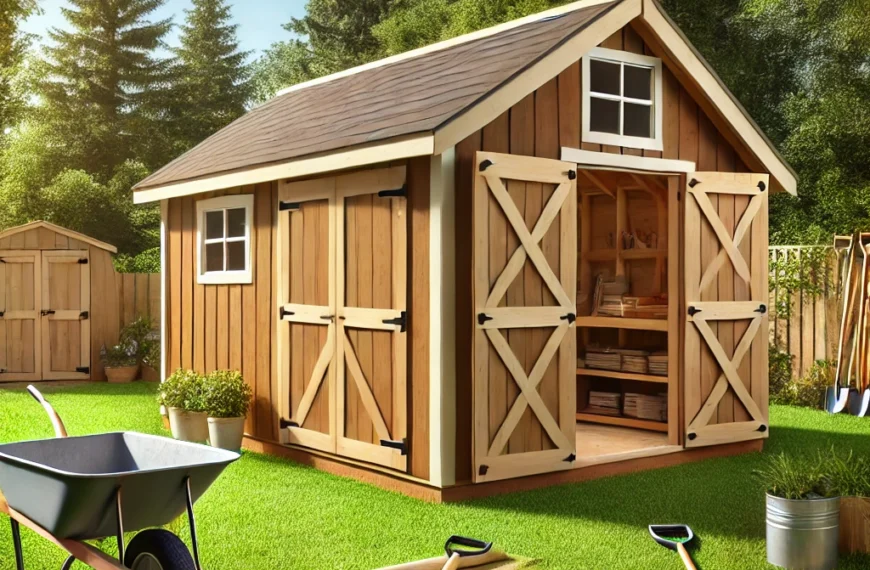
- Benefits: Maximizes interior headroom and upper storage space, making it excellent for hanging long tools, creating a loft, or storing bulky items. Offers a rustic, charming farmhouse aesthetic.
- Typical Sizes: Commonly 8×10 ft, 8×12 ft, or larger, as the design inherently creates more internal volume.
- Modern/Flat Roof Shed:
- Description: Features a minimal slope or a completely flat roof, often with clean lines and contemporary materials.
- Benefits: Provides a sleek, minimalist aesthetic that complements modern homes. Can be integrated with green roofs or used for solar panel installation. Requires careful attention to drainage on a flat roof.
- Typical Sizes: Highly variable, can be very compact (4×6 ft) or larger, depending on the desired architectural statement.
When choosing a design, consider not only the practical aspects of storage and space but also how the shed will visually integrate with your existing home and garden landscape. The right design can transform a utilitarian structure into an attractive garden feature.
Key Elements of Small Garden Shed Plans
Regardless of the chosen design, every small garden shed relies on a few fundamental structural components. Understanding these elements is crucial for anyone planning to build their own shed, ensuring durability, stability, and functionality.
- Foundation: This is the most critical element, as it provides a stable, level base and protects the shed from ground moisture and pests.
- Skid or Runner Foundation: The simplest option for smaller sheds. Pressure-treated lumber skids sit directly on the ground (or on gravel). Allows for easy relocation. Requires a very level site.
- Concrete Block/Pier Foundation: Concrete blocks or pre-cast piers are set on a gravel bed or concrete footings. This lifts the shed off the ground, improving ventilation and moisture protection. Requires careful leveling.
- Concrete Slab Foundation: The most durable and permanent option, ideal for heavier sheds or those needing a very stable floor (e.g., for heavy machinery). Involves pouring a concrete slab directly on a prepared base. Offers excellent protection against moisture and pests.
Proper foundation prevents settling, warping, and premature rot.
- Floor Framing: Built on top of the foundation, the floor frame typically consists of pressure-treated lumber joists (e.g., 2×4 or 2×6) spaced evenly and covered with plywood or OSB sheeting. It must be strong enough to support the weight of stored items and foot traffic.
- Wall Framing: The skeleton of your shed, constructed from vertical studs (typically 2x4s) spaced 16 or 24 inches on center, along with horizontal top and bottom plates. Openings for doors and windows require additional framing (headers and sills) to distribute loads effectively.
- Roof Framing: This involves rafters (sloping members) or trusses (pre-built triangular frames) that create the roof pitch. The type of roof (gable, saltbox, gambrel) dictates the specific framing method. Proper roof framing ensures the structure can support snow loads and resist wind uplift.
- Roof Sheathing: Plywood or OSB panels are nailed to the roof framing, creating a solid surface for the roofing material. This layer adds rigidity to the structure.
- Roofing Material: Protects the shed from water intrusion.
- Asphalt Shingles: Common, durable, available in many colors. Requires an underlayment (felt paper).
- Metal Roofing: Very durable, low maintenance, comes in panels, good for shedding snow, but can be noisy in rain.
- Polycarbonate Panels: Clear or translucent, used for light transmission, often for potting sheds or skylights.
- Siding: The exterior covering of the walls, protecting the shed from the elements and contributing to its aesthetic appeal.
- T-111 Plywood: A popular choice, economical, durable, with built-in grooves for a rustic look.
- Wood Siding: Cedar, pine, or spruce planks offer a classic look but require more maintenance (painting/staining).
- Vinyl Siding: Low maintenance, durable, wide range of colors, but less traditional aesthetic.
- Metal Siding: Very durable and fire-resistant, but can be prone to dents.
- Doors and Windows:
- Doors: Crucial for access. Consider single vs. double doors based on the size of items you’ll store (e.g., lawnmower needs wide access). Placement matters for workflow.
- Windows: Provide natural light and ventilation. Can be fixed, sliding, or hinged. Consider security and weatherproofing.
- Ventilation: Essential to prevent condensation, mold, mildew, and stale odors. Vents (ridge vents, gable vents, or continuous soffit/fascia vents) promote airflow. Windows can also aid in ventilation when opened.
- Interior Organization: While not a structural element, planning for interior shelving, pegboards, hooks, and benches is vital for maximizing the utility of a small shed. This should be considered during the planning phase to ensure wall studs can support heavy shelving or benches.
Each of these elements plays a vital role in the overall integrity and longevity of your small garden shed. Investing in quality materials and proper construction for each component will ensure your shed stands strong for years to come.
DIY vs. Pre-fabricated Kits vs. Professional Builders
Once you’ve settled on a design and size, the next major decision is how your small garden shed will come into existence. You generally have three paths: building it yourself from scratch (DIY), assembling a pre-fabricated kit, or hiring a professional.
- Do-It-Yourself (DIY) from Plans:
- Pros:
- Cost Savings: Typically the cheapest option as you only pay for materials and tools.
- Full Customization: You have complete control over every detail, from dimensions and materials to door and window placement, ensuring it perfectly fits your specific needs and aesthetic preferences.
- Sense of Accomplishment: There’s immense satisfaction in building something substantial with your own hands.
- Learning Experience: A great opportunity to learn new carpentry and construction skills.
- Cons:
- Time Commitment: Can be a significant time investment, especially for complex designs or if you’re new to building.
- Required Skills: Demands basic carpentry knowledge, ability to read plans, use power tools safely, and understand structural principles.
- Tool Investment: You might need to purchase or rent specialized tools (saws, drills, levels, nail guns).
- Potential for Errors: Mistakes can lead to wasted materials, structural issues, or delays.
- Best For: Individuals with some DIY experience, a reasonable set of tools, plenty of free time, and a desire for a fully customized shed.
- Pros:
- Pre-fabricated Shed Kits:
- Pros:
- Convenience: All parts are pre-cut and often pre-drilled, simplifying the assembly process. Detailed instructions are usually included.
- Faster Assembly: Significantly quicker to build than from-scratch DIY, often taking a weekend or two.
- Predictable Costs: The upfront cost of the kit is clear, reducing budget surprises (though foundation materials are separate).
- Less Skill Required: While some carpentry skill is helpful, the process is more about assembly than complex construction.
- Cons:
- Limited Customization: You’re largely stuck with the kit’s design, size, and material choices.
- Material Quality: Quality can vary; some kits use thinner lumber or lower-grade materials to keep costs down.
- Still Requires Effort: It’s not a “set it and forget it” solution; you still need to pour a foundation, assemble the components, and often add roofing and painting.
- Shipping Costs: Large kits can incur significant delivery fees.
- Best For: Those who want a shed quickly and conveniently, have basic handy skills, and don’t require extensive customization.
- Pros:
- Hiring a Professional Builder:
- Pros:
- No Effort Required: The builder handles everything from foundation to finishing touches.
- Guaranteed Quality: Professionals ensure proper construction, adherence to codes, and usually offer warranties.
- Time Savings: The fastest way to get a shed built, as you’re not doing the work yourself.
- Access to Expertise: Builders can advise on optimal design, materials, and placement.
- Cons:
- Highest Cost: This is typically the most expensive option, as you’re paying for labor, expertise, and materials.
- Less Involvement: You have less direct control over the day-to-day building process.
- Scheduling: You’ll need to work around the builder’s schedule.
- Best For: Individuals with a higher budget who prefer convenience, want a perfectly built shed without the DIY hassle, or have complex design requirements.
- Pros:
Your choice depends on your budget, available time, skill level, and desire for customization. Weigh these factors carefully to select the path that’s right for you.
Maximizing Space in Your Small Shed
The beauty of a small garden shed lies in its compact footprint, but this also means organization is paramount. A well-organized small shed can often hold more than a larger, unorganized one. Smart storage solutions are key to making every inch count.
- Go Vertical: This is the golden rule for small spaces.
- Shelving Units: Install sturdy shelves from floor to ceiling. Adjustable shelving offers flexibility for different-sized items. Corner shelves are great for odd spaces.
- Wall-Mounted Tool Racks: Utilize pegboards, slat walls, or magnetic strips to hang hand tools, rakes, shovels, brooms, and other long-handled items. This keeps them off the floor and easily accessible.
- Overhead Storage: Install a small loft or sturdy joist-mounted hooks for storing seasonal items, lumber scraps, or lightweight bulky items like empty pots or pool noodles.
- Install Hooks and Hangers Liberally:
- Utility Hooks: For hoses, extension cords, buckets, and folded chairs.
- Bike Hooks: Hang bicycles vertically to free up floor space.
- Ladder Hooks: Securely store step ladders or small stepladders against a wall.
- Specialized Tool Hangers: Look for hooks designed specifically for rakes, shovels, or weed trimmers.
- Use Clear and Stackable Bins/Containers:
- Store smaller items like seeds, gloves, fertilizers, or pest control products in clear, labeled bins. This makes it easy to see contents and keeps things tidy.
- Stackable bins help maximize vertical space on shelves.
- Consider a Folding Workbench: If you need a workspace, a workbench that folds down from the wall when not in use is an excellent space-saving solution.
- Slim Storage Solutions:
- Door-Mounted Organizers: Utilize the back of the shed door for shallow shelves, small tool pouches, or a narrow pegboard.
- Slim Cabinets: If space allows, a shallow cabinet with narrow shelves can be great for chemicals or smaller supplies.
- Label Everything: Once organized, label shelves, bins, and drawers. This makes finding items quick and ensures everything is returned to its proper place, maintaining order.
- Think Outside the Box:
- PVC Pipe Organizers: Cut PVC pipes to size and attach them to a wall to hold long-handled tools or even sports equipment like baseball bats.
- Repurpose Items: Old crates or pallets can be repurposed into rustic shelves or storage bins.
Regular decluttering is also essential. Periodically go through your shed and remove anything you no longer use or need. By applying these smart storage strategies, your small garden shed will transform into an incredibly efficient and functional storage hub.
Tools and Materials Needed for DIY Small Shed Construction
Embarking on a DIY small garden shed project requires a specific set of tools and a clear understanding of the materials you’ll need. Having everything on hand before you start will ensure a smooth and efficient build.
Essential Tools:
- Measuring & Marking:
- Tape Measure: At least 25 feet for accurate measurements.
- Speed Square / Combination Square: For marking precise 90-degree angles and cutting lines.
- Chalk Line: For snapping straight lines over long distances (e.g., for foundation layout).
- Pencil: For marking cuts and layouts.
- Cutting & Shaping:
- Circular Saw: Essential for cutting lumber and sheet goods (plywood, OSB). A good quality blade is crucial.
- Miter Saw (Optional but Recommended): For precise crosscuts and angle cuts on framing lumber.
- Jigsaw: For cutting curves or intricate shapes, and for openings (e.g., windows).
- Utility Knife: For cutting roofing felt or house wrap.
- Fastening & Assembly:
- Cordless Drill/Driver: Indispensable for drilling pilot holes and driving screws. Have spare batteries.
- Hammer: For driving nails, if not using a nail gun.
- Nail Gun (Optional but Recommended): Speeds up framing significantly. Requires an air compressor.
- Staple Gun: For attaching roofing felt or house wrap.
- Leveling & Plumbing:
- Spirit Level: Various lengths (2-foot, 4-foot, or a torpedo level) for ensuring components are perfectly level and plumb.
- String Level & Line: For leveling foundation elements.
- Post Hole Digger (if applicable): For pier foundations.
- Safety Gear:
- Safety Glasses: Non-negotiable for protecting your eyes from sawdust and debris.
- Work Gloves: To protect hands from splinters and rough materials.
- Ear Protection: Especially when using power saws or nail guns.
- Dust Mask/Respirator: When cutting wood, especially OSB or treated lumber.
- Miscellaneous:
- Sawhorses: For supporting lumber during cutting.
- Clamps: For holding pieces together while fastening.
- Wheelbarrow & Shovel (if applicable): For moving gravel or concrete.
- Caulk Gun: For sealing gaps.
- Paint Brushes / Rollers: For finishing the exterior.
Common Materials:
- For the Foundation:
- Gravel (Crushed Stone): For drainage and leveling beneath skids or piers.
- Pressure-Treated Lumber: Essential for any wood in contact with the ground (skids, floor joists). Resists rot and insects.
- Concrete Blocks / Pre-cast Piers / Bagged Concrete Mix: Depending on your chosen foundation type.
- For Framing:
- Dimensional Lumber (e.g., 2x4s, 2x6s): For floor joists, wall studs, roof rafters, and headers. Standard construction grade lumber.
- For Sheathing & Flooring:
- Plywood or OSB (Oriented Strand Board): For floor decking, wall sheathing, and roof sheathing. Look for exterior-grade plywood for flooring.
- For Siding:
- T-111 Plywood Siding, Wood Siding (cedar, pine), Vinyl Siding, or Metal Panels: Choose based on aesthetic, durability, and budget.
- For Roofing:
- Roofing Felt (Tar Paper) or Synthetic Underlayment: Moisture barrier beneath shingles.
- Asphalt Shingles, Metal Panels, or other chosen roofing material.
- Drip Edge: Metal flashing for the roof edges.
- Hardware:
- Construction Screws / Nails: Specific types for framing, decking, and siding. Ensure they are exterior grade or galvanized for outdoor use.
- Joist Hangers (if applicable): For securing floor joists to beams.
- Hurricane Ties / Rafter Ties (if applicable): For securing roof framing to wall plates.
- Hinges and Latch/Lock: For the shed door.
- Finishing & Miscellaneous:
- Exterior Paint or Stain: To protect wood siding and add curb appeal.
- Caulk / Sealant: To seal gaps and prevent water intrusion.
- Ventilation Grills: For proper airflow.
Review your chosen small garden shed plans carefully to create a precise materials list. It’s always wise to over-order by 10-15% to account for mistakes or damaged pieces.
Maintenance Tips for Your Small Garden Shed
Building or acquiring a small garden shed is an investment in your property and organizational peace of mind. To ensure your shed remains functional, attractive, and protected for years to come, regular maintenance is essential. Neglecting these simple tasks can lead to costly repairs down the line.
- Regular Inspections:
- Check for Leaks: After heavy rain, inspect the interior for any signs of water intrusion, especially around windows, doors, and the roof. Small leaks can lead to significant damage if left unaddressed.
- Examine the Foundation: Look for any signs of settling, cracking, or shifting. Ensure proper drainage away from the base.
- Inspect Siding and Trim: Look for cracks, rot, peeling paint, or insect damage. Pay close attention to corners and areas close to the ground.
- Check the Roof: Look for loose, cracked, or missing shingles, rust on metal panels, or any debris buildup.
- Doors and Windows: Ensure they open and close smoothly. Check hinges, latches, and window panes for damage.
- Maintain Exterior Finish (for wood sheds):
- Repaint or Restain: Wood sheds need protection from UV rays and moisture. Depending on the product, plan to repaint or restain every 3-5 years, or as soon as you notice peeling, fading, or wear. This is crucial for preventing wood rot and extending the shed’s life.
- Seal Cracks: Use exterior-grade caulk to seal any cracks or gaps in the siding or around windows and doors to prevent water and pest entry.
- Keep it Clean:
- Exterior Washing: Periodically wash the exterior of your shed with a mild detergent and soft brush to remove dirt, mold, and mildew. A gentle power wash can be effective but be careful not to damage the siding.
- Interior Cleaning: Sweep out debris, dust shelves, and clean up any spills. This prevents pest infestations and keeps your tools clean.
- Clear Gutters (if applicable): If your shed has gutters, keep them free of leaves and debris to ensure proper water runoff.
- Ensure Proper Ventilation:
- Good airflow prevents condensation, which can lead to mold, mildew, and rust on tools. Ensure vents (gable, soffit, or ridge) are clear and unobstructed.
- On humid days, consider opening the door and windows for a few hours to air out the shed.
- Pest Control:
- Regular inspections help identify early signs of insects (termites, carpenter ants) or rodents.
- Seal any gaps or holes where pests could enter. Store food items in sealed containers.
- Consider placing bait traps or repellents if you notice activity.
- Organize Regularly:
- While not strictly structural maintenance, a well-organized shed reduces clutter, improves airflow, and makes it easier to spot potential problems during inspections.
- Prevent heavy items from leaning against walls, which can cause warping or damage.
By dedicating a small amount of time to these maintenance tasks each season, you can significantly extend the life of your small garden shed, keeping your belongings safe and your garden tidy for many years to come.
A small garden shed, while seemingly modest in scale, offers immense value to any homeowner seeking to declutter, organize, and enhance their outdoor living space. From providing secure storage for gardening tools and equipment to serving as a charming focal point in your backyard, the benefits are numerous and far-reaching. We’ve explored the compelling reasons to choose a small shed, delved into the crucial planning considerations like purpose, location, and local regulations, and showcased various popular designs, from the classic gable to the space-efficient lean-to. Understanding the key structural elements—foundation, framing, roofing, and siding—is vital whether you opt for a hands-on DIY build, the convenience of a pre-fabricated kit, or the expertise of a professional builder. Crucially, maximizing every inch of your compact shed through smart vertical storage, hooks, and diligent organization transforms it into an incredibly efficient hub. Finally, committing to routine maintenance ensures your investment remains protected, functional, and aesthetically pleasing for years to come. By carefully considering these aspects, you’re not just building a shed; you’re crafting a dedicated space that brings order, beauty, and efficiency to your garden. So, gather your plans, select your design, and embark on the rewarding journey of creating your perfect small garden shed.
