
Welcome to our comprehensive guide about diy golf simulator shed plans.
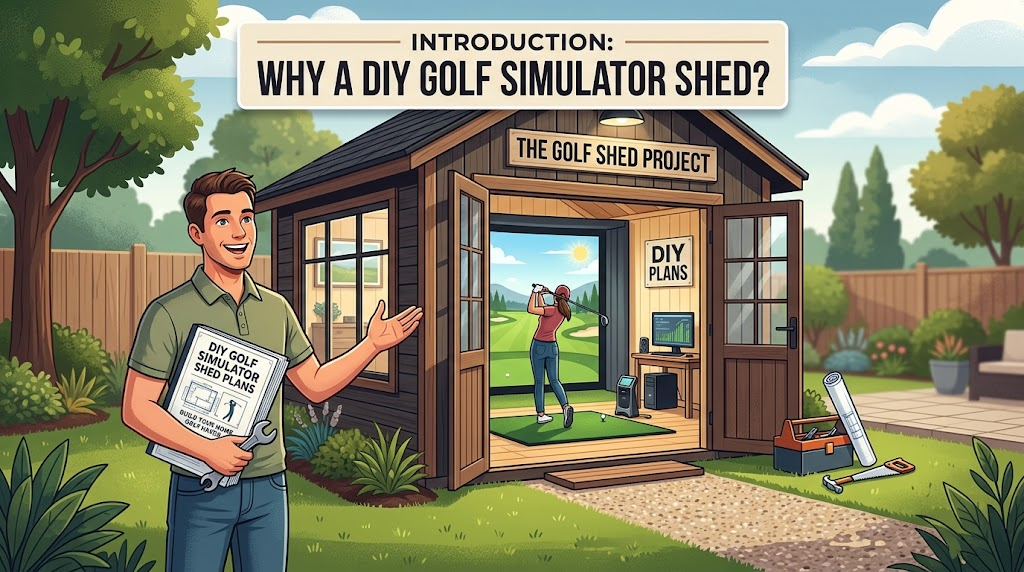
Introduction: Why a DIY Golf Simulator Shed?
Escape the confines of your living room and elevate your golf game with a dedicated DIY golf simulator shed! Imagine stepping into your backyard sanctuary, rain or shine, and teeing off on world-renowned courses without ever leaving home. This isn’t just about convenience; it’s about creating a personalized, high-performance training environment that truly enhances your golfing experience.
The Unmatched Advantages of a Dedicated Shed
Building your own golf simulator shed offers a myriad of benefits that a traditional indoor setup simply can’t match:
- Dedicated Space, Zero Compromises: Unlike converting a garage or basement, a shed provides a permanent, purpose-built structure. This means no more moving cars, clearing clutter, or worrying about stray balls damaging household items. You can design the space specifically for optimal swing mechanics, screen placement, and projector angles.
- Weatherproof Practice, Year-Round Enjoyment: Don’t let unpredictable weather dictate your practice schedule. A robust shed protects your valuable equipment from the elements, allowing you to play a full 18 holes in a blizzard or refine your short game during a sweltering summer afternoon. This consistency is crucial for skill development.
- Enhanced Immersion and Focus: Stepping into your shed creates a mental separation from daily distractions. It’s your personal golf zone, fostering deeper concentration and a more immersive experience. The quiet, controlled environment allows you to fully engage with your virtual round or practice session.
- Increased Property Value & Aesthetic Appeal: A well-designed and constructed golf simulator shed can be a valuable addition to your property, offering a unique amenity that appeals to golf enthusiasts. It can transform an unused corner of your yard into a functional and attractive feature.
What This Guide Will Deliver
This comprehensive guide is your blueprint to transforming that dream into a tangible reality. We’ll walk you through every critical step, providing the knowledge and confidence you need to build a professional-grade golf simulator shed from the ground up. Expect to learn:
- Strategic Planning: How to assess your space, define your budget, and choose the ideal shed type for your specific needs.
- Design & Construction Mastery: Detailed insights into essential design elements, material selection, and a step-by-step construction guide for a sturdy foundation and structure.
- Equipping Your Sanctuary: Recommendations for golf simulator components, from launch monitors and projectors to screens and hitting mats.
Ready to embark on this exciting journey? This guide will empower you to create the ultimate backyard golf haven. Start planning your perfect practice space today with these expertly crafted diy golf simulator shed plans.
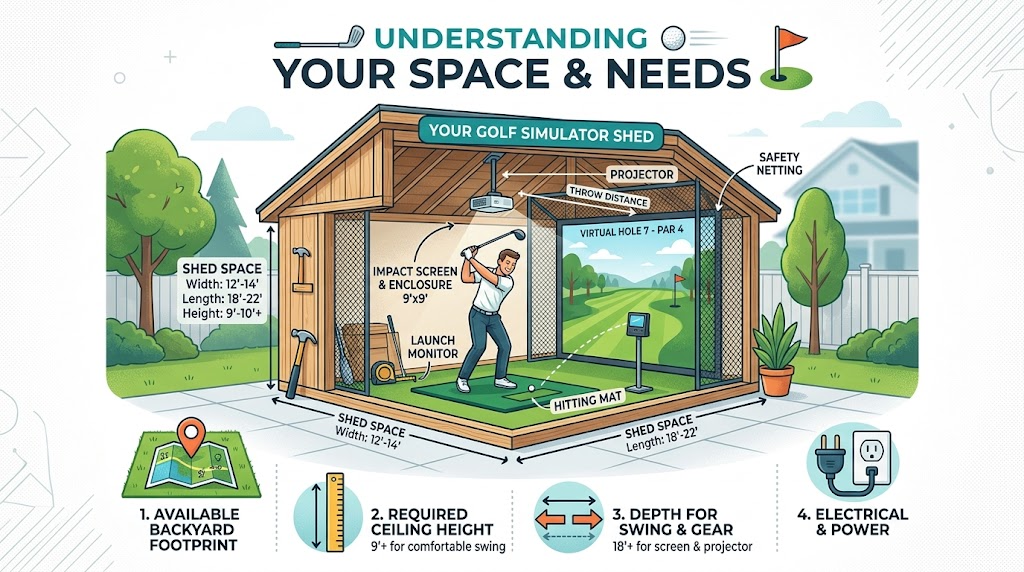
Understanding Your Space & Needs
Before swinging a single hammer, a thorough assessment of your available space and specific requirements is paramount. This foundational step ensures your DIY golf simulator shed is not only functional but also compliant and fits seamlessly into your property.
Optimal Dimensions and Placement
The first critical step is accurately measuring your intended build site and understanding the minimum space needed for a comfortable and safe golf swing.
- Minimum Swing Space: For most adults, a safe golf swing requires a ceiling height of at least 9-10 feet, a width of 10-12 feet (to accommodate left and right-handed swings and monitor placement), and a depth of 12-15 feet (for ball flight, hitting mat, and projector throw distance).
For example, a typical 10x12x10-foot shed provides a good starting point, but taller individuals or those with wider swings may need more.
- Shed Footprint: Consider the exterior dimensions of your chosen shed design. Will it fit comfortably in your backyard without overwhelming the space or encroaching on property lines? Leave adequate clearance around the shed for maintenance and access.
- Sunlight and Orientation: While not directly impacting simulator performance, consider sun exposure. Orienting the shed to minimize direct sunlight on screens or monitors can improve visibility and prevent glare. Also, think about prevailing winds if your shed will have opening windows or doors.
Navigating Local Regulations and Budget
Ignoring local zoning laws and underestimating costs can quickly derail your project.
- Permitting and Zoning: Almost all permanent outdoor structures require permits. Check with your local municipality or homeowner’s association (HOA) regarding building codes, setback requirements (how far from property lines your shed must be), maximum height restrictions, and any specific aesthetic guidelines.
For instance, some areas may require an engineered foundation plan for structures over a certain square footage.
Failing to secure permits can lead to fines or even forced demolition.
- Budgeting Realistically: Beyond the shed itself, factor in costs for site preparation (leveling, foundation), electrical work (for the simulator, lighting, HVAC), and interior finishing (insulation, flooring). Don’t forget a contingency fund (10-15% of your total budget) for unexpected expenses. A detailed budget avoids surprises and ensures you can complete the project as planned.
By meticulously assessing these aspects, you lay a solid groundwork for a successful and enjoyable DIY golf simulator shed. For comprehensive resources and detailed guidance, explore various diy golf simulator shed plans.
Choosing the Right Shed Type for Your Golf Simulator
Choosing the right shed type is a foundational decision that impacts everything from construction complexity to long-term enjoyment of your DIY golf simulator. Your selection will largely depend on your budget, DIY skill level, and the specific features you envision for your golf sanctuary.
Custom-Built Sheds: Tailored to Perfection
Opting for a custom-built shed offers unparalleled flexibility and the ability to perfectly match your aesthetic and functional requirements.
- Pros:
- Exact Dimensions: You dictate the precise length, width, and height, crucial for optimal simulator screen placement and swing clearance. This is especially important for taller golfers or those with wider swings.
- Integrated Features: Design in specific electrical conduit runs, HVAC considerations, soundproofing, and reinforced walls for impact screens from the outset.
- Aesthetic Harmony: Match your home’s architectural style and existing landscaping, enhancing your property’s value.
- Cons:
- Higher Cost: Generally the most expensive option due to labor and bespoke materials.
- Time-Consuming: Requires more planning, procurement, and construction effort.
- DIY Skill Required: If building yourself, a good understanding of carpentry and construction is essential.
Recommendation: Consider custom-built if you have a unique space, specific design preferences, or if you’re an experienced DIYer looking for a long-term, high-quality solution.
Prefabricated Sheds: Convenience and Speed
Prefabricated (prefab) sheds arrive as pre-cut kits or even pre-assembled units, significantly reducing build time and complexity.
- Pros:
- Faster Construction: Often assembled in a day or two, especially for smaller kits.
- Cost-Effective: Typically more affordable than custom builds.
- Predictable Results: Kits come with detailed instructions, leading to a consistent outcome.
- Examples: Brands like Studio Shed offer modern designs that can be adapted, while many local shed manufacturers provide robust utility sheds that can be converted.
- Cons:
- Limited Customization: You’re largely confined to standard sizes and designs.
- Quality Variability: Material quality can differ significantly between manufacturers; research is key.
- Potential for Hidden Costs: Factor in delivery, foundation work, and any necessary modifications for your simulator.
Tip: When evaluating prefabs, prioritize models with sufficient ceiling height (minimum 9-10 feet is ideal) and a robust frame that can withstand impact screen tension.
Converting an Existing Shed: Repurposing Potential
If you already have a shed on your property, converting an existing structure can be the most budget-friendly and eco-conscious option.
- Considerations:
- Structural Integrity: Is the shed sound? Check for rot, unstable foundations, and adequate framing. Reinforcements may be necessary.
- Dimensions: Does it offer enough height and width for a comfortable swing? This is often the biggest hurdle.
- Insulation & Ventilation: Most existing sheds lack proper insulation and ventilation, which are critical for temperature control and equipment longevity.
- Electrical Access: Will you need to run new electrical lines for your projector, launch monitor, and computer?
Example: A sturdy 10×12 utility shed with a gable roof might be a good candidate if the peak height is sufficient. You’d likely need to add insulation, reinforce walls, and upgrade electrical. Many find that popular brands like Tuff Shed offer robust structures that lend themselves well to conversion due to their generally solid construction.
Ultimately, the best shed type for you balances your vision with practical constraints. For detailed guidance and comprehensive blueprints, explore dedicated diy golf simulator shed plans.
Essential Golf Simulator Shed Plans & Design Elements
Optimizing Internal Space for Peak Performance
The heart of any great golf simulator shed lies in its internal layout. This isn’t just about fitting equipment; it’s about creating a safe, comfortable, and highly functional environment for every swing.
- Swing Clearance: This is paramount. For most adults, you’ll need a minimum of 10 feet of width to accommodate a full swing without hitting walls, and 10-12 feet of depth from the hitting mat to the screen for optimal ball flight tracking. Ceiling height is equally crucial, with 10-12 feet being the recommended range to avoid club-to-ceiling contact during a backswing. Taller individuals or those with steeper swing planes might require even more.
- Equipment Placement:
- Hitting Mat: Position this centrally, allowing ample space on either side.
- Launch Monitor: Depending on the model, this will be either behind the mat (e.g., Trackman, GCQuad) or in front, mounted on the ceiling or a stand (e.g., Mevo+). Ensure clear lines of sight.
- Projector: Typically ceiling-mounted, directly above and slightly behind the hitting mat, projecting onto the impact screen.
- Impact Screen: This should span nearly the full width and height of your hitting area, absorbing ball impact and displaying the simulation.
Integrating a Golf Simulator Shed Kit
Many DIY builders opt for pre-designed golf simulator shed kits, which can simplify the planning process significantly. When incorporating a kit into your shed design, consider these elements:
- Kit Dimensions vs. Shed Dimensions: Always check the kit’s required footprint (width, depth, height) against your shed’s internal measurements. A common mistake is building a shed that’s too small for the chosen simulator enclosure.
- Structural Support: Ensure your shed’s framing can adequately support the weight of ceiling-mounted projectors, nets, and any other kit components. Reinforced joists might be necessary.
- Accessibility: Plan for easy access to the simulator components for setup, maintenance, and future upgrades. This includes power outlets, USB ports, and network connections.
Key Design Elements for Functionality and Comfort
Beyond the simulator itself, several design elements contribute to a superior golf shed experience:
- Lighting: Beyond the projector, good ambient lighting is essential. Dimmable LED strip lights or recessed lighting can create a comfortable atmosphere and reduce eye strain. Avoid lights that cast shadows on the screen or interfere with launch monitor sensors.
- Ventilation: Especially in warmer climates or during extended sessions, proper airflow prevents heat buildup and maintains air quality. Consider windows, vents, or even a small air conditioning unit.
- Soundproofing/Acoustics: Impact screens can be noisy. Adding insulation to walls and ceilings, or even acoustic panels, can significantly reduce noise levels, both inside and for neighbors.
- Storage: Designate space for golf clubs, balls, cleaning supplies, and other accessories. Built-in shelving or wall-mounted racks keep the area tidy and clutter-free.
- Flooring: Durable, easy-to-clean flooring like rubber mats or low-pile carpeting is ideal. Ensure the hitting mat is securely placed and doesn’t shift.
Careful consideration of these essential design elements will transform a simple shed into a fully functional and enjoyable golf sanctuary. For a deeper dive into detailed layout options and comprehensive building guides, explore various diy golf simulator shed plans available online.
Materials & Construction: Building Your Shed Foundation
Laying the Groundwork: Foundation Options
A stable and level foundation is paramount for your golf simulator shed, ensuring the longevity of your structure and the accuracy of your simulator. The best choice depends on your climate, soil conditions, and budget.
- Concrete Slab: The most durable and recommended option for a permanent structure. A 4-6 inch thick reinforced concrete slab provides an excellent, level surface that’s resistant to moisture and pests. It’s ideal for all climates and offers superior stability for heavy simulator equipment.
Tip: Include a vapor barrier beneath the slab to prevent moisture wicking.
- Pier and Beam: Suitable for slightly uneven terrain or when a full concrete slab isn’t feasible. Concrete piers are dug below the frost line, supporting beams that form a level platform for your shed. This allows for airflow beneath the structure, which can be beneficial in humid environments.
Example: Use pre-cast concrete piers or pour concrete into Sonotubes for consistency.
- Gravel Pad: A more economical and simpler option for smaller, lighter sheds in well-drained areas. A compacted layer of gravel (typically 4-6 inches deep) with a perimeter frame provides a relatively level base. However, it offers less stability than concrete options and isn’t recommended for areas with significant ground movement or heavy snowfall.
Recommendation: Always use a landscape fabric beneath the gravel to prevent weed growth and improve drainage.
Framing, Walls, and Roofing: Structural Integrity
Selecting the right materials for the shed’s superstructure ensures it can withstand the elements and provide a comfortable environment for your simulator.
- Framing: Treated lumber (e.g., pressure-treated 2x4s or 2x6s) is essential for the foundation and any wood in direct contact with the ground, preventing rot and insect damage. For the main framing, standard dimensional lumber (e.g., SPF or Douglas Fir) is typically used.
- Walls:
- Exterior: OSB or plywood sheathing (minimum 7/16 inch) forms the structural layer, often covered with a weather-resistant barrier (house wrap) before adding siding like vinyl, wood, or fiber cement. Vinyl siding is low-maintenance, while wood offers a classic aesthetic but requires more upkeep.
- Interior: Drywall or plywood panels create a smooth, finished surface suitable for painting or mounting simulator screens.
- Roofing: A sturdy roof is critical for protection.
- Sheathing: OSB or plywood (minimum 1/2 inch) forms the base.
- Underlayment: Roofing felt or synthetic underlayment provides an extra layer of moisture protection.
- Finish: Asphalt shingles are popular for their cost-effectiveness and ease of installation. Metal roofing offers superior longevity and durability, especially in areas with heavy snow.
Environmental Control: Insulation, Ventilation, and Electrical
Maintaining a consistent indoor climate and providing power are crucial for your simulator’s performance and your comfort.
- Insulation: Essential for temperature regulation and sound dampening.
- Walls and Ceiling: Fiberglass batts (R-13 for 2×4 walls, R-19 for 2×6 walls) or rigid foam insulation are effective.
- Floor: If using a pier and beam foundation, insulate the floor joists with rigid foam or batt insulation to prevent cold transfer from below.
- Ventilation: Prevents moisture buildup and ensures fresh air circulation.
- Passive Vents: Soffit and ridge vents allow natural airflow.
- Active Ventilation: A small exhaust fan can be beneficial in humid climates or if you plan to spend extended periods in the shed.
- Electrical Wiring: Consult with a qualified electrician to ensure safe and compliant wiring.
- Dedicated Circuit: A dedicated 20-amp circuit is often required for the projector, launch monitor, and computer equipment to prevent overloads.
- Outlets: Strategically place outlets for all simulator components, charging devices, and potential future additions like a mini-fridge or fan.
- Lighting: LED recessed lighting provides bright, even illumination without interfering with projector visuals. Consider dimmer switches for versatility.
For detailed schematics and material lists that guide you through every step of this process, explore comprehensive diy golf simulator shed plans.
Step-by-Step DIY Golf Simulator Shed Construction Guide
Building your DIY golf simulator shed is a rewarding project that combines construction skills with your passion for golf. Follow these steps for a successful build.
1. Site Preparation and Foundation Laying
Before any construction begins, proper site preparation is crucial.
- Clear the Area: Remove all vegetation, rocks, and debris from your chosen site. Ensure the ground is level. For example, if your shed is 10×12 feet, clear an area at least 12×14 feet to allow working space.
- Mark Layout: Use stakes and string to accurately mark the shed’s footprint. Double-check measurements and ensure corners are square using the 3-4-5 triangle method.
- Foundation Type:
- Skid Foundation (Shed on Skids): Ideal for smaller, movable sheds. Lay pressure-treated 4×4 or 6×6 skids directly on gravel pads or concrete blocks. Ensure they are level.
- Concrete Slab: Best for larger, permanent structures. Dig a trench for footings (if required by local code), pour gravel as a base, install rebar, and then pour concrete, ensuring it’s perfectly level and sloped slightly away from the shed for drainage.
Tip: Allow concrete to cure fully (typically 7 days) before proceeding.
2. Framing the Walls and Roof
With a solid foundation, you can start building the structure.
- Floor Framing: If not using a concrete slab, construct a floor frame using pressure-treated lumber (e.g., 2x6s for joists) and cover it with ¾-inch exterior-grade plywood or OSB.
- Wall Framing: Assemble wall sections flat on the ground. Use 2×4 or 2×6 studs at 16 or 24 inches on center. Include king studs, jack studs, and headers for all door and window openings.
Recommendation: Use hurricane ties or similar connectors to secure walls to the foundation for added stability.
- Roof Framing:
- Gable Roof: Build roof trusses or rafters on the ground or cut them individually to fit. Install a ridge beam and secure rafters to wall top plates.
- Shed Roof: Simpler to frame, with rafters pitched in one direction.
- Sheathing: Cover the roof frame with ½-inch or ⅝-inch OSB or plywood, ensuring proper overhangs.
3. Installing Siding, Roofing, Doors, and Windows
This stage encloses your shed, protecting the interior from elements.
- Siding: Apply your chosen siding material – be it T1-11 plywood, vinyl siding, cedar shakes, or metal panels. Start from the bottom and work your way up, overlapping correctly to prevent water intrusion.
Best Practice: Leave small gaps for expansion and contraction.
- Roofing: Install roofing felt or synthetic underlayment first. Then apply shingles (asphalt, metal, etc.) according to manufacturer instructions, starting from the eaves and overlapping rows.
- Doors and Windows: Install pre-hung doors and windows into their framed openings. Ensure they are plumb, level, and sealed properly with flashing tape and caulk to prevent leaks.
4. Interior Finishing
Now, focus on making the interior functional and visually appealing for your golf simulator.
- Insulation: Add insulation (fiberglass batts, rigid foam, or spray foam) to walls and ceiling for temperature control, crucial for electronics and comfort.
- Vapor Barrier: Install a vapor barrier over insulation, especially in humid climates, to prevent moisture issues.
- Interior Walls: Cover interior walls with drywall, plywood, or OSB. For a golf simulator, consider durable options like impact-resistant panels behind the screen area.
- Flooring: Lay down your chosen flooring. Options include rubber matting for impact absorption, artificial turf for a golf course feel, or durable vinyl plank flooring.
- Painting and Trim: Paint walls and ceilings to your preference. Install baseboards and trim around doors and windows for a finished look.
Tip: Choose light colors to maximize perceived space and reflect light for your projector.
For detailed blueprints and step-by-step instructions tailor-made for your project, explore comprehensive Free Shed Plans with Material Lists.
Cost Breakdown: What to Expect When Building a Golf Simulator Shed
Building a DIY golf simulator shed offers significant savings compared to a pre-built solution, but understanding the cost breakdown is crucial for budgeting. Expenses can range widely based on your chosen materials, simulator technology, and whether you opt for professional help.
Core Cost Categories
Here’s an overview of the primary expenditures you’ll encounter:
- Shed Construction Materials: This is the foundation of your project.
- Framing Lumber: Expect costs for pressure-treated lumber (for the base) and standard dimensional lumber (for walls, roof). Prices vary by region and wood type, but budget for several hundred to over a thousand dollars.
- Roofing: Options include asphalt shingles (most economical), metal roofing (durable, mid-range), or even rubber roofing. A basic shingle roof could be $200-$500.
- Siding: Plywood, OSB with exterior paint, vinyl siding, or wood siding all have different price points. Plywood siding with paint might be $300-$800.
- Foundation: Concrete slab (most durable, highest cost, $500-$1500+ for a 10x12ft shed) or gravel and concrete blocks (more economical, $100-$300).
- Doors & Windows: A sturdy entry door is essential, costing $150-$400. Windows are optional but add light and ventilation, typically $50-$200 each.
- Electrical: Wiring, outlets, lighting fixtures, and a sub-panel (if needed) can run $300-$1000, especially if you hire an electrician.
- Golf Simulator Equipment: This is where costs can skyrocket or remain reasonable.
- Launch Monitor: The heart of your simulator. Entry-level models like the Garmin Approach R10 start around $600, while high-end professional units can exceed $20,000. Mid-range options like SkyTrak or Bushnell Launch Pro are often $2,000-$4,000.
- Impact Screen: A quality, durable screen is vital. Expect $300-$1,000+ depending on size and material.
- Projector: A short-throw projector with good lumens is recommended. Budget $400-$1,500.
- Computer/Tablet: You’ll need a device powerful enough to run the simulation software, potentially $500-$2,000 if you don’t already own one.
- Software Subscription: Many launch monitors require an annual subscription for full features, often $100-$500 per year.
- Hitting Mat: A good quality mat protects your joints and clubs, costing $100-$500.
Hidden Costs & Contingency
Don’t forget miscellaneous items and unexpected expenses.
- Tools: If you don’t own basic construction tools, factor in purchases or rentals.
- Permits: Check local regulations; building permits can cost $50-$300.
- Site Preparation: Leveling the ground, clearing debris.
- Interior Finishing: Insulation (crucial for comfort, $200-$600), flooring (rubber tiles, artificial turf, $100-$400), paint.
- Contingency Fund: Always add 10-15% to your total budget for unexpected issues or material price fluctuations.
A basic DIY shed (materials only) might start around $1,500-$3,000. Add an entry-level simulator setup for another $1,500-$3,000, bringing your total to $3,000-$6,000+. For a more robust shed and a mid-tier simulator, expect to spend $8,000-$15,000+. Careful planning and sourcing can help keep these costs in check. For detailed blueprints and material lists to help you budget accurately, explore comprehensive Free 10×12 Shed Plans: The Ultimate Step-by-Step DIY Guide.
Equipping Your Golf Simulator Shed
Outfitting your newly constructed golf simulator shed transforms it from a mere structure into your personal golf haven. This crucial phase involves selecting the right technology and accessories to deliver an immersive and accurate virtual golf experience.
Choosing Your Golf Simulator System
The heart of your setup is the golf simulator itself. These systems typically comprise a launch monitor and accompanying software.
- Launch Monitors: These devices track critical ball and club data.
- Photometric Systems: Use high-speed cameras to capture ball spin, launch angle, and club path. Examples include SkyTrak or Foresight Sports GCQuad. They offer high accuracy and are often preferred for their detailed data analysis.
- Doppler Radar Systems: Utilize radar waves to track ball flight. Examples include FlightScope Mevo+ or Uneekor EYE XO. These can be more forgiving with positioning and often perform well outdoors, making them suitable for shed environments.
- Software: The software interprets data from the launch monitor and projects it onto a virtual course. Most launch monitors come bundled with basic software, but many offer premium subscriptions for access to more courses, driving ranges, and analytical tools. Consider compatibility with various golf simulation platforms like E6 CONNECT or TGC 2019 for diverse course options.
Impact Screens, Netting, and Projection
For a truly immersive experience, a high-quality impact screen and projector are essential.
- Impact Screens: These durable screens absorb the force of golf balls while displaying the simulated image.
- Material: Look for screens made from tightly woven, multi-layered polyester or nylon for longevity and image clarity. Raw screen material allows for custom sizing, while pre-made screens with grommets offer easier installation.
- Size: Ensure the screen is large enough to fill your projector’s display area and provide ample hitting room. A common recommendation is at least 10 feet wide by 8 feet high.
- Side Netting & Baffles: Crucial for safety, especially in a shed environment. Install heavy-duty netting on the sides and ceiling to catch errant shots and protect your shed’s interior, equipment, and yourself.
- Projectors & Mounts:
- Short-Throw Projectors: Ideal for golf simulators as they can project a large image from a short distance, minimizing shadows and maximizing space. Aim for a projector with 1080p resolution (or 4K if budget allows) and at least 3,000-4,000 lumens for a bright, clear image, even in ambient light.
- Mounts: A ceiling mount is typically preferred for projectors to keep them out of the hitting area and ensure a stable, consistent image.
Hitting Mats and Turf Solutions
Your hitting surface significantly impacts feel and long-term comfort.
- Hitting Mats: Invest in a high-quality mat that simulates real turf and protects your joints.
- Gel or Foam Backing: Mats with a substantial backing, such as Fiberbuilt or TruStrike, absorb impact, reducing strain on wrists and elbows.
- Size: A mat large enough to allow you to stand entirely on it, with room for your stance and swing, is ideal (e.g., 5’x5′ or larger).
- Putting Green/Turf: While optional, installing artificial turf in the rest of your shed creates a more professional and aesthetically pleasing environment. It also provides a consistent putting surface for practice.
With these components carefully selected and installed, your DIY golf simulator shed will be ready to transport you to the world’s most renowned golf courses, right in your backyard. To get started building your ideal golf sanctuary, explore comprehensive diy golf simulator shed plans.
Maintenance Tips for Your Outdoor Golf Simulator Shed
Maintaining your outdoor golf simulator shed is crucial for protecting your investment and ensuring countless hours of enjoyment. Regular upkeep prevents costly repairs and keeps your equipment performing optimally.
Protecting Your Investment: Equipment & Structure
- Environmental Control: Your shed’s climate is paramount.
- Humidity Management: Invest in a dehumidifier to prevent moisture buildup, which can damage electronics, screens, and even the shed’s wooden structure. Aim for 40-50% humidity.
- Temperature Regulation: While not always necessary for the shed itself, extreme temperature swings can affect electronics. Consider a small heater or AC unit if your climate experiences harsh highs or lows, especially if using a projector in direct sunlight.
- Pest Control: Outdoor sheds are magnets for critters.
- Seal Entry Points: Regularly inspect for cracks or gaps around doors, windows, and utility penetrations. Use caulk or weatherstripping to seal them.
- Bait Stations/Traps: Strategically place non-toxic bait stations or snap traps for mice or insects, especially during colder months when they seek shelter.
- Impact Screen Care: The heart of your simulator needs attention.
- Regular Cleaning: Gently vacuum or brush the screen to remove dust and debris. For tougher marks, use a mild soap solution and a soft cloth, blotting rather than scrubbing.
- Rotation/Replacement: If your screen shows uneven wear, consider rotating it if possible. Eventually, screens will need replacement; factor this into your long-term budget.
Shed Exterior & Interior Upkeep
- Exterior Integrity: The shed’s shell is your first line of defense.
- Roof Inspection: Annually check for missing shingles, cracks, or sagging spots. Repair promptly to prevent water leaks.
- Siding & Paint: Clean siding periodically to remove mold or mildew. Repaint or re-stain wooden sheds every few years to protect against weathering and UV damage.
- Gutter Cleaning: Clear gutters of leaves and debris at least twice a year to ensure proper drainage away from the foundation.
- Interior Cleanliness: A tidy shed is a happy shed.
- Floor Maintenance: Sweep or vacuum regularly. For concrete floors, consider a sealant to prevent dusting and make cleaning easier.
- Lighting & Ventilation: Ensure all lights are working and ventilation fans (if installed) are clear of obstructions. Good airflow helps with humidity and prevents stale odors.
By following these maintenance tips, you can significantly extend the life of your golf simulator shed and the valuable equipment inside. For comprehensive guidance on building your dream setup from the ground up, explore detailed diy golf simulator shed plans.
Where to Find Golf Simulator Shed for Sale and Kits
Finding the perfect structure for your DIY golf simulator can be simplified by exploring pre-built options or comprehensive kits. These solutions offer convenience and often ensure structural integrity, saving you significant time and effort compared to building entirely from scratch.
Ready-Made Golf Simulator Sheds
For those prioritizing speed and minimal construction, several companies specialize in pre-fabricated sheds designed specifically for golf simulators. These often come with features like reinforced walls, appropriate dimensions, and even climate control options.
- Specialized Golf Enclosure
Conclusion: Enjoy Your Backyard Golf Sanctuary
You’ve journeyed through the exciting process of conceptualizing, designing, and constructing your very own DIY golf simulator shed. This endeavor isn’t just about building a structure; it’s about creating a dedicated space where your passion for golf can flourish regardless of weather or time constraints.
The Rewards of Your Hard Work
Remember the initial vision – escaping to your backyard for a quick 18 holes, practicing your swing in solitude, or even hosting friendly competitions with friends. By following the comprehensive steps outlined, from understanding your space and needs to equipping your shed with the right technology, you’ve transformed that vision into a tangible reality.
- Unrestricted Practice: No more waiting for clear skies or booking expensive tee times. Your simulator shed offers instant access to your virtual course.
- Skill Improvement: Consistent practice in a controlled environment, aided by launch monitors and swing analysis tools, will undoubtedly shave strokes off your game.
- Entertainment Hub: Beyond individual practice, your shed becomes a unique entertainment zone, perfect for family fun or social gatherings.
- Increased Property Value: A well-built, functional shed can add significant appeal and value to your property.
Maximizing Your Golf Sanctuary
To truly enjoy your new golf sanctuary for years to come, keep these final tips in mind:
- Regular Maintenance: Don’t neglect the ongoing care of your shed. Periodically check for any wear and tear, especially on the exterior, and ensure your simulator equipment is clean and calibrated. This proactive approach will prevent minor issues from becoming costly repairs.
- Optimize Your Setup: Experiment with different simulator settings, course options, and practice drills. Many simulator software packages offer a wealth of features that can be tailored to your specific needs and goals.
- Embrace the Community: Connect with other DIY simulator builders online. Share your experiences, learn new tips, and discover innovative ways to enhance your setup. The golf simulator community is vast and supportive.
- Personalize Your Space: Make your shed truly yours. Add comfortable seating, golf-themed decor, a mini-fridge, or even a sound system to create the ultimate personalized golf escape.
Building your own golf simulator shed is a significant undertaking, but the satisfaction of hitting a perfect drive from your backyard, rain or shine, is an unparalleled reward. You’ve invested time, effort, and resources into creating a space that brings joy and improves your game. Now, it’s time to step inside, grab your club, and enjoy the fruits of your labor. If you’re ready to start your own journey, explore detailed diy golf simulator shed plans to guide your construction.
Thank you for reading our guide about diy golf simulator shed plans.
Frequently Asked Questions
Why should I consider building a DIY golf simulator shed instead of using my garage or basement?
A dedicated DIY golf simulator shed offers several significant advantages over converting an indoor space. It provides a permanent, purpose-built structure, eliminating the need to constantly move items or worry about damaging household belongings with stray balls. This dedicated space allows for optimal design in terms of swing mechanics, screen placement, and projector angles. Furthermore, a robust shed protects your equipment from the elements, enabling year-round practice regardless of weather conditions, which is crucial for consistent skill development. It also creates a focused, immersive environment free from daily distractions and can even increase property value and aesthetic appeal.
What are the key benefits of having a dedicated golf simulator shed?
The benefits of a dedicated golf simulator shed are numerous. Firstly, it offers a “dedicated space with zero compromises,” meaning you have a permanent setup tailored specifically for golf, without the clutter or limitations of a shared space. Secondly, it provides “weatherproof practice, year-round enjoyment,” protecting your equipment and allowing you to play in any weather. Thirdly, it enhances “immersion and focus,” creating a personal golf zone that minimizes distractions. Lastly, a well-designed shed can contribute to “increased property value & aesthetic appeal,” transforming an unused part of your yard into a valuable and attractive feature.
What can I expect to learn from a comprehensive guide on DIY golf simulator shed plans?
A comprehensive guide on DIY golf simulator shed plans will provide you with the knowledge to build a professional-grade simulator from scratch. You can expect to learn about “strategic planning,” which includes assessing your space, defining your budget, and choosing the ideal shed type. It will cover “design & construction mastery,” offering detailed insights into essential design elements, material selection, and a step-by-step construction guide for building a sturdy foundation and structure. Finally, it will guide you in “equipping your sanctuary,” with recommendations for all golf simulator components, such as launch monitors, projectors, screens, and hitting mats.
What is the most crucial first step before starting the construction of a DIY golf simulator shed?
Before any construction begins, the most crucial first step is to conduct a thorough assessment of your available space and specific requirements. This includes accurately measuring your intended build site and understanding the minimum space needed for a comfortable and safe golf swing. This foundational step ensures that your DIY golf simulator shed will not only be functional but also compliant with local regulations and seamlessly integrated into your property. Without this initial assessment of “understanding your space & needs,” you risk building a shed that doesn’t fit or isn’t practical for its intended use.


