
Welcome to our comprehensive guide about free shed plans 12×24 with material list.
Introduction: Your Guide to Free 12×24 Shed Plans

Are you looking for extra storage? Perhaps a dedicated workshop? A 12×24 shed offers ample space. This guide provides everything you need. We’ll explore free 12×24 shed plans. Moreover, we include a comprehensive materials list. Building your own shed can save you money. It also provides a rewarding DIY experience.
Why a 12×24 Shed is the Perfect Size
A 12×24 shed is incredibly versatile. It offers 288 square feet of usable space. This size is ideal for many needs. For instance, you can store gardening equipment. You might also create a home office. Many people use it as a hobby shed. Consider its potential for a small studio. Furthermore, it’s large enough for ATVs or motorcycles. Unlike smaller sheds, it prevents clutter. This larger footprint allows for better organization. Consequently, you can allocate specific zones. One area for tools, another for storage boxes. This size often fits well in most backyards. It provides significant utility without overwhelming your property. Therefore, it’s a popular choice for homeowners.
What to Expect from Free 12×24 Shed Plans
Our free shed plans 12×24 with material list are detailed. They provide clear instructions. You will find blueprints and elevation views. These plans are designed for DIY enthusiasts. However, they require basic carpentry skills. We break down complex steps. This makes the project manageable. You will see illustrations for each stage. Therefore, you can visualize the process. These plans aim for practical construction. They balance cost-effectiveness with durability. Keep in mind, “free” means no purchase cost. However, material costs are still involved. We strive for accuracy and completeness. Our goal is to empower your building journey.
How This Guide Empowers Your Shed Project
This guide is your complete resource. It goes beyond just plans. We provide a full materials list. This helps with budgeting. Moreover, it ensures you buy correct quantities. We cover site preparation. You will learn about necessary tools. Understanding local regulations is also crucial. We offer step-by-step instructions. These range from foundation to roofing. Furthermore, we discuss customization ideas. You can personalize your shed. For example, add shelves or windows. We also share expert tips. These enhance durability and functionality. Consequently, you can build a shed that lasts. This comprehensive approach ensures success. You will gain confidence through each section. Ultimately, you’ll have a functional, attractive shed.
Understanding 12×24 Shed Plans: Styles and Features
Understanding the various styles and features available is crucial when embarking on a shed building project. A 12×24 shed offers substantial space, making design choices even more impactful. Therefore, exploring different architectural styles will help you select the perfect fit for your needs and property aesthetics.
Common 12×24 Shed Styles
Several popular styles lend themselves well to a 12×24 footprint. Each offers distinct advantages in terms of appearance, storage capacity, and construction complexity.
- Gable Shed: This is the most common and recognizable style. It features a simple, symmetrical A-frame roof that slopes in two directions, meeting at a ridge.
- Benefits: Easy to build, excellent water runoff, and often provides ample overhead storage space if a loft is incorporated.
- Example: Ideal for general storage, a workshop, or even a small home office.
- Gambrel Shed (Barn Style): Characterized by a distinctive roof with two different slopes on each side, resembling a traditional barn.
- Benefits: Maximizes headroom and storage capacity due to its unique roof design, making it perfect for lofts.
- Example: Excellent for storing large equipment, gardening tools, or creating a two-story storage solution.
- Lean-To Shed: Designed to be built against an existing structure, it features a single-sloped roof.
- Benefits: Cost-effective as it shares one wall, space-saving, and relatively simple to construct.
- Example: A great choice for storing firewood, gardening supplies, or as an extension to a workshop.
- Modern Studio Shed: These sheds boast contemporary designs with flat or gently sloped roofs, clean lines, and often large windows.
- Benefits: Aesthetically appealing, can serve as an office or creative space, and integrates well with modern homes.
- Example: Perfect for a backyard office, art studio, or a chic guest house.
Key Features to Look For in Free Shed Plans 12×24
When reviewing free shed plans 12×24 with material list, certain features enhance functionality and longevity. Consequently, paying attention to these details can save you time and money.
- Foundation Type: Plans should clearly specify the foundation, whether it’s a concrete slab, gravel pad, or skids. A robust foundation is paramount for stability.
- Roof Pitch: The angle of the roof impacts water drainage and potential for loft space. A steeper pitch generally offers better weather protection.
- Wall Framing: Look for clear instructions on stud spacing (typically 16 or 24 inches on center) and how to frame openings for doors and windows.
- Door and Window Placement: Well-placed doors improve accessibility, while windows offer natural light and ventilation. Consider double doors for moving larger items.
- Ventilation: Proper ventilation is essential to prevent moisture buildup and maintain air quality inside your shed. Therefore, gable vents or continuous ridge vents are beneficial.
- Material Specifications: Comprehensive plans will detail the type and size of lumber, siding, roofing materials, and fasteners required. This is often included in the material list.
Visualizing your 12×24 shed’s design in advance is a smart step. Consider its placement on your property and how it will complement your existing landscape. For example, a modern studio shed might clash with a rustic garden, whereas a gable or gambrel style would blend seamlessly. Think about future uses; even if it’s primarily for storage now, you might want to convert it into a workspace later. Therefore, choosing a versatile design is often a wise decision.
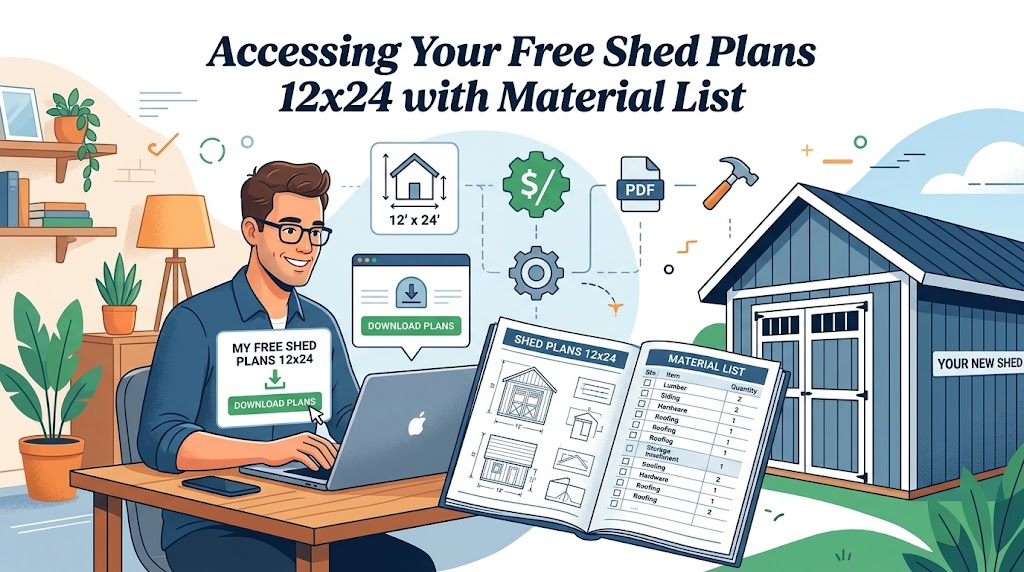
Accessing Your Free Shed Plans 12×24 with Material List
Finding Reliable Free 12×24 Shed Plans with Material Lists
Locating free shed plans 12×24 with material list can seem daunting, however, many reputable sources exist. Online, you can often find valuable resources from DIY communities, woodworking forums, and even some lumber supply companies. For instance, websites dedicated to home improvement often host free plans as a way to attract visitors. Similarly, some tool manufacturers provide plans to showcase their products. When searching, prioritize sources that offer downloadable PDF files; these are usually well-formatted and easy to print. Moreover, look for plans that include clear diagrams and step-by-step instructions. Consequently, you will save time and avoid frustration during the build process.
Evaluating the Quality of Free Plans
Not all free plans are created equal, therefore, careful evaluation is crucial. First, check for completeness. A good set of Learn more should include detailed blueprints, elevations, cross-sections, and a comprehensive list of all required lumber, hardware, and roofing materials. For example, ensure the material list specifies quantities, dimensions, and types of wood (e.g., 2×4 pressure-treated lumber). Second, assess the clarity of instructions. Are they easy to understand? Do they include safety warnings? In addition, look for plans that offer multiple views or 3D renderings, as these greatly aid in visualization. Reliable plans will also often include foundation details, such as concrete slab or skid foundation options. Moreover, consider if the plans align with local building codes, even if not explicitly stated, as this will prevent future issues.
Downloading and Organizing Your Free Shed Plans: Best Practices
Once you’ve identified suitable free shed plans 12×24 with material list, effective downloading and organization are key. Always download the plans as a PDF to ensure consistent formatting across different devices. Create a dedicated folder on your computer for all shed-related documents; this includes the plans, material lists, and any inspiration photos. Furthermore, consider printing a hard copy of the plans. Working with physical blueprints can be much easier on a job site, especially when your hands might be dirty or wet. As a result, you won’t have to worry about battery life or screen glare. Additionally, highlight important sections on your printed copy, such as critical measurements or specific assembly steps. This proactive organization will streamline your building process significantly.
The Essential 12×24 Shed Plans Materials List Unpacked
Building a sturdy 12×24 shed requires a precise understanding of its material needs. This section unpacks the essential components, ensuring you have everything before starting your project. A comprehensive materials list is crucial for accurate budgeting and efficient construction.
Breaking Down Your 12×24 Shed’s Material Needs
Your free shed plans 12×24 with material list will detail these items, but understanding their purpose is key.
- Foundation Materials:
- Concrete Blocks or Skids: These form the base, lifting the shed off the ground. For example, pressure-treated 4x4s for skids or concrete pier blocks for a raised foundation are common.
- Gravel/Crushed Stone: This provides proper drainage and a level surface beneath the foundation. Approximately 2-4 inches deep across the footprint is typically recommended.
- Framing Lumber: This is the skeleton of your shed.
- Pressure-Treated Lumber (PT): Essential for all ground-contact components like skids, floor joists, and bottom plates. For instance, 2x6s are often used for floor joists, while 2x4s form wall studs.
- Standard Lumber: Used for wall studs, top plates, rafters, and roof trusses. Common sizes include 2x4s and 2x6s. You’ll need to account for headers above doors and windows.
- Flooring:
- Plywood or OSB (Oriented Strand Board): Typically 3/4-inch thick, these create a durable floor surface. For example, 4×8 sheets will be laid perpendicular to the floor joists.
- Fasteners: Specific nails or screws designed for subflooring are necessary.
- Siding: This protects your shed from the elements and defines its aesthetic.
- Plywood Siding (T1-11): A popular and cost-effective choice, often 5/8-inch thick. Alternatively, you might choose
- Wood Lap Siding: Offers a more traditional look.
- Vinyl Siding: Provides low maintenance.
- Roofing: Essential for weatherproofing.
- Plywood or OSB Sheathing: Usually 1/2-inch thick, this forms the roof deck.
- Tar Paper/Roofing Felt: A crucial underlayment for waterproofing.
- Asphalt Shingles: The most common and affordable roofing material. Consider architectural shingles for enhanced durability and appearance.
- Drip Edge: Metal flashing installed along roof edges to direct water away.
Estimating Costs and Sourcing Materials Affordably
Estimating the cost of your 12×24 shed project requires careful calculation. Break down each material category and multiply the quantity by current local prices. For instance, lumber prices fluctuate, so checking with multiple suppliers is wise. In addition, don’t forget to factor in miscellaneous items like nails, screws, caulk, paint/stain, and hinges. These small items can add up quickly.
- Tips for Sourcing Affordably:
- Buy in Bulk: Many lumberyards offer discounts for larger purchases.
- Check Local Sales: Keep an eye out for promotions at hardware stores.
- Consider Reclaimed Materials: For non-structural elements like shelving or interior finishes, reclaimed wood can save money and add character. However, ensure structural components are new and certified.
- Compare Quotes: Obtain pricing from at least three different suppliers for your Learn more.
- Sustainable Sourcing: Opt for FSC-certified lumber, which comes from sustainably managed forests. Moreover, choose low-VOC paints and stains to reduce environmental impact. Recycling leftover materials, such as wood scraps and metal, is also a good practice. By planning meticulously and sourcing wisely, you can build your shed efficiently and economically.
Preparing for Construction: Tools, Site & Regulations
Before you even lift a hammer, thorough preparation is crucial for a successful 12×24 shed build. This involves gathering the right tools, meticulously preparing your site, and understanding local regulations. Consequently, these steps will save you time, effort, and potential headaches down the line.
Essential Tools for Building Your 12×24 Shed
Having the correct tools makes all the difference in a DIY project. For your 12×24 shed, you’ll need a mix of basic hand tools and some power tools.
- Measuring and Marking:
- Tape Measure: A 25-foot tape is essential for accurate measurements.
- Pencil/Marker: For marking cuts and layouts.
- Speed Square & Framing Square: Crucial for ensuring square corners and straight cuts.
- Chalk Line: Ideal for marking long, straight lines on larger surfaces.
- Cutting Tools:
- Circular Saw: Your primary tool for cutting lumber. A good quality blade is recommended.
- Miter Saw (Optional but Recommended): Provides precise angled cuts for framing.
- Jigsaw: Useful for cutting curves or intricate shapes, such as window openings.
- Fastening Tools:
- Cordless Drill/Driver: Indispensable for driving screws and drilling pilot holes. Have spare batteries charged.
- Hammer: For driving nails, especially during framing.
- Impact Driver (Optional): Excellent for driving long screws with less effort.
- Safety Gear:
- Safety Glasses: Protect your eyes from debris.
- Work Gloves: Prevent splinters and improve grip.
- Ear Protection: Important when using power tools for extended periods.
- Dust Mask: Especially when cutting treated lumber or plywood.
Furthermore, consider renting larger tools like a post-hole digger if your foundation requires it.
Choosing and Preparing Your Shed Site
The location and preparation of your shed site significantly impact its longevity and stability.
- Site Selection:
- Level Ground: A relatively level area minimizes the effort required for foundation work.
- Good Drainage: Avoid low-lying spots where water can collect. Poor drainage causes rot and structural issues.
- Accessibility: Ensure you have enough space around the shed for construction and future maintenance.
- Sunlight Exposure: Consider sun exposure for potential heat gain or moss growth.
- Site Preparation:
- Clear Vegetation: Remove all grass, weeds, and brush from the shed footprint plus an extra 1-2 feet around the perimeter.
- Leveling: Use a string level and stakes to determine if the ground needs leveling. You might need to add or remove soil.
- Foundation Options:
- Skid Foundation: Simplest, using pressure-treated skids directly on gravel. This requires minimal ground disturbance.
- Concrete Blocks/Piers: Raised foundation with concrete blocks or pre-cast piers. This offers better airflow and protection from moisture.
- Concrete Slab: The most durable option, providing a solid, level base. However, it’s also the most labor-intensive and costly. For your free shed plans 12×24 with material list, the foundation choice will influence the required materials.
Navigating Local Building Codes and Permits
Ignoring local regulations can lead to costly fines or even the demolition of your shed. Therefore, always check with your local authority before starting.
- Permit Requirements:
- Size Restrictions: Many municipalities have specific size limits for sheds that don’t require a permit. A 12×24 shed often exceeds these limits.
- Zoning Laws: These dictate where you can place structures on your property, including setbacks from property lines.
- Structural Requirements: Codes may specify foundation types, framing lumber sizes, and roofing materials for safety.
- How to Check:
- Local Planning/Building Department: This is your primary resource. Visit their office or check their website.
- Homeowners’ Association (HOA): If applicable, your HOA might have additional rules regarding shed size, appearance, and placement.
Be prepared to submit your Learn more, a site plan, and potentially elevation drawings. Obtaining permits can take time, so factor this into your project schedule. Consequently, early communication with officials is highly recommended.
Step-by-Step DIY Guide: From Foundation to Finish
Building your 12×24 shed is a rewarding project. This step-by-step guide will walk you through the entire process. We begin with the foundation and conclude with the finishing touches. Following these instructions will help ensure a sturdy and long-lasting structure.
Laying the Foundation for Your 12×24 Shed
A solid foundation is crucial for any shed. It prevents moisture damage and provides a level base. First, mark out the shed’s footprint accurately. Use stakes and string for this. Next, excavate the area for your chosen foundation type. For example, a gravel pad is a simple and effective option. Dig down about 6-8 inches. Then, lay a weed barrier fabric. This prevents vegetation growth. After that, fill the area with compacted gravel. A 4-inch layer of crushed stone works well. Ensure the surface is perfectly level. Use a long level and a straight edge for precision. Alternatively, concrete piers or a full concrete slab offer even greater stability. However, they require more effort and materials. Your free shed plans 12×24 with material list will specify the recommended foundation type. Always double-check local building codes before starting. This ensures compliance and safety.
Framing the Walls and Roof Structure
With the foundation complete, you’re ready for framing. This stage brings your shed to life. Start by assembling the floor frame. Use pressure-treated lumber for durability. Securely attach joists to rim joists. Next, construct the wall sections on the ground. This makes assembly easier and safer. Each wall typically consists of studs, top plates, and a bottom plate. Use a framing square to ensure corners are perfectly 90 degrees. Once assembled, lift each wall section into place. Brace them temporarily for stability. Then, secure them to the floor frame. Fasten the top plates together at the corners. This creates a strong, unified structure.
Installing the Roof and Exterior Sheathing
The roof structure comes next. Most 12×24 shed plans feature a gable roof. This design is both functional and aesthetically pleasing. Begin by installing the ceiling joists. These provide support for the roof and future attic space. Next, erect the rafters. They form the slope of your roof. Ensure consistent spacing as per your free shed plans 12×24 with material list. Use hurricane ties for added wind resistance. Once the rafters are in place, apply the roof sheathing. Plywood or OSB panels are common choices. Nail them securely to the rafters. After the roof is sheathed, install the exterior wall sheathing. This adds rigidity to the walls. It also provides a surface for siding. Use appropriate nails or screws for sheathing. Moreover, ensure all panels are flush and tightly butted together. This prevents air and moisture infiltration.
Adding Siding, Roofing, and Finishing Touches
Now it’s time to protect your shed from the elements. Begin with the roofing material. First, lay down roofing felt or synthetic underlayment. This provides an additional moisture barrier. Next, install drip edge along the roof eaves and gables. This directs water away from the fascia. Then, apply your chosen roofing material. Asphalt shingles are a popular and cost-effective option. Follow the manufacturer’s instructions for proper installation. Overlap shingles correctly to prevent leaks. After the roof is complete, install your siding. Options include wood, vinyl, or engineered wood products. Each has its own installation method. For example, vinyl siding often uses a starter strip and interlocking panels. Ensure all siding is level and plumb.
Finally, add the finishing touches. Install windows and doors according to your plans. Seal all gaps and openings with caulk. This prevents drafts and moisture. Paint or stain the exterior surfaces. This protects the wood and enhances curb appeal. Inside, you might add shelving or a workbench. Consider electrical wiring if you need power. These additions will maximize the functionality of your new 12×24 shed. Congratulations on building your own shed!
Maximizing Your 12×24 Shed: Customization & Uses
Your newly built 12×24 shed, constructed from free shed plans 12×24 with material list, offers a versatile blank canvas. Therefore, consider thoughtful customization to truly optimize its functionality and aesthetic appeal. Small additions can make a significant difference.
Smart Customization Options
- Enhanced Accessibility and Light:
- Windows: Adding more windows, or larger ones, dramatically increases natural light. This makes the space more pleasant for working or spending time inside. For example, consider a casement window for better ventilation.
- Doors: While most plans include a single entry, installing a double door allows for easier movement of large items. Moreover, a roll-up garage door can transform one end into a dedicated vehicle bay.
- Optimized Interior Organization:
- Shelving Units: Built-in shelves or freestanding units are crucial for efficient storage. Therefore, plan for various depths to accommodate different items.
- Workbenches: A sturdy workbench is essential for any workshop. You can build a fixed bench along one wall or opt for a collapsible design to save space.
- Pegboards and Hooks: These simple additions keep tools organized and easily accessible. Consequently, your workspace remains tidy and efficient.
- Loft Storage: Utilize the vertical space above door and window frames. A small loft can store seasonal decorations or lesser-used items, freeing up floor space.
Popular Uses for Your 12×24 Shed
A 12×24 footprint provides ample room for diverse applications. Consequently, these plans are incredibly popular.
- Dedicated Workshop: This size is ideal for a woodworking, metalworking, or craft studio. There’s enough space for tools, a workbench, and even a dust collection system.
- Ultimate Storage Solution: Beyond lawnmowers and garden tools, store seasonal items, sports equipment, or even overflow furniture. Effective shelving and labeling systems are key here.
- Home Office or Studio: Escape household distractions. Transform your shed into a quiet space for creative pursuits, remote work, or even a personal gym. Add insulation and climate control for year-round comfort.
- Garden Center: Store gardening supplies, potting benches, and even start seedlings in a dedicated space. Include a small sink for easy cleanup.
- Recreational Space: Consider a “man cave” or “she shed” for hobbies, relaxation, or entertaining. Add comfortable seating and perhaps a small bar.
Maintenance Tips for Longevity
Regular maintenance is vital for extending your shed’s lifespan.
- Inspect Annually: Check for loose nails, damaged siding, or roof leaks. Address issues promptly to prevent larger problems.
- Clean Gutters: Ensure proper water drainage away from the foundation. Clogged gutters can lead to wood rot.
- Seal and Paint: Reapply sealant or paint every few years. This protects the wood from weather damage.
- Ventilation: Good airflow prevents moisture buildup and mold. Therefore, ensure any vents are clear.
Success Stories and Expert Advice
Real Projects, Real Results: Building Your Dream Shed
Many DIY enthusiasts have successfully built robust and functional 12×24 sheds using readily available plans. For instance, John from Oregon transformed his overgrown backyard into an organized haven. He used free shed plans 12×24 with material list to construct a spacious workshop, complete with a workbench and ample storage for his tools. He noted, “The detailed material list was a lifesaver. It prevented multiple trips to the hardware store.” Similarly, Sarah, a hobby gardener, built a beautiful garden shed using the same resources. She customized hers with extra windows and a potting bench, proving the adaptability of these plans. Her advice: “Don’t be afraid to personalize it. It’s your space, after all.” These stories highlight the tangible benefits and satisfaction derived from a successful DIY shed project.
Overcoming Common Shed Building Challenges
Even with excellent plans, challenges can arise. However, most are easily surmountable with a little foresight and preparation.
- Foundation Imperfections: A common issue is an uneven foundation. Expert Tip: Before laying any timber, use a long level and shims to ensure your foundation is perfectly flat. This prevents racking and ensures structural integrity.
- Material Sourcing: Sometimes specific lumber dimensions are hard to find. Solution: Be flexible. Often, you can substitute slightly different sizes or adjust cutting plans. Moreover, always double-check local lumberyard stock before starting.
- Weather Delays: Unpredictable weather can halt progress. Recommendation: Plan your build during dry seasons if possible. Furthermore, invest in tarps to protect exposed materials overnight or during unexpected rain showers.
- Missing Tools: Starting a project only to discover you lack a crucial tool is frustrating. Best Practice: Review the entire tool list thoroughly before beginning. Consider borrowing or renting specialized tools for short-term use.
When to Consider Premium Plans or Professional Help
While Learn more are excellent for many, there are instances where investing in premium plans or professional assistance is wise. If you’re planning a shed with complex architectural features, such as multiple stories, intricate roofing, or integrated plumbing/electrical systems, premium plans offer greater detail and specialized guidance. These plans often include advanced structural calculations and specific material recommendations for more elaborate designs.
Furthermore, if you lack confidence in your carpentry skills, have limited time, or are dealing with challenging site conditions (e.g., steep slopes, rocky terrain), hiring a professional contractor for certain stages, like foundation work or framing, can save time and prevent costly mistakes. For example, a professional can ensure your foundation meets local building codes, which is crucial for safety and resale value. Ultimately, the decision depends on your budget, skill level, and the complexity of your vision.
To explore more comprehensive plans and detailed guides for your shed project, Get started.
Thank you for reading our guide about Learn more.
Frequently Asked Questions
What makes a 12×24 shed an ideal size for homeowners?
A 12×24 shed is highly versatile, offering 288 square feet of usable space. This size is perfect for a wide range of needs, from storing gardening equipment, ATVs, or motorcycles, to creating a dedicated workshop, home office, or hobby shed. Its substantial footprint allows for excellent organization by enabling you to allocate specific zones for different items, preventing clutter that often occurs in smaller sheds. It strikes a good balance between providing significant utility and fitting well in most backyards without overwhelming the property.
What kind of detail can I expect from free 12×24 shed plans, and are there hidden costs?
Free 12×24 shed plans typically include detailed instructions, blueprints, and elevation views, designed to be manageable for DIY enthusiasts with basic carpentry skills. They break down complex steps with illustrations for each stage to help visualize the construction process. While the plans themselves are free of charge, saving you purchase costs, it’s important to remember that material costs for lumber, roofing, fasteners, and other components are still involved. These plans aim for practical construction, balancing cost-effectiveness with durability, and strive for accuracy and completeness to empower your building journey.
What are the most common styles for a 12×24 shed, and what are their advantages?
Two common and popular styles for a 12×24 shed are the Gable Shed and the Gambrel Shed (Barn Style). A Gable Shed features a simple, symmetrical A-frame roof that slopes in two directions. Its benefits include ease of construction, excellent water runoff, and the potential for ample overhead storage if a loft is incorporated. A Gambrel Shed is characterized by a distinctive roof with two different slopes on each side, resembling a traditional barn. This style maximizes headroom and storage capacity due to its unique roof design, making it perfect for incorporating lofts and storing large equipment or gardening tools.
Beyond the plans, what comprehensive support does this guide offer to ensure my shed building success?
This guide provides a comprehensive resource that extends beyond just the free shed plans. It includes a full materials list to assist with budgeting and ensure correct quantities are purchased. It covers crucial aspects like site preparation, necessary tools, and understanding local building regulations. Furthermore, it offers step-by-step instructions from foundation to roofing, discusses customization ideas (e.g., adding shelves or windows), and shares expert tips to enhance the shed’s durability and functionality. This holistic approach is designed to build your confidence and ensure you construct a functional and attractive shed that will last.


