
Welcome to our comprehensive guide about backyard shed plan.
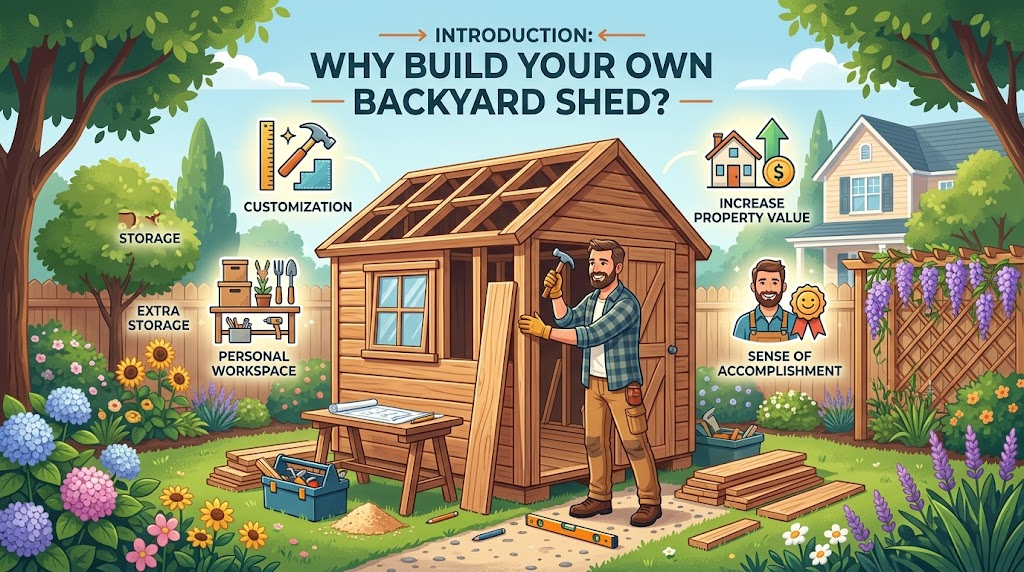
Introduction: Why Build Your Own Backyard Shed?

Is your garage overflowing with seasonal decorations, lawn equipment, or tools? Perhaps you dream of a dedicated space for hobbies, away from the main house. Building your own backyard shed offers a powerful solution to these common dilemmas. It’s more than just extra storage; it’s an investment in organization, functionality, and even your property value.
Unlocking the Potential of Your Backyard
A backyard shed can transform your outdoor living space. Consider the multifaceted benefits.
- Ultimate Storage Solution: Reclaim your garage and basement. A shed provides a designated home for everything from garden tools and patio furniture to sports equipment and holiday decor. For instance, imagine easily finding your snow blower in winter or your pool supplies in summer, neatly stored and accessible.
- Dedicated Workspace: For many, a shed becomes a tranquil workshop. Whether you’re a woodworking enthusiast, a keen crafter, or simply need a quiet spot for DIY projects, a shed offers a distraction-free environment. Moreover, you can customize it with benches, shelving, and proper lighting.
- Garden Sanctuary: Beyond tools, a shed can serve as a potting shed, a greenhouse extension, or a cozy garden retreat. Consequently, you can store seeds, plant pots, and even start seedlings early, all within easy reach of your garden beds. This creates a functional, aesthetically pleasing hub for all your gardening endeavors.
- Increased Property Value: A well-built, attractive shed enhances your property’s curb appeal and functionality. Therefore, it can be a significant asset should you decide to sell your home in the future. Potential buyers often appreciate the added storage and utility.
This comprehensive guide will empower you to build the backyard shed of your dreams. We provide actionable resources, including detailed plans and material lists. Furthermore, we commit to offering everything you need to confidently embark on your shed-building journey. You will discover how simple and rewarding this project can be, even for novice builders.
Choosing the Right Backyard Shed Plan For Your Needs
Selecting the perfect Learn more is crucial for a successful project. It ensures your shed meets your specific needs. Moreover, it prevents wasted time and materials. Therefore, careful consideration at this stage is essential.
Matching Your Needs to the Right Plan
First, assess your personal skill level. Are you a woodworking novice, an intermediate DIYer, or an experienced builder? Beginner plans often feature simple gable roofs and standard framing. For example, a basic 8×10 storage shed might be ideal for a first-timer. Intermediate plans might include more complex roof lines or multiple windows. On the other hand, advanced plans could involve multi-level designs or intricate joinery. Choosing a plan that aligns with your abilities will make the building process more enjoyable and achievable.
Next, define the shed’s primary purpose. Will it be purely for storage, like garden tools or seasonal decorations? Perhaps you need a dedicated workspace, such as a potting shed or a home office. Alternatively, it could serve as a unique playhouse for children. The intended use directly influences the required size and features. For instance, a small 6×8 shed is ample for basic storage. However, a 10×12 shed offers more versatility for a workshop. For larger needs, like housing ATVs or creating a substantial studio, consider plans for 12×24 or even 16×20 structures. Each Learn more offers different possibilities.
Consider the various popular shed sizes and their typical applications.
- 8×12 Shed: Excellent for general garden storage, small workshops, or pool equipment.
- 10×12 Shed: Provides ample space for larger tools, a dedicated workbench, or even a small art studio.
- 12×24 Shed: Ideal for storing multiple vehicles, creating a spacious workshop, or a substantial hobby room.
- 16×20 Shed: Perfect for a two-car garage, a large home office, or a serious woodworking shop.
Environmental and Regulatory Factors
Several external factors also influence your choice of backyard shed plan. Your local climate is a significant consideration. If you live in an area with heavy snow, you’ll need a plan with a steeper roof pitch for snow load. Conversely, in hurricane-prone regions, robust anchoring and wind-resistant designs are paramount. Therefore, checking local weather patterns is a smart first step.
Furthermore, the type of foundation is critical. Options include concrete slabs, gravel pads, or pier foundations. The soil type on your property and the shed’s weight will heavily influence this decision. For example, a heavy 16×20 shed will almost certainly require a concrete slab. A smaller, lighter shed might do well with a gravel pad.
Finally, always research local building codes and permit requirements. These regulations vary widely by municipality. Some areas have strict rules on shed size, height, and proximity to property lines. Consequently, selecting a backyard shed plan that adheres to these guidelines will save you potential headaches and fines later on. It is wise to consult your local planning department before committing to any design.
Free Shed Plans: Detailed Guides with Materials List
Here at Ultimate Backyard Shed Plans, we believe everyone should have access to quality resources. Therefore, we offer a robust selection of free shed plans to get you started. These detailed guides come complete with essential materials lists. For instance, you can find popular sizes like an 8×12 garden shed or a versatile 10×12 storage solution. We even provide plans for larger projects, such as a 12×24 workshop or a spacious 16×20 barn-style shed. Consequently, you can choose the perfect design for your specific needs.
Accessing Your Free Shed Plans and What’s Included
Accessing our free resources is straightforward. Simply navigate to our “Free Plans” section. You’ll find a variety of backyard shed plan options there. Each free plan is a comprehensive package. It includes detailed architectural drawings, for example, showing elevations and floor plans. Moreover, you’ll receive precise cut lists for all lumber and sheet goods. These lists ensure you purchase exactly what you need. Furthermore, step-by-step instructions guide you through the entire building process. This helps even novice builders succeed. You can easily download these plans in PDF format. This allows for convenient printing and offline access.
Maximizing Your Free Shed Plan Experience
To make the most of your free shed plan, consider a few tips. First, carefully review the entire document before purchasing any materials. This helps you visualize the project. Additionally, double-check local building codes. They might have specific requirements for structures like sheds. For example, some areas require specific foundation types. Consequently, adjusting your plan slightly might be necessary. Use the provided materials list as a shopping guide. However, always verify quantities based on your chosen lumber dimensions. This prevents over-purchasing or running short. Finally, don’t hesitate to consult our online community for advice. Many builders have successfully used these free plans.
Premium & Customizable Shed Plan Options
While free plans offer a fantastic starting point, sometimes your vision demands more. Premium and customizable shed plan options cater to those seeking advanced designs, specific functionalities, or a truly unique aesthetic. Therefore, considering these paid alternatives can unlock a new level of quality and personalization for your backyard shed project.
Benefits of Investing in Premium Shed Plans
Premium plans often provide an unparalleled level of detail. For instance, they might include intricate joinery diagrams or 3D renderings that clarify complex steps. Moreover, these plans frequently feature architectural-grade blueprints, ensuring structural integrity and longevity.
Key advantages include:
- Advanced Designs: Access to modern, craftsman, or custom-sized sheds that go beyond basic utility. For example, a premium plan might offer a shed with a gambrel roof for extra loft storage or integrated skylights for natural light.
- Detailed Instructions: Expect step-by-step guides with more illustrations and less room for guesswork. Consequently, even novice builders can navigate challenging aspects with confidence.
- Comprehensive Material Lists: These lists are often more precise, potentially including specific fastener types or lumber grades. This reduces waste and ensures you purchase exactly what’s needed.
- Ongoing Support: Some providers offer direct access to designers or builders for questions during your project. This can be invaluable, especially when encountering unexpected challenges.
Customization Options for Your Backyard Shed
The ability to customize is a significant draw of premium plans. Many platforms allow you to modify existing designs to suit your exact needs. For example, you might adjust dimensions to fit a narrow space or add extra windows for a potting shed. Furthermore, some services offer complete bespoke design creation. This means you can collaborate with a designer to craft a backyard shed plan entirely from scratch, incorporating unique features like a built-in workbench or a specific door style.
Tips for customization:
- Prioritize Functionality: Determine primary uses (storage, workshop, office) before considering aesthetics.
- Consider Site Constraints: Measure your available space precisely; therefore, your custom plan will fit perfectly.
- Visualize with Tools: Utilize online shed designer tools to experiment with different layouts and features. These interactive platforms allow you to drag and drop elements like doors, windows, and shelving. As a result, you can visualize your dream shed before committing to a plan. This ensures the final backyard shed plan truly reflects your requirements and looks great in your yard.
Essential Tools and Materials for Your Shed Project
Building your own shed is a rewarding project. However, you need the right tools and materials. Proper preparation ensures a smooth construction process. Therefore, understanding what you’ll need is crucial.
Essential Tools for Your Shed Project
Having the correct tools makes all the difference. Moreover, safety should always be your top priority.
- Hand Tools:
- Tape Measure: Essential for accurate measurements. For example, use a 25-foot tape.
- Claw Hammer: For nailing and prying. Choose a comfortable weight.
- Utility Knife: Great for cutting roofing felt or insulation.
- Level: A 2-foot and 4-foot level are indispensable. They ensure plumb and level surfaces.
- Speed Square/Framing Square: For marking and checking angles. A framing square is vital for larger components.
- Chalk Line: To mark long, straight lines.
- Pencil: For marking cuts and layouts.
- Power Tools:
- Circular Saw: Your primary tool for cutting lumber. A 7¼-inch blade is standard.
- Cordless Drill/Driver: For drilling pilot holes and driving screws. Two batteries are ideal.
- Miter Saw (Optional but Recommended): Provides precise crosscuts. This saves time and effort.
- Jigsaw: Useful for intricate cuts or notches.
- Orbital Sander: For smoothing rough edges or preparing surfaces for paint.
- Safety Gear:
- Safety Glasses: Protect your eyes from debris. Always wear them.
- Work Gloves: Prevent splinters and cuts.
- Ear Protection: Crucial when using power tools.
- Dust Mask: Important for cutting wood and handling insulation.
Remember, investing in quality tools can prevent frustration. Furthermore, maintaining your tools extends their lifespan.
Understanding Your Materials List
Your chosen Learn more will detail the specific materials. However, a general understanding helps with planning and budgeting.
- Lumber:
- Framing Lumber: Typically 2x4s or 2x6s. This forms the shed’s skeleton. Pressure-treated lumber is recommended for the foundation.
- Plywood/OSB: For subflooring, wall sheathing, and roof decking. OSB is often more cost-effective.
- Roofing:
- Shingles: Asphalt shingles are common and affordable. Consider color and durability.
- Roofing Felt: Provides an extra layer of protection under shingles.
- Drip Edge: Directs water away from the fascia boards.
- Siding:
- Plywood Siding (T1-11): An all-in-one sheathing and siding option. It offers a rustic look.
- Vinyl Siding: Durable and low-maintenance.
- Wood Siding (e.g., cedar, clapboard): Offers a classic aesthetic. This often requires more upkeep.
- Fasteners:
- Nails: For framing and sheathing. Common sizes include 16d and 8d.
- Screws: Deck screws are excellent for structural connections. They offer superior holding power.
- Hurricane Ties/Connectors: Reinforce roof rafters to wall plates. These are especially important in windy areas.
- Foundation Materials:
- Concrete Blocks/Piers: For a simple pier foundation.
- Gravel/Crushed Stone: For drainage under the foundation.
- Doors and Windows:
- Pre-hung Door: Simplifies installation.
- Shed Windows: Can be fixed or operable.
- Miscellaneous:
- Caulk/Sealant: For weatherproofing.
- Paint/Stain: To protect and beautify your shed.
When sourcing materials, compare prices from different suppliers. For instance, local lumberyards often offer better quality and service than big box stores. Buying in bulk can also lead to significant savings. A detailed material list from your backyard shed plan will guide your purchases. Always over-order slightly to account for mistakes or damaged pieces. This prevents delays.
Step-by-Step Shed Building Process: From Foundation to Finish
Building your own backyard shed is a rewarding project. This step-by-step guide walks you through the entire process. You will go from an empty space to a functional shed.
Foundation and Floor Framing
First, prepare your site. Clear the area of debris and vegetation. Level the ground properly. This is crucial for stability. For example, use a landscape rake and a level. Next, lay your foundation. Common options include:
- Concrete slab: This offers the most durable base.
- Skid foundation: This uses pressure-treated skids directly on the ground.
- Pier foundation: This lifts the shed off the ground.
Choose the best option for your chosen backyard shed plan.
After the foundation, frame the floor. Use pressure-treated lumber for floor joists. Space them according to your plan. Secure joists with galvanized screws or nails. Then, attach the subfloor. For instance, use ¾-inch exterior-grade plywood. Ensure it’s flush and securely fastened. This creates a strong base for your shed.
Wall and Roof Construction
Now, construct the walls. Build each wall section on a flat surface. This ensures squareness. Use 2x4s or 2x6s for studs. Space them evenly, typically 16 or 24 inches on center. Include openings for windows and doors. Frame these openings with headers and cripple studs. Stand up each wall section. Secure them to the floor frame. Use temporary bracing to keep them plumb. Then, connect adjacent walls at the corners.
Next, it’s time for the roof. Build the roof trusses or rafters. Follow your backyard shed plan precisely. Incorrect angles can compromise roof integrity. Lift the roof sections into place. Secure them to the top plates of the walls. Add ridge boards and fascia boards. For example, use hurricane ties for extra wind resistance. This strengthens the roof structure significantly.
Exterior Finishing and Weatherproofing
With the main structure up, move to the exterior. Install the roof sheathing first. Use ½-inch or ⅝-inch plywood. Cover the sheathing with tar paper or synthetic underlayment. This provides a crucial moisture barrier. Install your chosen roofing material. Common options include asphalt shingles or metal panels.
Next, install siding. Options range from wood siding to vinyl or T1-11. Cut panels to fit. Nail or screw them securely to the wall studs. Install windows and doors. Follow manufacturer instructions for proper sealing. This prevents drafts and leaks. Apply caulk around all openings. Finally, paint or stain your shed. This protects the wood from weather damage. It also enhances its appearance. This final step weatherproofs your new shed.
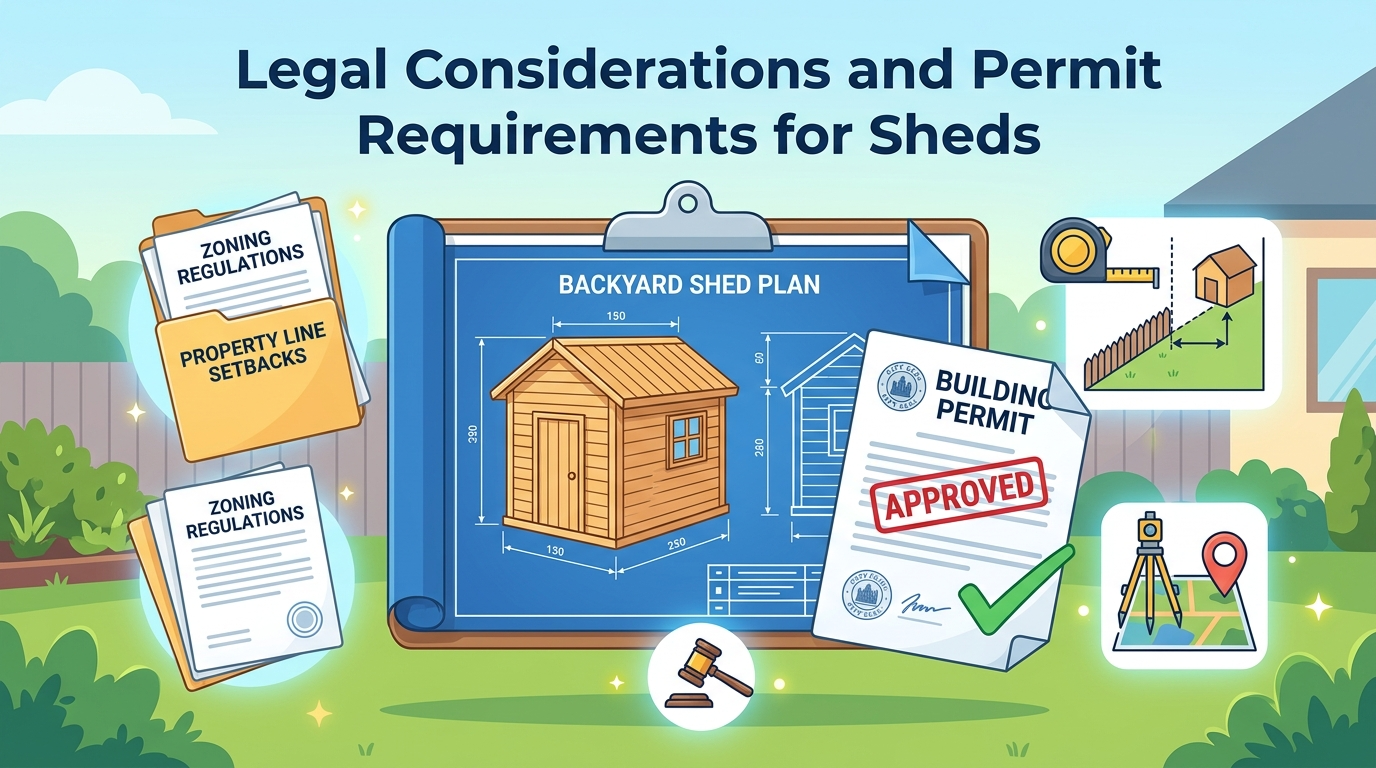
Legal Considerations and Permit Requirements for Sheds
Building a backyard shed can significantly enhance your property. However, before you start, understanding the legal landscape is crucial. Ignoring these aspects can lead to costly fines, demolition orders, or even legal disputes. Therefore, careful planning is essential for a smooth project.
Navigating Local Zoning Laws and Building Permits
Your local municipality has specific rules governing property development. These are known as zoning laws. They dictate what you can build, where you can build it, and how large it can be. For example, many towns have setback requirements. This means your shed must be a certain distance from property lines. Moreover, there might be limits on the maximum height or footprint of any accessory structure. Before finalizing your backyard shed plan, always consult your local planning or zoning department.
When is a building permit required? This varies widely by location.
- Size: Most areas require a permit for sheds exceeding a certain square footage (e.g., 100 or 120 square feet).
- Height: Taller sheds often trigger permit requirements, even if they are small in footprint.
- Foundation: If your shed requires a permanent concrete foundation, a permit is usually necessary.
- Electrical/Plumbing: Any shed incorporating electricity or plumbing will almost certainly need multiple permits and inspections.
Failure to obtain necessary permits can result in significant penalties. Consequently, always check with your local building authority *before* starting construction. They can provide specific guidelines and application forms.
Understanding Homeowner Association (HOA) Rules
If your property is part of a Homeowner Association (HOA), you have an additional layer of regulations to consider. HOAs often have strict covenants regarding exterior structures. For instance, they might specify:
- Materials: Certain siding types or roofing materials may be prohibited or mandated.
- Color: Your shed’s paint color might need to match your main house or fall within an approved palette.
- Placement: HOAs often have rules about where sheds can be located on your lot.
- Approval Process: You will almost certainly need to submit your backyard shed plan to the HOA board for approval before starting any work.
Ignoring HOA rules can lead to fines, forced modifications, or even legal action from the association. Therefore, review your HOA’s Covenants, Conditions, and Restrictions (CC&Rs) thoroughly. It’s best practice to get written approval from your HOA even if you believe your shed falls within their guidelines. This proactive step can prevent future disputes and ensure your project proceeds without issues. Proper planning truly is key to avoiding legal headaches.
Real-Life Success Stories & Testimonials
Hearing directly from our users truly brings our mission to life. Their success stories demonstrate the practicality and versatility of our free shed plans. Moreover, these testimonials offer invaluable insights for anyone considering building their own backyard shed.
Inspiring Transformations: Our Shed Plans in Action
We are incredibly proud to showcase real-life constructions. For example, Sarah from Oregon used our “Compact Garden Shed” Learn more. She needed extra storage for gardening tools. “The detailed instructions made it so easy,” she shared. “I finished it in a weekend!” Her shed now perfectly complements her vibrant garden. Similarly, David from Texas built our “Workshop Shed” design. He customized it with extra windows. Consequently, his new workspace is bright and functional. He mentioned, “The material list was spot on. I saved so much time and money.” These examples highlight the adaptability of our plans. Furthermore, they prove that anyone can achieve a professional-looking result.
Customer Raves and Recommendations
Our users frequently share their positive experiences. Many praise the clarity of our guides. For instance, Maria, a first-time builder, commented, “I never thought I could build a shed. However, your step-by-step process gave me confidence.” She successfully constructed our “Lean-To Shed.” In addition, John, an experienced carpenter, noted the quality of the designs. “The structural integrity of your backyard shed plan is excellent,” he stated. He built our “Large Storage Shed.” These testimonials underscore the user-friendly nature of our resources. They also emphasize the robust engineering behind each plan. We encourage all our builders to share their finished projects. Your stories inspire others to start their own building journey.
Conclusion: Start Building Your Dream Shed Today
The journey to owning a custom backyard shed, as you’ve discovered, is incredibly rewarding. Throughout this guide, we’ve explored the myriad benefits of building your own. You’ve seen how a well-chosen backyard shed plan can transform your outdoor space. Moreover, it provides invaluable storage, a dedicated workspace, or even a creative sanctuary. We’ve highlighted the importance of selecting the right design for your specific needs. Additionally, we’ve emphasized the cost savings and personal satisfaction that come with DIY construction.
Your Next Steps to a Perfect Shed
Now, it’s time to turn inspiration into action. You have a solid understanding of the planning process. Furthermore, you know about material selection and legal considerations. Our free shed plans, complete with detailed materials lists, offer an excellent starting point. They provide comprehensive instructions. Consequently, even a novice builder can achieve great results. For those seeking unique aesthetics or advanced features, our premium and customizable options are ideal. They allow for a truly personalized structure. Remember, proper preparation is key to a successful build.
- Review Your Needs: Revisit your initial requirements. Confirm the size, style, and function of your ideal shed.
- Explore Our Plans: Dive into our extensive collection of free guides. Pay close attention to the materials lists. These are crucial for budgeting.
- Gather Your Tools: Ensure you have the necessary essential tools. This prevents delays once construction begins.
- Understand Regulations: Contact your local authorities. Confirm all permit requirements for your area. This step is non-negotiable.
Building your own shed is more than just a construction project. It’s an investment in your property and your lifestyle. It offers a tangible sense of accomplishment. Furthermore, it provides practical utility for years to come. Many of our users share inspiring success stories. They attest to the ease and satisfaction of using our resources. Take the first confident step towards creating that perfect outdoor addition. Learn more here Get started.
Thank you for reading our guide about backyard shed plan.
Frequently Asked Questions
Why should I consider building my own backyard shed?
Building your own backyard shed offers numerous benefits, transforming your outdoor space and enhancing your property. It provides an ultimate storage solution, freeing up space in your garage and basement by offering a dedicated home for seasonal decorations, lawn equipment, tools, and more. A shed can also serve as a dedicated workspace for hobbies like woodworking or crafting, a tranquil garden sanctuary for potting and starting seedlings, or even increase your property’s value due to its added functionality and curb appeal.
What are the different purposes a backyard shed can serve?
A backyard shed is incredibly versatile and can be used for various purposes. It can act as an ultimate storage solution for garden tools, outdoor furniture, sports equipment, and holiday decor. Many people customize sheds into dedicated workspaces for DIY projects, woodworking, or crafts. For gardeners, a shed can become a potting shed or a greenhouse extension for organizing seeds and starting plants. It can even be used as a playhouse for children or a quiet retreat away from the main house. The specific purpose will influence the size and features you choose for your shed plan.
How do I choose the right backyard shed plan for my needs?
Choosing the right backyard shed plan involves assessing several factors to ensure a successful project. First, consider your personal skill level (novice, intermediate, or experienced builder) to select a plan that matches your abilities. Simple gable roofs are great for beginners, while advanced plans might include complex designs. Second, define the shed’s primary purpose—whether it’s for storage, a workshop, a potting shed, or a playhouse. This will dictate the required size and features. The article mentions common sizes like an 8×12 for garden storage or a 10×12 for larger tools and a workbench, highlighting that each plan offers different possibilities based on its use.
What are some popular shed sizes and their typical applications?
The choice of shed size greatly depends on its intended use. According to the article, an 8×12 shed is an excellent choice for general garden storage, small workshops, or housing pool equipment. A slightly larger 10×12 shed provides ample space for bigger tools, can accommodate a dedicated workbench, or even serve as a small art studio for those with creative hobbies. For more substantial needs, such as storing ATVs or creating a larger studio, plans for 12×24 or even 16×20 structures might be necessary.


