

Embarking on a DIY project can be incredibly rewarding, and building your own garden shed with comprehensive diy garden shed plans is no exception. Whether you’re a seasoned builder or a complete novice, the idea of constructing a functional and aesthetically pleasing structure for your garden can seem daunting. However, with the right plans, guidance, and a bit of elbow grease, it’s an achievable goal that offers significant benefits. This ultimate guide will walk you through every step of the process, from understanding what diy garden shed plans entail to putting the finishing touches on your new outdoor space. We’ll explore the advantages of building your own shed, help you select the perfect design, detail the tools and materials you’ll need, and provide a clear, step-by-step building process. Get ready to transform your backyard and create a valuable asset for your home.
What are diy garden shed plans and why choose them?
What Exactly Are DIY Garden Shed Plans?
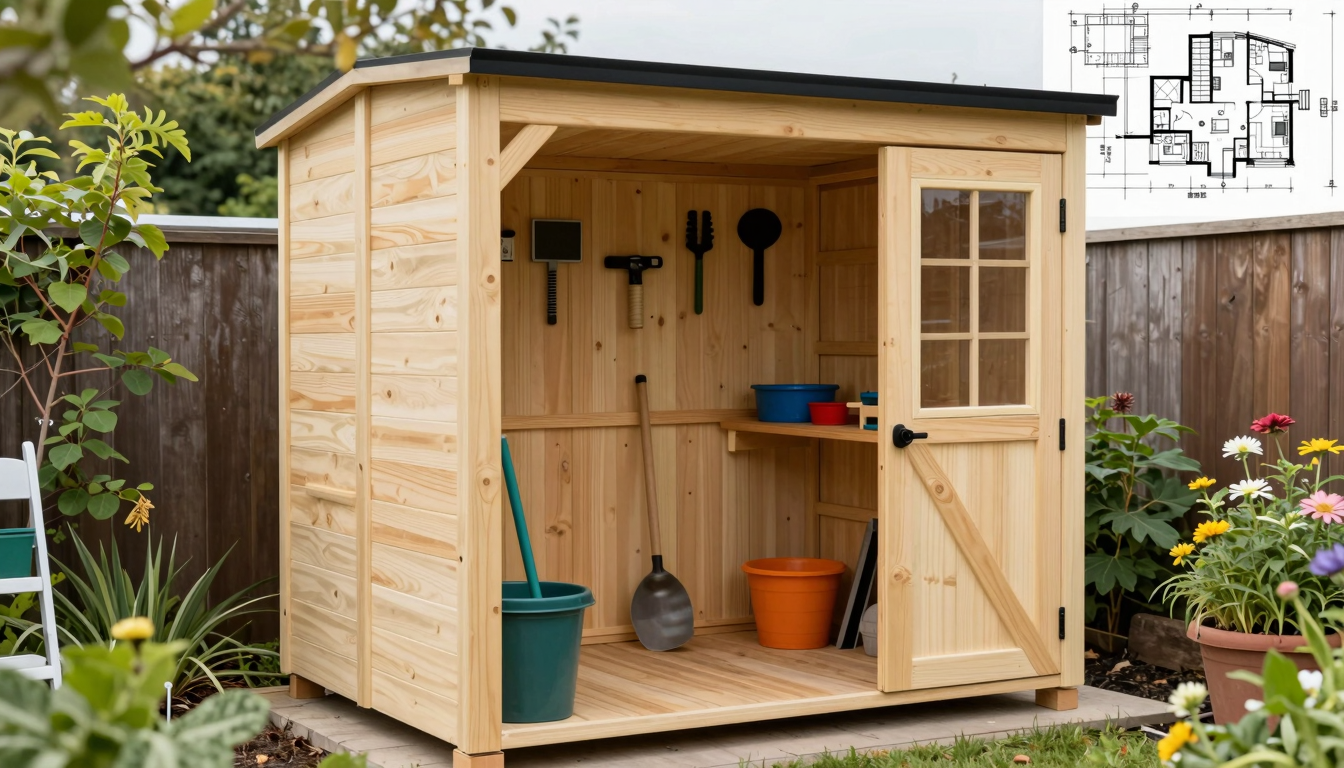
DIY garden shed plans are comprehensive blueprints and instructions designed to guide you through building a storage shed from the ground up. Essentially, they are your personal construction manual, transforming a complex project into manageable steps. These plans typically include a detailed materials list, specifying everything from lumber dimensions to hardware. Furthermore, they often feature precise cutting guides, ensuring you optimize material use and achieve accurate cuts. You’ll also find step-by-step assembly instructions, frequently accompanied by diagrams or even 3D renderings to clarify each stage of construction. Consequently, even a novice builder can confidently tackle the project. Building with diy garden shed plans empowers individuals to create a functional and attractive shed without relying on expensive pre-built options or professional contractors.
Why Choose DIY Garden Shed Plans? Unlocking Numerous Benefits
Opting for diy garden shed plans offers a wealth of advantages, making it a popular choice for homeowners and hobbyists alike.
- Significant Cost Savings: One of the most compelling reasons is the potential for substantial cost reduction. By sourcing materials yourself and providing the labor, you can dramatically lower the overall expense compared to purchasing a pre-fabricated shed or hiring a construction team. For example, buying lumber in bulk can lead to considerable savings.
- Unrivaled Customization: Unlike off-the-shelf sheds, DIY plans provide unparalleled flexibility. You can tailor every aspect of your shed to perfectly suit your specific needs and aesthetic preferences. Do you need extra windows for natural light? Perhaps a built-in workbench for gardening tasks? With DIY plans, you can easily incorporate such features. Our interactive 3D visualization tool allows you to experiment with different layouts and features before you even cut the first piece of wood!
- Quality Control and Durability: When you build your own shed, you have complete control over the quality of materials used. You can select premium lumber, robust fasteners, and durable roofing, ensuring your shed is built to last. Many mass-produced sheds, in contrast, may use lower-grade materials to cut costs. Therefore, your DIY shed often results in a more resilient and long-lasting structure.
Beyond the Practical: The Rewards of Building Your Own Shed
The benefits of using diy garden shed plans extend beyond mere practicality; they encompass personal growth and satisfaction.
- Immense Personal Satisfaction: There’s an incredible sense of accomplishment that comes from building something with your own hands. Completing a DIY shed project provides a tangible testament to your skills and perseverance. It’s a structure you can proudly point to and say, “I built that!”
- Skill Development: This type of project is an excellent opportunity to learn valuable construction skills. You’ll gain experience with measuring, cutting, framing, and roofing, among other techniques. These newly acquired skills can then be applied to future home improvement projects.
- Engaging Hobby and Community: For many, building a shed is an enjoyable hobby, a way to spend time outdoors, and engage in a productive, creative endeavor. Moreover, our community forum offers a supportive environment where you can share progress, ask questions, and get advice from fellow DIY enthusiasts. You can even use our material calculator to estimate costs and quantities, helping you plan your project efficiently.
Choosing the Right diy garden shed plans for Your Needs
Selecting the perfect DIY garden shed plans is the cornerstone of a successful build. This crucial decision depends on several key factors. Consider your shed’s primary purpose. Will it primarily store gardening tools and equipment? Perhaps it needs to function as a dedicated workshop. Alternatively, you might envision a potting shed or even a quiet home office. The intended use significantly influences the required size, layout, and essential features like windows, ventilation, and shelving.
Understanding Your Needs and Space
Next, assess your available space with precision. Measure the exact area where your shed will reside. Remember to account for necessary setbacks from property lines and other structures. This measurement dictates the maximum footprint for your new shed. Furthermore, always consider door swings and adequate access around the shed. Your budget is another significant consideration. Some DIY garden shed plans demand more expensive materials or complex building techniques. Be realistic about what you can afford for both materials and any potential tool rentals. For example, a larger shed with custom features will naturally cost more.
Matching Plans to Your Skills and Style
Honestly evaluate your DIY skill level. Many DIY garden shed plans cater to beginners, offering straightforward instructions and common materials. Conversely, others are more complex, requiring advanced carpentry skills and specialized tools. Choose plans that align with your experience, or opt for a simpler design if you’re just starting out. For instance, a lean-to shed is generally easier to build than a gambrel-roof design.
Consider various styles such as gable, lean-to, gambrel, or modern flat-roof designs. Each style offers a distinct aesthetic and presents different construction challenges. Moreover, always check local building codes and permit requirements. These regulations can significantly impact the size, height, and foundation type of your shed. Many DIY garden shed plans offer variations or modifications, allowing you to adapt them to your specific site and needs. For instance, you might modify a plan to add more windows or a larger door.
Essential Tools and Materials for Your diy garden shed plans Project
Building your own shed from diy garden shed plans is a rewarding project. However, success hinges on having the right tools and materials. Preparing these beforehand will save you time and frustration. Moreover, it ensures a safer and more efficient build.
Essential Tools for Your DIY Shed Project
A well-equipped toolkit is your best friend when tackling diy garden shed plans. Here’s a breakdown of what you’ll need:
- Measuring & Marking:
- Tape Measure: Crucial for accurate dimensions. Choose one at least 25 feet long.
- Pencil & Marker: For clear markings on various materials.
- Speed Square & Framing Square: Essential for ensuring perfectly square cuts and corners.
- Chalk Line: Ideal for snapping long, straight lines across larger surfaces. For instance, marking cuts on plywood sheets.
- Cutting Tools:
- Circular Saw: Your primary saw for straight cuts on lumber and sheet goods. A good quality blade makes a significant difference.
- Miter Saw: Excellent for precise crosscuts and angled cuts on framing lumber. This ensures tight-fitting joints.
- Jigsaw: Handy for cutting curves, intricate shapes, or making cutouts for windows and doors.
- Fastening & Assembly:
- Drill/Driver Combo: Indispensable for drilling pilot holes and driving screws. Consider a cordless model for convenience.
- Hammer: For driving nails, though many prefer screws for shed construction.
- Impact Driver (Optional but Recommended): Provides more torque than a standard drill, making driving long screws much easier.
- Clamps: Various sizes will hold pieces together while fastening or gluing.
- Leveling & Squaring:
- Spirit Level (2-foot and 4-foot): Absolutely critical for ensuring your shed is plumb and level. Consequently, your doors and windows will operate correctly.
- String Line: Useful for establishing straight lines over longer distances, especially for the foundation.
- Safety Gear (Non-negotiable!):
- Safety Glasses: Protect your eyes from flying debris.
- Hearing Protection: Crucial when operating power tools like circular saws or impact drivers.
- Work Gloves: Prevent splinters and protect your hands.
- Dust Mask: Important when cutting wood or working with insulation.
- Sturdy Footwear: Protects your feet from falling objects or nails.
Key Materials for Your DIY Garden Shed
Your chosen diy garden shed plans will provide a detailed materials list. Nevertheless, here’s a general overview of what you’ll likely need:
- Foundation Materials:
- Gravel or Crushed Stone: For drainage and a level base.
- Concrete Blocks or Deck Blocks: To support the shed’s floor joists and elevate it off the ground.
- Pressure-Treated Lumber (2x4s, 2x6s): Essential for the shed’s base frame, as it resists rot and insects.
- Framing Lumber:
- Dimension Lumber (e.g., 2x4s, 2x6s): For walls, roof trusses, and floor joists. Your plans will specify sizes and quantities.
- Sheathing & Roofing Substrate:
- Plywood or OSB (Oriented Strand Board): For walls, floor decking, and roof decking. Choose exterior-grade for weather resistance.
- Exterior Siding:
- T1-11 Siding: A popular, cost-effective option that combines sheathing and siding.
- Wood Siding (Cedar, Pine): Offers a traditional look.
- Vinyl Siding: Low maintenance and durable.
- Roofing Materials:
- Asphalt Shingles: Common and relatively easy to install.
- Metal Roofing Panels: Durable and long-lasting.
- Roofing Felt/Underlayment: Provides an additional layer of weather protection.
- Fasteners:
- Exterior-Grade Screws (Deck Screws): Recommended for framing and general assembly due to superior holding power and rust resistance.
- Nails: For specific applications, such as roofing shingles.
- Hurricane Ties/Connectors: If required by your local building codes for structural integrity.
- Doors & Windows:
- Pre-hung Door: Simplifies installation.
- Windows: Single-pane or double-pane, depending on your insulation needs.
- Hardware:
- Hinges: For doors.
- Latches/Handles: For security and access.
- Flashing: To direct water away from windows, doors, and roof junctions.
Tip: Always purchase slightly more material than your plans suggest. This accounts for mistakes or damaged pieces. You can usually return unused, uncut materials. For an accurate estimate, consider using an online material calculator. These tools often integrate with diy garden shed plans to provide precise quantities.
Step-by-Step Guide to Building with diy garden shed plans
Building your own garden shed from diy garden shed plans is a rewarding project. It involves several key stages. Following these steps ensures a sturdy and long-lasting structure.
Laying the Foundation and Floor
First, prepare your chosen site. Clear any debris and level the ground thoroughly. This prevents future structural issues. For instance, a gravel pad offers excellent drainage. Alternatively, a concrete slab provides a more permanent base. Many diy garden shed plans recommend a foundation of pressure-treated skids. These elevate the shed, protecting it from moisture.
Next, assemble the floor frame. Use pressure-treated lumber for joists and rim joists. Ensure the frame is perfectly square and level. This is crucial for the entire shed’s stability. Then, attach the subfloor. Typically, this involves nailing or screwing down plywood or OSB panels. Always consult your specific diy garden shed plans for exact measurements and materials.
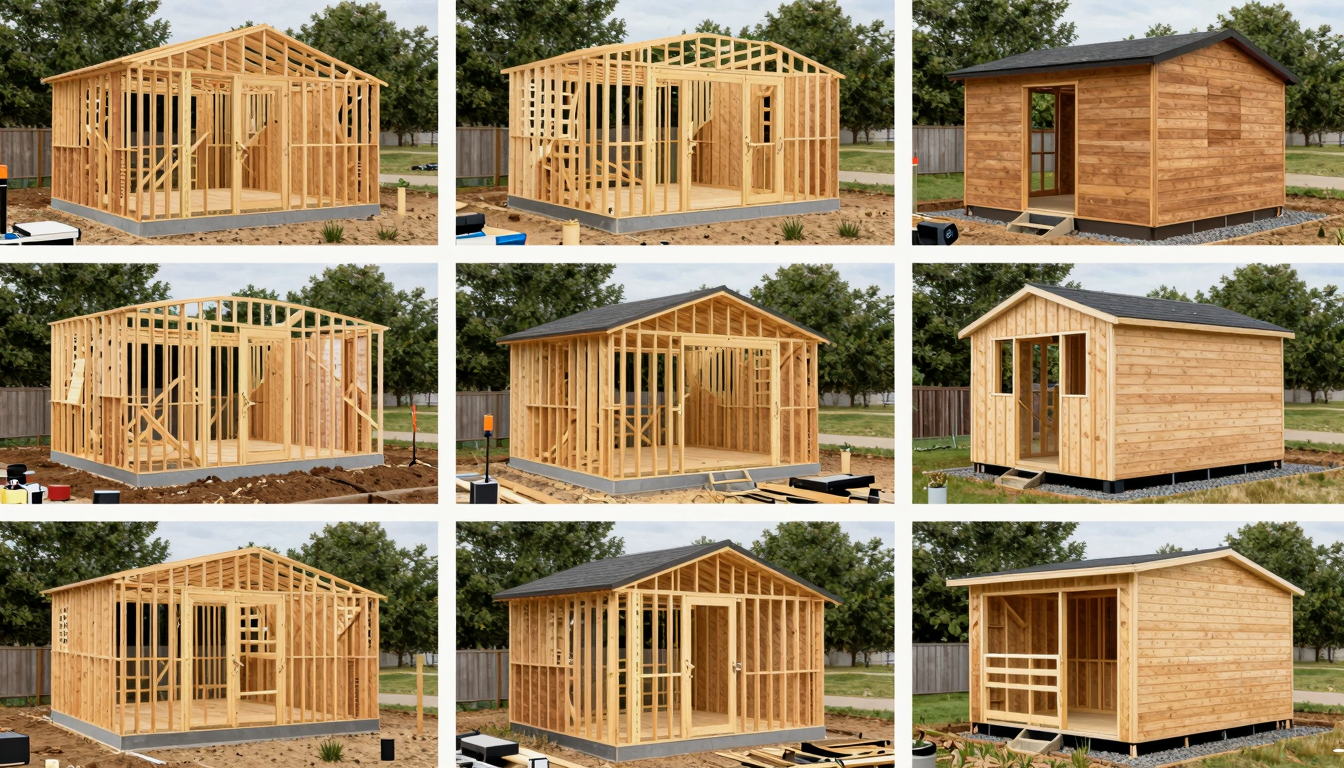
Constructing Walls and Roof
With the floor complete, move to wall framing. Build each wall section flat on the subfloor. This simplifies the process. Each wall requires studs, bottom plates, and top plates. Remember to frame openings for doors and windows as specified in your plans. Once framed, carefully raise each wall into position. Securely fasten them to the floor frame. Brace the walls temporarily to keep them plumb and square. This step requires precision.
The roof framing follows. This can be the most challenging part. Your diy garden shed plans will detail whether to build rafters or trusses. Install these onto the top plates of the walls. Ensure correct spacing and secure fastening. Add a ridge board and any necessary bracing for structural integrity. Subsequently, apply sheathing to the walls, typically plywood or OSB. Then, cover the roof with sheathing. After that, install roofing felt or underlayment. Finally, apply your chosen roofing material, such as shingles or metal panels. This protects the shed from weather elements.
Finishing Touches and Customization
Now, focus on the exterior. Apply your siding material to the walls. This could be wood, vinyl, or other options. Install corner trim, fascia boards, and any other decorative elements. This not only enhances appearance but also protects vulnerable edges. For example, trim prevents water intrusion.
Next, install doors and windows. You might use pre-hung doors for ease or build custom ones. Ensure windows are properly sealed and flashed. This is vital for preventing leaks.
Finally, add interior finishing touches. Consider shelving, workbenches, or even a basic flooring. Paint or stain the exterior for protection against the elements and aesthetic appeal. Install any remaining hardware or accessories. Consequently, your DIY garden shed will be both functional and attractive. Always refer back to your diy garden shed plans for precise instructions.
Customizing and Maintaining Your DIY Garden Shed
Once your DIY garden shed is complete, the exciting phase of customization and long-term maintenance begins. This is where you transform a structure into a personalized, highly functional asset for your garden.
Personalizing Your DIY Garden Shed
Customization allows your shed to truly reflect your style and meet specific needs. Consider these options:
- Exterior Enhancements:
- Color & Finish: Paint or stain your shed to complement your home or garden palette. For instance, a natural wood stain provides a rustic look, while a vibrant color can make it a focal point.
- Architectural Details: Add window boxes for flowers, decorative shutters, or even a small porch with a railing to boost curb appeal.
- Landscaping Integration: Surround the shed with complementary plants, create a small stone pathway leading to the door, or install solar-powered lights for evening ambiance. This seamlessly blends it into your outdoor space.
- Interior Optimization:
- Storage Solutions: Maximize vertical space with shelves, pegboards for hanging tools, or overhead storage racks. For example, adjustable shelving units offer flexibility for various item sizes.
- Functional Zones: Designate areas for specific tasks. A sturdy workbench transforms a section into a potting station, crafting area, or repair shop.
- Utilities: For advanced use, consider adding electrical outlets for power tools or lighting. However, this often requires professional assistance to ensure safety and compliance. Good ventilation, such as vents or a small fan, is crucial, especially if storing chemicals or working inside, thus preventing moisture buildup and fumes.
Maintaining Your DIY Garden Shed for Longevity
Regular maintenance is paramount to protect your investment and ensure your DIY garden shed lasts for decades. Therefore, establish a routine inspection schedule.
- Roof Integrity: Annually inspect the roof for loose, cracked, or missing shingles. Clear gutters regularly to prevent water buildup and potential leaks, which can lead to costly damage.
- Siding and Structure: Check the siding for signs of rot, insect damage, or peeling paint. Address these issues promptly by repairing damaged sections or reapplying paint/stain every few years. Moreover, inspect the foundation for any shifting, cracks, or signs of water pooling.
- Doors and Windows: Lubricate hinges and latches on doors and windows to ensure smooth operation. Check seals around windows and doors to prevent water intrusion and drafts.
By performing these routine checks and addressing minor issues as they arise, you can protect your investment and keep your shed looking great and functioning perfectly. The careful planning from your initial diy garden shed plans will pay off with years of reliable service. To discover more innovative ideas and detailed guides for both building and maintaining your ideal shed, Get started today!
Building your own garden shed using well-designed diy garden shed plans is a deeply rewarding project that offers immense practical and personal satisfaction. From the initial excitement of choosing the perfect design to the final touches of customization, each step brings you closer to creating a functional and beautiful addition to your home. We’ve covered the compelling reasons to choose the DIY route, guided you through selecting plans that align with your needs, detailed the essential tools and materials, and provided a clear, step-by-step building process. Remember, patience, attention to detail, and a willingness to learn are your best assets throughout this journey.
Your new DIY garden shed will not only provide much-needed storage or workspace but also stand as a testament to your hard work and ingenuity. Embrace the process, don’t be afraid to ask for help when needed, and enjoy the pride of ownership that comes with a structure you’ve built with your own hands. With proper maintenance, your custom-built shed will serve you faithfully for many years to come, proving that the best solutions often come from a little bit of DIY spirit and excellent diy garden shed plans.


