

Tired of searching for ‘free garden shed diy plans‘ only to find incomplete guides, missing details, or frustrating teasers? You’re in the right place. This isn’t just another set of blueprints; it’s the most comprehensive, start-to-finish guide to building your own 8×10 garden shed on the internet—and it’s completely free. We’ve designed this project for the determined DIYer with basic-to-intermediate skills. We’ll walk you through every single step, from pouring the foundation to hanging the doors, with detailed instructions, clear visuals, and video tutorials for the tricky parts. Forget the guesswork. Let’s build something you’ll be proud of for years to come.
Before You Build: Planning Your Perfect Garden Shed
The success of your shed project is determined long before you cut the first piece of wood. Proper planning is the foundation upon which your entire build rests, preventing costly mistakes and ensuring the final structure is both functional and durable. Let’s map out the three critical pre-build steps.
1. Site Selection & Layout
Where you build is just as important as how you build. Our free plan is for a versatile 8×10 foot shed, but you need to confirm it’s the right fit for your yard. If you realize you need more spacious outdoor storage, you might consider large garden shed plans, while those with limited space can find great options with our small garden shed plans.
- Perform a “Footprint Test”: Use four stakes and some string to outline an 8×10 foot rectangle on the ground. This simple visualization is crucial. Can you walk around it easily? Is there enough clearance to swing the doors wide open without hitting a fence?
- Assess the Ground: Look for a spot that is relatively level. A slight slope can be corrected with a foundation, but a steep grade will dramatically increase the work. Crucially, check the area after heavy rain. If water pools there, the base of your shed will be prone to rot and insect damage. Good drainage is non-negotiable.
- Consider Access & Sunlight: Think about the path to the shed. You’ll need a clear route for carrying long lumber during construction and for moving large items like lawnmowers in and out later. Also, consider sun exposure—do you want morning sun for a potting station or shade to keep stored items cool?
2. Navigating Local Permits & Building Codes
This is the step you absolutely cannot skip. Many municipalities have specific rules for accessory structures, and ignorance is not an excuse. A quick phone call or visit to your local building authority’s website can save you a massive headache. Here’s what to verify:
- Permit Threshold: Our 80 sq. ft. shed often falls below the size that requires a permit (typically 100 or 120 sq. ft.), but you must confirm this.
- Setback Requirements: Ask how far the shed must be from property lines, your house, and other structures. This is a common and strictly enforced rule.
- Height Restrictions: Ensure your shed’s planned peak height doesn’t exceed local limits.
3. Assembling Your Tools & Safety Gear
Having your tools organized and ready will make the construction process flow smoothly. While you don’t need a professional workshop (though if that’s your goal, we have DIY large workshop shed plans), a few key power tools will make a world of difference in the quality of your cuts and the speed of your build, which is a key part of our easy to build garden shed plans for beginners.
Essential Tool Checklist:
- Power Tools: A Circular Saw is a must-have, a Power Drill/Driver is essential for assembly, and a Miter Saw is highly recommended for accurate, repeatable angle cuts on your framing.
- Hand Tools: Tape Measure (25 ft), Speed Square, a 4-foot Level, Framing Hammer, and a Chalk Line for snapping long, straight lines.
Mandatory Safety Gear:
- Safety Glasses: Wear them at all times when cutting, nailing, or drilling.
- Work Gloves: Protect your hands from splinters and improve your grip.
- Hearing Protection: Crucial when operating power saws.
Once you have your site prepared and your tools ready, you’re set for a successful build. If you decide a different size or style might suit your needs better, we have a wide range of affordable garden shed plans and even decorative garden shed plans to explore. You can also find a wide variety of other options at https://shedplans.org/shed-plans/.
The Complete Materials & Cut List (Free Download)
The secret to a stress-free DIY shed project isn’t just about having good plans—it’s about having a perfect shopping list. Nothing kills momentum faster than a mid-project trip to the hardware store for a handful of screws or an extra 2×4. We’ve taken all the guesswork out of the equation to ensure you buy the right materials in the right quantities, the first time.
Our comprehensive materials and cut list is your single source of truth for this project. It’s designed to save you time, money, and headaches.
Enter your email below to instantly receive your FREE downloadable spreadsheet, which includes:
- A Complete Shopping List: Every piece of lumber, sheathing, hardware, and fastener you’ll need.
- A Precision Cut List: Maximize every board and minimize waste with our optimized cutting guide.
- A Built-in Cost Estimator: Plug in local prices to see your total project cost before you even start.
What’s On The List?
Your downloadable spreadsheet contains every specific item, but here is a general overview of the high-quality materials that will bring your shed to life. We’ve planned this list to be efficient and durable.
- Foundation and Floor: The base of your shed must be tough. We specify pressure-treated 4×4 lumber for the ground-contact skids and 2×6 joists to create a rock-solid floor frame. This is topped with durable 3/4″ tongue-and-groove plywood for a sturdy, seamless floor.
- Wall and Roof Framing: The skeleton is built primarily from standard 2×4 lumber for wall studs, plates, and roof rafters. Our cut list shows you exactly how to assemble the roof trusses for perfect angles every time. For a masterclass on this crucial step, watch our video guide on cutting roof trusses.
- Sheathing and Roofing: To enclose the structure, you’ll wrap the frame in 7/16″ OSB sheathing. For the roof, the list includes drip edge, roofing felt, and architectural shingles to create a professional, long-lasting, and weatherproof seal.
- Doors, Trim, and Hardware: A functional shed needs a solid door. Our plans include a guide for building a custom door from simple materials. We list all the necessary heavy-duty hinges, a secure door latch, screws, and framing nails you’ll need to finish the job right.
While this guide provides everything for our most popular shed design, we know one size doesn’t fit all. If you’re looking for different dimensions or styles, we have a wide range of options. For those with limited space, our small garden shed plans are a perfect fit. If you need more room, you can explore everything from affordable large shed plans to dedicated DIY large workshop shed plans for your next big project. You can also explore a wide variety of options at https://shedplans.org/shed-plans/ to find the perfect fit for your backyard.
Step-by-Step Construction: From Foundation to Frame
With your materials pre-cut and organized, the real fun begins. This is where your shed starts to take physical form. Work carefully, double-check your measurements, and always prioritize safety.
Building the Foundation and Floor
A level and stable foundation is the most critical part of your shed build. An unlevel floor will cause problems with everything that follows, from wall alignment to hanging the door.
- Prepare the Site: Clear and level the ground where your shed will be. We recommend building a simple gravel pad (4-6 inches deep) that is slightly larger than your shed’s footprint. This provides excellent drainage and a stable base, a technique suitable even for affordable garden shed plans.
- Set the Skids: Lay your pressure-treated 4×4 skids on the gravel, ensuring they are level with each other. These skids lift the shed off the ground, preventing rot.
- Construct the Floor Frame: Assemble the outer frame using 2×6 lumber. Then, install the interior floor joists, spacing them 16 inches on center.
- Square the Frame: This step is crucial. Measure the frame diagonally from corner to corner. Adjust the frame until both diagonal measurements are identical. Once it’s perfectly square, nail the frame together securely.
- Attach the Subfloor: Lay your 3/4″ plywood sheets over the squared frame and fasten them down with screws or nails every 6-8 inches.
Assembling and Raising the Walls
Building the walls on the flat surface of your new floor makes assembly fast and accurate. Remember to consult your downloaded cut list for precise stud placement and opening dimensions.
- Frame Each Wall: Lay out the top and bottom plates for one wall. Position the studs between them, typically 16 inches on center. Frame the rough openings for your door and any windows, using headers above the openings to support the roof’s weight.
- Raise and Brace: With a helper (this is a two-person job!), carefully lift the first wall into position. Use a level to ensure it is plumb (perfectly vertical), then secure it with temporary braces. Nail the wall’s bottom plate to the shed floor.
- Repeat and Connect: Assemble and raise the remaining three walls one by one. As you raise each new wall, nail it securely to the adjacent wall at the corners.
Installing the Roof Trusses
The roof structure might seem complex, but our plans simplify the process. The key is cutting the “bird’s mouth” notch, which allows the rafters to sit flush and securely on the wall’s top plates.
First, use a miter saw or circular saw to cut all your rafter pieces according to the plan’s specified angles. We highly recommend assembling one full truss on the ground to use as a template. Once you confirm it fits perfectly, build the rest.
Lift the completed trusses into place, spacing them 24 inches on center. Secure each truss to the wall’s top plates using hurricane ties—these small metal brackets provide immense strength against high winds. Finally, install the ridge board connecting the peak of each truss, creating a solid and complete frame ready for finishing. For more advanced roof designs or a deeper dive into framing techniques, you can always explore our detailed large shed plans. Whether you need a smaller footprint or more space, we have everything from small garden shed plans to designs for spacious outdoor storage.
Finishing Your Shed: Siding, Roofing, and Doors
With the frame standing strong, it’s time to give your shed its personality and protect it from the elements. This finishing stage transforms your wooden skeleton into a durable, weatherproof, and functional structure, a crucial part of any easy to build garden shed plans for beginners.
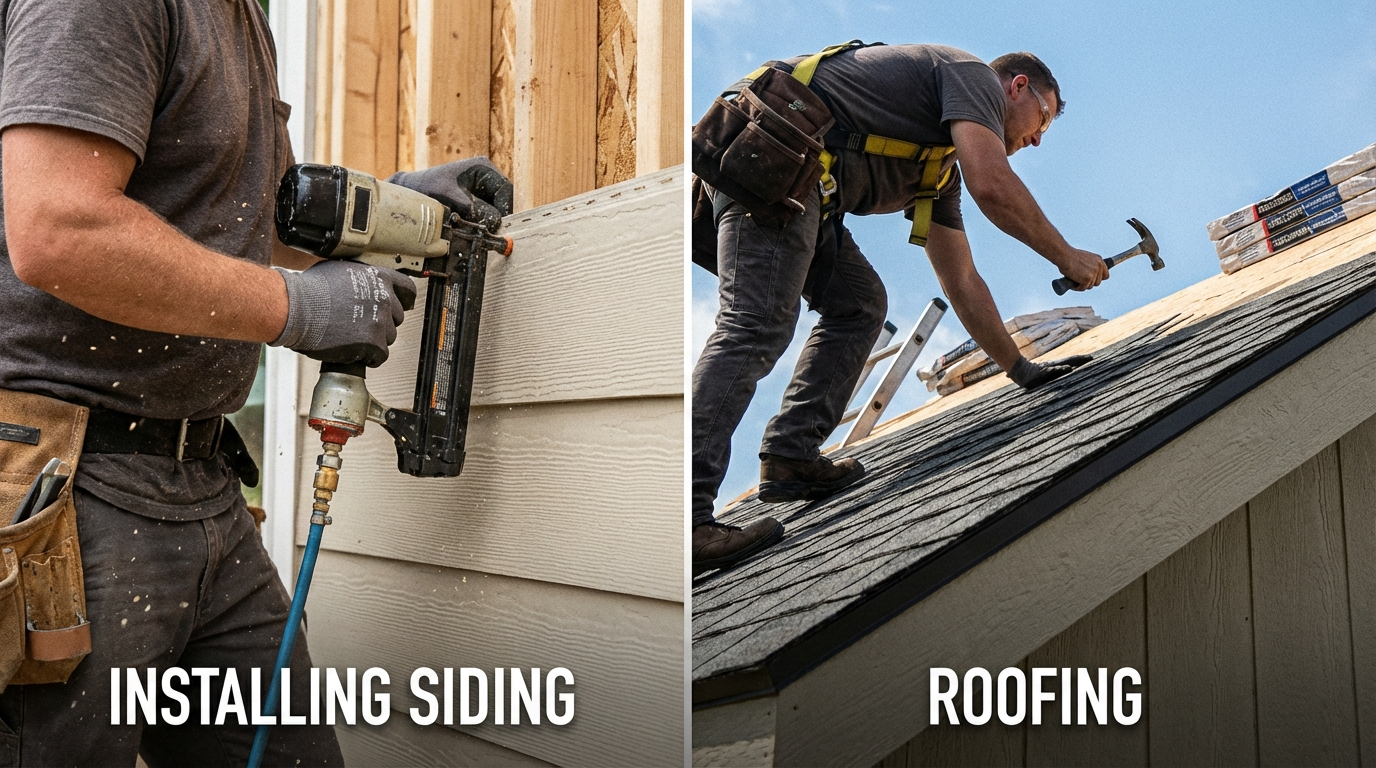
Installing Siding and Trim
Your shed’s siding is its first line of defense against rain, wind, and sun. Before installing it, you’ll first sheathe the walls with OSB or plywood panels, nailing them directly to the wall studs.
Once the sheathing is up, you can apply your chosen siding.
- Panel Siding: Materials like T1-11 or engineered wood panels are popular for their rustic look and straightforward installation. Simply nail them over the sheathing, cutting out the window and door openings as you go.
- Lap Siding: Vinyl or fiber cement lap siding offers a classic look but requires more time to install each course individually.
After the siding is on, install trim boards on all four corners and along the roof gables (rake trim). Trim covers the seams, provides a crisp, finished appearance, and adds an extra layer of weather protection, turning your project into stylish backyard storage.
Pro Tip: Apply a high-quality exterior caulk to all seams, corners, and around window/door openings to create a completely watertight seal.
Roofing Your Shed Like a Pro
A well-built roof is non-negotiable for a long-lasting shed. Follow these steps for a professional-grade installation, all of which are detailed in our free downloadable plans. For even more in-depth guidance, our detailed large shed plans offer comprehensive blueprints.
- Install Roof Sheathing: Nail OSB or plywood panels to the roof trusses, creating a solid deck.
- Add Drip Edge: Attach this metal flashing along all edges of the roof. It helps guide rainwater directly into the gutters or away from the fascia boards.
- Lay the Underlayment: Roll out roofing felt or a synthetic underlayment, starting at the bottom edge of the roof and working your way up. Overlap each row by several inches to prevent water from getting underneath.
- Install Shingles: Begin with a “starter row” of shingles along the bottom edge. Then, install the subsequent rows, staggering the seams according to the manufacturer’s instructions. Finish the roof’s peak with specialized ridge cap shingles.
Building and Hanging the Shed Door
A custom-built door ensures a perfect fit and matches your shed’s aesthetic. Our plans detail how to construct a sturdy and sag-proof door using a simple 2×4 frame and a panel of your siding material—a great way to keep costs down, which is a core principle of our affordable garden shed plans. The key is adding a “Z-brace” on the inside, which provides crucial diagonal support to prevent the door from drooping over time.
When hanging the door, use at least two heavy-duty hinges. A third hinge in the center is recommended for heavier doors. Ensure the door swings freely without rubbing against the frame and closes snugly. Finish the job by installing a secure hasp latch or a locking T-handle for security. Whether you’re working on small garden shed plans or a larger workshop, a solid door is essential. For more advanced door designs or different shed styles, you can explore our complete collection at https://shedplans.org/shed-plans/.
Project FAQ & Common Mistakes to Avoid
Frequently Asked Questions
You’ve got the plans, you’ve got the ambition—now let’s clear up some common questions before you make the first cut.
-
What’s the realistic cost for this project?
While lumber prices fluctuate, you can generally budget between $1,800 and $3,000 for this 8×10 shed. Your final cost heavily depends on your choice of siding (e.g., basic T1-11 plywood vs. premium vinyl) and roofing materials (asphalt shingles vs. metal panels). For the most accurate estimate, use our downloadable Materials & Cut List spreadsheet. Simply plug in the current prices from your local hardware store to see your exact projected cost.
-
How long will this build take?
For a DIYer with moderate skills working with a helper, this project is achievable over two or three dedicated weekends. A smart timeline would be:
- Weekend 1: Prepare the site, build the foundation, and assemble the floor frame.
- Weekend 2: Frame all four walls, raise them into place, and build and install the roof trusses.
- Weekend 3: Install sheathing, roofing, siding, and finish by building and hanging the door.
Top 3 Mistakes First-Time Builders Make
Attention to detail in the early stages prevents major headaches later. Avoid these common but critical errors.
-
An Unlevel Foundation. This is the original sin of shed building. If your foundation isn’t perfectly level, every single subsequent step will be more difficult. Your walls won’t be plumb, your roof trusses won’t fit snugly, and your door will never open and close smoothly. Triple-check for level using a long 4-foot or 6-foot level before moving on. An extra hour spent here will save you a weekend of frustration.
-
Out-of-Square Frames. When building your floor and wall frames, simply measuring the sides isn’t enough. You must check for square by measuring the diagonals. If the two diagonal measurements are identical, your frame is a perfect rectangle. If they differ, gently tap the long corners to rack the frame until they match. Nail it off only when the diagonals are equal.
-
Incorrect Stud Spacing. Our plans call for studs placed 16 inches on-center. This isn’t an arbitrary number—it provides optimal strength and ensures that 4×8 sheets of OSB or plywood sheathing will land perfectly on the center of a stud. If your spacing is off, you’ll be forced to cut almost every sheet of sheathing, wasting time and material. Measure carefully and mark all your top and bottom plates at once for consistency.
Ready for even more designs or need a different size? Whether you’re looking for small garden shed plans for a compact space, large garden shed plans for maximum storage, or even decorative garden shed plans to enhance your backyard, explore our complete collection for your next project.
Congratulations! You now have a complete roadmap to build a durable, functional, and beautiful garden shed. By following these plans, you’re not just building a structure; you’re gaining valuable skills and the immense satisfaction of a project well done. Imagine the clutter-free garage, the organized garden tools, or the quiet workshop space you’ve just created.
If you enjoyed this project and are ready to tackle something bigger or with more advanced features—like a gambrel roof for a loft or a fully-finished backyard office—be sure to check out our Premium Shed Plan Bundle. It includes five of our most popular designs with even more detailed 3D models and bonus guides. Happy building!


