
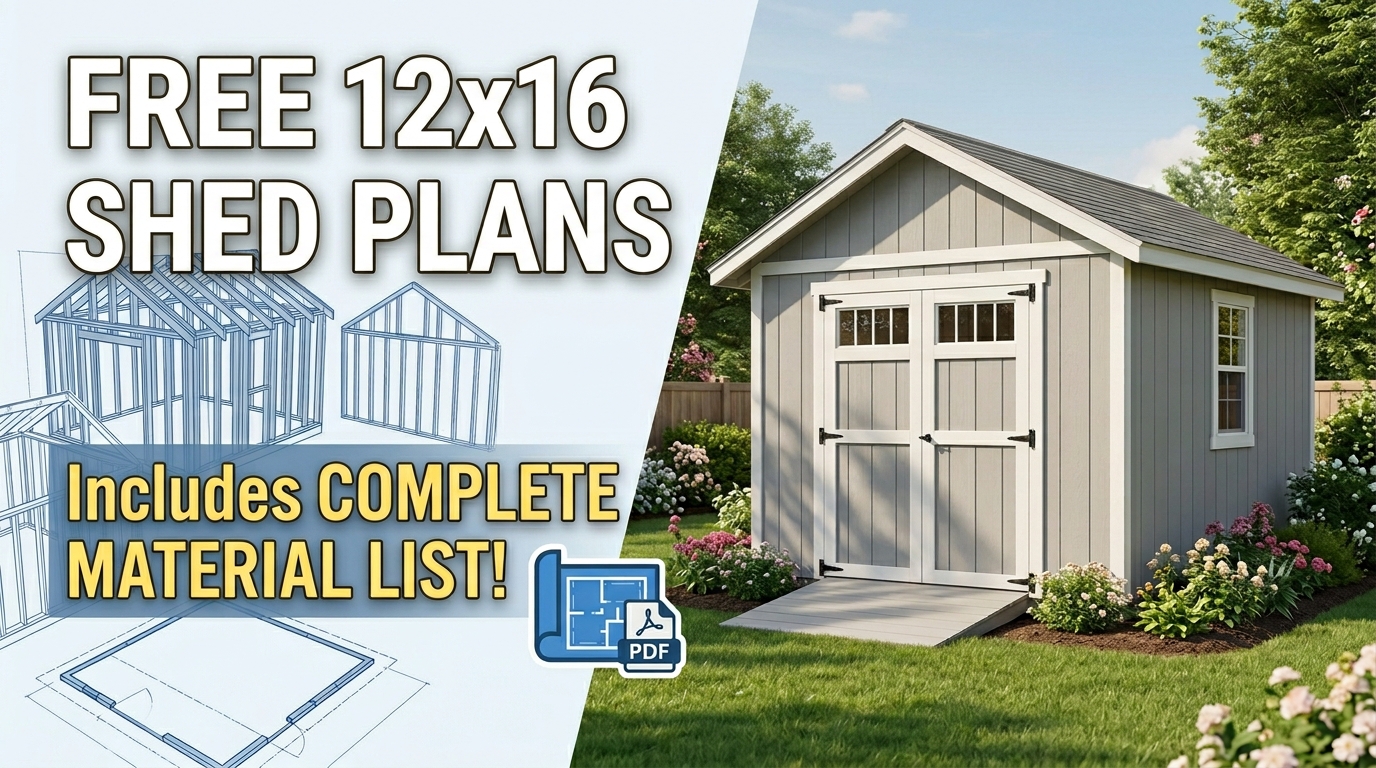
Welcome to our comprehensive guide about free 12×16 shed plans with material list.
Introduction: Why Choose Free 12×16 Shed Plans?
Choosing to build your own 12×16 shed is a decision that offers a multitude of benefits, both practical and financial. Rather than settling for pre-fabricated options that often fall short on customization and quality, our free 12×16 shed plans empower you to create a durable, functional, and aesthetically pleasing storage solution tailored precisely to your needs. This introductory section will explore the compelling reasons why these plans are the ideal starting point for your next DIY project.
Unlock Significant Savings and Customization
One of the most attractive aspects of building your own shed is the substantial cost savings. By sourcing materials directly and investing your own time and effort, you can often construct a high-quality 12×16 shed for a fraction of the price of a professionally built or store-bought alternative. For instance, a comparable pre-built shed might cost upwards of $5,000, while a DIY project using our plans could reduce that cost by 30-50%, depending on material choices. Beyond the financial benefits, our plans offer unparalleled customization. Want extra windows for natural light in a potting shed? Need reinforced walls for heavy tools in a workshop? Our comprehensive plans provide a robust foundation, allowing you to easily adapt features to suit specific functions, such as adding a workbench, shelving, or specific door types.
Designed for Every Skill Level
Our free 12×16 shed plans with material list are meticulously crafted to be accessible to a wide audience, from seasoned DIY enthusiasts to ambitious beginners. We understand that not everyone has extensive construction experience, which is why our instructions are broken down into clear, manageable steps.
- Beginner-Friendly: Detailed diagrams and explanations guide you through each phase, from foundation laying to roof installation. Tips on common pitfalls are included to help you avoid mistakes.
- Intermediate Builders: Experienced individuals will appreciate the efficiency and clarity of the plans, enabling them to complete the project quickly and accurately.
- Material List Included: The comprehensive material list eliminates guesswork, ensuring you purchase exactly what you need, minimizing waste and additional trips to the hardware store. For example, it specifies quantities of lumber, roofing shingles, fasteners, and siding, saving you significant planning time.
These plans are perfect for anyone seeking to add valuable storage space, create a dedicated workshop, or even build a cozy backyard retreat without breaking the bank. They offer a rewarding experience, culminating in a tangible asset that adds value and functionality to your property.
Ready to transform your backyard and gain essential storage? Download your complete free 12×16 shed plans with material list today and embark on your rewarding DIY journey!
Understanding Your 12×16 Shed Project
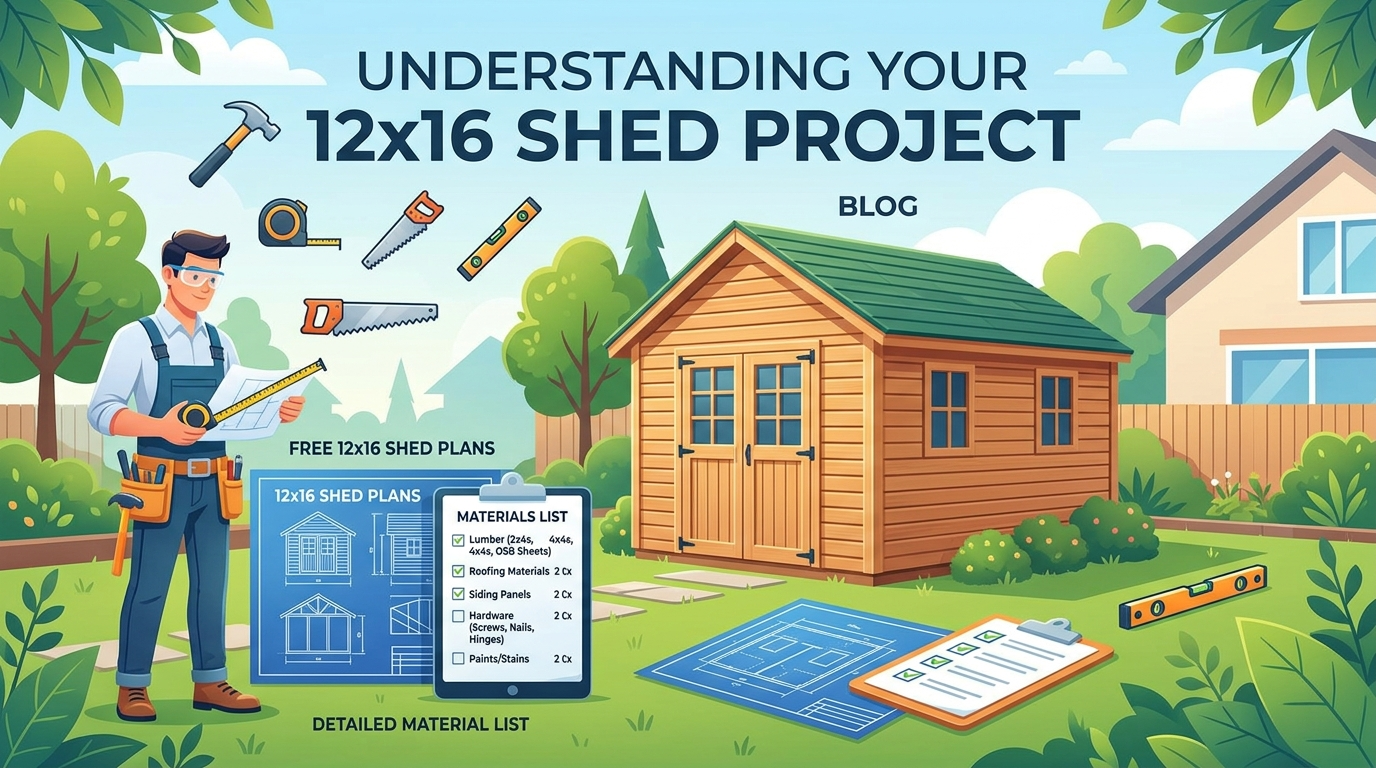
Before diving into construction, a clear understanding of your 12×16 shed project is paramount. This section will guide you through crucial considerations, ensuring your build is successful, efficient, and meets your specific needs.
Defining Your 12×16 Shed’s Purpose and Style
A 12×16 shed offers substantial space, making it versatile for various uses. Clarifying its primary function will influence design choices and material selection.
- Storage Shed: For garden tools, lawnmowers, seasonal decorations, or sporting equipment. Consider shelving, pegboards, and wide double doors for easy access.
- Workshop: Ideal for hobbyists or DIY enthusiasts. Requires robust flooring, ample natural light (windows), and potentially electrical wiring.
- She-Shed/Man Cave: A dedicated retreat for relaxation or hobbies. Focus on insulation, comfortable aesthetics, and perhaps a porch or deck.
- Potting Shed: For gardeners, this needs benches, good ventilation, and easy-to-clean surfaces.
Beyond purpose, consider the aesthetic style. While our plans provide a solid foundation, understanding common shed styles helps visualize the final product:
- Gable Shed: The most common design, featuring a classic A-frame roof. Offers good headroom and efficient water runoff.
- Barn Style (Gambrel Roof): Provides maximum headroom and often includes a loft area, perfect for extra storage.
- Lean-To Shed: Designed to be built against an existing structure (house, fence). Saves space and materials, making 12×16 lean to shed plans particularly efficient for smaller yards or specific placements.
- Saltbox Shed: Features an asymmetrical roof with one side longer than the other, offering a unique, traditional look.
Pre-Construction Essentials: Site, Foundation, and Regulations
Successful shed building starts long before the first nail is hammered. Overlooking these initial steps can lead to costly problems down the line.
- Site Preparation:
- Leveling: The site must be perfectly level to ensure structural integrity and prevent future issues like twisting or settling. This might involve excavating, adding fill, or using a combination of methods.
- Drainage: Choose a location that drains well, away from your home’s foundation. Standing water can damage your shed’s base and encourage mold.
- Accessibility: Ensure there’s enough space around the shed for construction, maintenance, and future access.
- Foundation Type: Your 12×16 shed requires a robust foundation to support its weight and protect it from moisture and pests.
- Concrete Slab: Most durable, providing a solid, level floor. Ideal for workshops or heavy storage. Requires professional pouring or significant DIY effort.
- Gravel Pad: A cost-effective option involving a leveled bed of crushed stone. Offers good drainage but requires a treated wood floor frame.
- Concrete Piers/Blocks: Raises the shed off the ground, promoting air circulation and preventing moisture issues. Best for slightly uneven terrain.
- Local Codes and Permits: This is non-negotiable. Many municipalities require permits for structures exceeding a certain size (often 100-120 sq ft), which a 12×16 shed (192 sq ft) will almost certainly trigger. Ignoring these can result in fines, demolition, or difficulty selling your property. Check with your local building department before you begin any work.
Skill Level and Time Commitment
Building a 12×16 shed is a significant DIY project. While our plans are designed for accessibility, honesty about your skill level and available time is crucial.
- Skill Level: These plans are suitable for individuals with intermediate to advanced DIY skills. Basic carpentry knowledge, familiarity with power tools, and the ability to read construction diagrams are essential. If you’re a complete novice, consider enlisting help from experienced friends or a local contractor for specific stages.
- Time Commitment: Expect to dedicate several weekends or a full week to construct your 12×16 shed. This estimate varies greatly depending on your experience, the foundation type chosen, weather conditions, and whether you have assistance. Factor in time for material collection, site preparation, and potential setbacks.
By thoughtfully considering these aspects, you’ll lay a strong foundation for a successful and rewarding 12×16 shed build. To get started on your journey, download your free 12×16 shed plans with material list today!
Your Complete Free 12×16 Shed Plans with Material List
This is where your shed-building journey truly begins! Our incredibly detailed free 12×16 shed plans are more than just diagrams; they’re your comprehensive guide to constructing a sturdy, functional, and attractive storage solution.
What’s Inside Your Free 12×16 Shed Plans Package?
We’ve meticulously crafted these plans to ensure clarity and ease of use, even for first-time builders. Here’s what you’ll receive:
- Downloadable PDF Plans: Get instant access to a high-resolution PDF document, perfect for viewing on any device or printing out for the workshop. These aren’t just sketches; they’re professional-grade blueprints.
- Detailed Blueprints and Diagrams:
- Foundation Layout: Precise measurements for a solid base, whether you choose a concrete slab, gravel pad, or skids. For example, you’ll see exact dimensions for 4×4 treated runners and concrete blocks.
- Framing Elevations: Cross-sectional views of wall, roof, and floor framing, clearly showing stud spacing (e.g., 16″ on center), header sizes (e.g., double 2×6), and rafter angles.
- Cut Lists: Specific measurements for every piece of lumber, minimizing waste and guesswork. You’ll know exactly how long each 2×4 or plywood sheet needs to be.
- Exploded Views: These 3D-like diagrams break down complex assemblies into simpler components, making it easier to visualize how all the pieces fit together.
- Comprehensive Material List: Gone are the days of multiple trips to the hardware store. Our material list is broken down into logical sections for easy shopping:
- Lumber: Itemized by type, dimension, and quantity (e.g., “24 pieces, 2x4x8′ Pressure Treated Lumber”).
- Sheathing: Specifies plywood or OSB thickness and quantity for flooring, walls, and roof.
- Roofing: Details shingles, felt paper, drip edge, and fasteners.
- Hardware: Includes an exhaustive list of nails, screws, joist hangers, and hurricane ties, specifying sizes and quantities.
- Doors & Windows: Recommendations and typical dimensions for these components.
Estimated 12×16 Shed Material Cost Breakdown
Understanding the potential cost upfront is crucial. While prices fluctuate based on location and material choices, our plans provide an estimated cost breakdown, helping you budget effectively.
- Budget-Friendly Options: We outline how to save money, perhaps by using OSB instead of plywood for sheathing, or asphalt shingles over metal roofing. Expect to spend approximately $1,500 – $2,500 for basic, functional construction.
- Mid-Range Quality: For enhanced durability and aesthetics, using higher-grade lumber, better quality siding, or a more robust roofing material might bring costs to $2,500 – $4,000.
- Premium Finishes: If you envision a shed with specialized siding (e.g., cedar), multiple windows, a robust foundation, or custom doors, your investment could be upwards of $4,000.
Tip: Always add 10-15% to your material budget for unexpected cuts, errors, or small missing items. It’s better to have a little extra than to run short.
Ready to transform your backyard with a functional and durable 12×16 shed? Don’t wait – dive into the details and start planning your build today. Get your free 12×16 shed plans with material list now!
Step-by-Step Construction Guide for Your 12×16 Shed
Building your own 12×16 shed is a rewarding project that, with the right guidance, is entirely achievable. This step-by-step guide will walk you through the essential stages of construction, transforming your lumber pile into a functional storage solution.
1. Foundation and Floor Framing
The success of your shed hinges on a solid foundation.
- Site Preparation: Begin by clearing the chosen area of debris, rocks, and vegetation. Level the ground as much as possible, accounting for proper drainage away from the shed.
- Foundation Options: For a 12×16 shed, common choices include concrete blocks (skids), concrete slab, or pressure-treated timber skids. For most DIY builders, a skid foundation using 4×4 or 6×6 pressure-treated timbers laid on a gravel bed offers excellent stability and ease of construction.
- Floor Joists: Once your skids are level and squared, you’ll construct the floor frame. Use pressure-treated lumber (typically 2x6s or 2x8s) for joists, spaced 16 inches on center. Securely attach joists to the skids using hurricane ties or appropriate fasteners. Tip: Double-check all measurements for squareness before fastening permanently.
- Decking: Cover the floor frame with ¾-inch pressure-treated plywood or OSB, fastened with screws every 6 inches along the joists. This creates a sturdy base for your walls.
2. Wall Framing and Sheathing
Now, your shed will begin to take shape.
- Wall Sections: Frame each wall individually on the flat floor deck. This involves cutting studs (typically 2x4s or 2x6s depending on your plan), top plates, and bottom plates to size. Lay them out, ensuring studs are spaced 16 or 24 inches on center as per your plans.
- Openings: Incorporate rough openings for any doors and windows as you frame. These require king studs, jack studs, and headers to support the load above the opening.
- Assembly: Once framed, stand each wall section upright and temporarily brace it. Connect adjacent walls at the corners using nails or screws, ensuring they are plumb (perfectly vertical).
- Wall Sheathing: Cover the exterior of your framed walls with ½-inch OSB or plywood sheathing. This adds structural rigidity and creates a surface for siding. Fasten securely with nails or screws.
3. Roof Construction and Finishing Touches
The roof protects your shed, and the finishing touches make it aesthetically pleasing and durable.
- Roof Trusses/Rafters: Depending on your design, you’ll either build and install pre-fabricated trusses or cut and install individual rafters. If your plans include a loft, the truss design will be heavier-duty to support the additional load. Securely fasten trusses or rafters to the top plates of your walls using hurricane ties.
- Roof Sheathing: Cover the roof frame with ½-inch OSB or plywood.
- Roofing Materials: Install roofing felt (underlayment) first, followed by your chosen roofing material – asphalt shingles are a popular and cost-effective choice for sheds.
- Doors and Windows: Install your pre-hung door and windows into their rough openings, shimming as needed to ensure they are plumb and operate smoothly. Seal gaps with appropriate caulk or spray foam.
- Siding and Trim: Apply your chosen siding material (e.g., T1-11, vinyl, wood planks) over the wall sheathing. Install corner trim, fascia boards, and any other decorative elements.
- Paint/Stain: Finish your shed with a protective coat of paint or stain, ensuring all exposed wood is sealed against the elements.
This detailed guide provides a solid framework for building your 12×16 shed. For comprehensive instructions, diagrams, and a complete material list, download your free 12×16 shed plans with material list today!
Essential Tools & Safety for Building Your Shed
Building your own 12×16 shed is a rewarding project, but it requires the right tools and a strong commitment to safety. Proper preparation ensures both efficiency and protection throughout the construction process.
Essential Tools for Your Shed Build
A well-equipped toolkit is crucial. We’ve categorized tools into basic hand tools and power tools for clarity.
- Basic Hand Tools: These are fundamental and often used for precision work or when power isn’t available.
- Tape Measure: Essential for accurate cuts and layouts (e.g., measuring wall studs).
- Claw Hammer: For driving nails and prying (e.g., securing sheathing).
- Utility Knife: Great for scoring and cutting various materials like roofing felt.
- Level (2-foot and 4-foot): Critical for ensuring plumb walls and level foundations.
- Framing Square / Speed Square: For marking accurate 90-degree angles on lumber.
- Chalk Line: To snap straight lines for long cuts or foundation layouts.
- Pencil: For marking cuts and measurements.
- Caulking Gun: For applying sealants.
- Wrenches/Socket Set: For assembling hardware or anchor bolts.
- Power Tools: These significantly speed up construction and improve accuracy.
- Circular Saw: Your primary tool for cutting lumber to size (e.g., cutting wall plates, roof rafters). A good quality blade is key.
- Cordless Drill/Driver: Indispensable for pre-drilling holes and driving screws quickly (e.g., assembling wall frames, attaching siding).
- Miter Saw (Chop Saw): Highly recommended for precise, repeatable angle cuts on framing lumber (e.g., roof rafters).
- Jigsaw: Useful for intricate cuts or curves (e.g., cutting out window openings).
- Nail Gun (Framing and Finishing): While optional, a nail gun can drastically reduce construction time for framing and attaching trim.
- Orbital Sander: For finishing touches on trim or areas that need smoothing.
Prioritizing Safety: Protective Gear and Best Practices
Safety should never be an afterthought. Always assume potential hazards and take preventive measures.
- Personal Protective Equipment (PPE):
- Safety Glasses/Goggles: Absolutely mandatory when cutting, drilling, or hammering to protect against flying debris.
- Work Gloves: Protect your hands from splinters, cuts, and blisters.
- Hearing Protection: Earplugs or earmuffs are crucial when operating loud power tools like circular saws or nail guns.
- Dust Mask/Respirator: Wear when cutting wood or working with insulation to avoid inhaling sawdust and airborne particles.
- Steel-Toe Boots: Protect your feet from falling objects or accidental punctures.
- Safety Best Practices:
- Read Manuals: Always read and understand the operating instructions for all power tools before use.
- Clear Work Area: Keep your construction site clean and free of clutter to prevent trips and falls.
- Proper Lighting: Ensure adequate lighting, especially when working indoors or during low-light conditions.
- Secure Materials: Always secure lumber or other materials before cutting or drilling to prevent movement.
- Extension Cord Safety: Use heavy-duty, outdoor-rated extension cords and ensure they are not damaged. Keep them out of high-traffic areas.
- Know Your Limits: Don’t attempt to lift heavy objects alone; ask for help. Take breaks when needed to avoid fatigue.
- First Aid Kit: Keep a well-stocked first aid kit readily accessible on site.
By meticulously preparing with the right tools and rigorously adhering to safety protocols, you’ll ensure your shed building project is as safe and efficient as possible. Ready to gather your tools and start building? Download your free 12×16 shed plans with material list today!
Navigating Building Codes and Permits for Your 12×16 Shed
Building a 12×16 shed is an exciting project, but before you break ground, it’s crucial to understand the legal landscape. Navigating local building codes and permits is not just about compliance; it’s about ensuring your shed is safe, structurally sound, and doesn’t lead to costly issues down the road.
When is a Permit Necessary?
The need for a building permit for your 12×16 shed depends heavily on your local jurisdiction (city, county, or even homeowners’ association). While a 12×16 shed might seem like a straightforward backyard addition, its size often pushes it into the realm of requiring a permit.
- Size Thresholds: Many municipalities have a square footage limit below which permits are not required. For example, some areas allow sheds under 100 or 120 square feet without a permit. A 12×16 shed (192 square feet) almost always exceeds these common thresholds, making a permit highly probable.
- Permanent vs. Temporary: Sheds built on permanent foundations (concrete slab, concrete piers) are more likely to require permits than those on skids or temporary foundations, which some codes might classify differently.
- Utility Connections: If your shed will have electricity, plumbing, or gas connections, you will undoubtedly need separate electrical, plumbing, and mechanical permits, regardless of the shed’s size.
- Zoning Regulations: Beyond building permits, zoning laws dictate where you can place your shed on your property (setbacks from property lines, main dwelling, etc.) and even its maximum height or aesthetic requirements.
Example: In many suburban areas, a 12×16 shed will require a permit because it exceeds the typical 120 sq ft exemption. Failure to obtain one could result in fines, demolition orders, or difficulty selling your home later.
Tips for a Smooth Approval Process
Approaching the permitting process with preparation can save you time and frustration.
- Contact Your Local Building Department Early: This is your first and most important step. Visit their website or call them directly. Explain your project (a 12×16 shed) and ask about specific requirements, forms, fees, and the typical timeline for approval.
- Obtain a Copy of Local Building Codes: While daunting, understanding the relevant sections (e.g., foundation requirements, structural bracing, roofing load) for accessory structures will help you design and build to code from the start.
- Prepare Detailed Plans: Most permit applications will require detailed drawings. This is where high-quality shed plans become invaluable.
- Site Plan: An overhead view showing your property, existing structures, and the proposed shed location with setback dimensions.
- Construction Drawings: Detailed blueprints of your shed, including foundation, framing, roofing, and elevations. Our comprehensive plans are designed to meet these needs.
- Homeowners’ Association (HOA) Approval: If you live in an HOA community, remember that their rules might be stricter than local government codes. Obtain their approval before applying for a municipal permit.
- Be Patient and Responsive: Permitting can take time. Be prepared for potential revisions or requests for more information from the building department. Responding promptly and thoroughly will expedite the process.
Best Practice: Always err on the side of caution. Even if you think your shed might be exempt, a quick call to your local building department can prevent significant headaches later.
To ensure your project starts on the right foot and meets all necessary standards, download our free 12×16 shed plans with material list, which are designed to provide the detailed information often required for permit applications.
Choosing the Right Materials for Longevity and Climate
Selecting the right materials for your 12×16 shed is paramount for its durability, resistance to local weather, and overall lifespan. Investing a little extra thought here can save you significant maintenance headaches down the road.
Structural Integrity: Lumber and Framing
The foundation of your shed’s strength lies in its lumber. For framing, pressure-treated (PT) lumber is non-negotiable for any components in direct contact with the ground, such as skids, floor joists, and often the bottom plates of walls. This prevents rot and insect infestation. For wall studs, rafters, and roof joists, SPF (Spruce-Pine-Fir) or Douglas Fir are excellent choices due to their strength-to-weight ratio and availability. Look for straight, knot-free boards to ensure a stable structure. When selecting plywood or OSB (Oriented Strand Board) for subflooring and sheathing, opt for exterior-grade (CDX) to withstand moisture during construction and potential leaks later on.
Weatherproofing: Roofing and Siding
Your roof is the first line of defense against the elements.
- Asphalt shingles are the most common and cost-effective choice, offering good weather protection and a wide range of colors. They are suitable for most climates.
- Metal roofing (like corrugated or standing seam) provides superior longevity, excellent wind resistance, and can reflect heat, making it ideal for sunny climates. While more expensive upfront, its lifespan often justifies the cost.
- For siding, consider options that blend aesthetics with resilience:
- T1-11 plywood siding offers a rustic look, is relatively affordable, and easy to install. It requires regular painting or staining for protection.
- Vinyl siding is low-maintenance, durable, and comes in various colors, making it a good choice for those seeking a hands-off approach.
- Wood siding (cedar, pine, etc.) provides a classic, natural appeal but demands more upkeep (sealing, painting, or staining) to prevent rot and insect damage.
Fasteners and Hardware: The Unsung Heroes
Don’t skimp on fasteners! They hold your entire shed together.
- Hot-dipped galvanized or stainless steel nails and screws are essential for exterior applications, especially with pressure-treated lumber, to prevent corrosion and unsightly rust streaks.
- Deck screws are excellent for attaching floor decking and other structural elements due to their superior holding power.
- For hinges, latches, and door hardware, choose heavy-duty, rust-resistant options that can withstand frequent use and exposure to weather. Consider a robust locking mechanism for security.
By carefully selecting these key materials, you’re not just building a shed; you’re crafting a long-lasting, resilient storage solution tailored to your needs and local environment. Get a detailed breakdown of all necessary components by downloading our free 12×16 shed plans with material list today!
Beyond the Build: Customization and Enhancements
Once the core structure of your 12×16 shed is complete, the real fun begins: personalizing it to perfectly suit your needs and aesthetic preferences. This is where your shed transforms from a basic storage unit into a truly functional and attractive extension of your property.
Enhancing Functionality and Storage
Maximize your shed’s utility with smart internal additions.
- Lofts and Shelving: Even a 12×16 shed can feel cramped without organized storage. Consider adding a loft for seasonal items, tools, or less frequently used equipment. Simple shelving units, built-in or freestanding, are invaluable for keeping smaller items tidy and accessible. For instance, a 2-foot deep loft spanning one end of the shed can store bulky holiday decorations, while adjustable shelves along a side wall can hold gardening supplies or paint cans.
- Workbenches and Tool Organization: If your shed will double as a workshop, integrate a sturdy workbench. Pegboards above the workbench are excellent for hanging hand tools, keeping them visible and within reach. Magnetic tool strips can secure metal items like screwdrivers and wrenches.
- Ventilation and Insulation: Protect your stored items and create a more comfortable workspace. Proper ventilation, such as gable vents or a ridge vent combined with soffit vents, prevents moisture buildup and extreme temperatures. If you plan to spend significant time in your shed, or store temperature-sensitive items, insulation (e.g., fiberglass batts or rigid foam panels) in the walls, floor, and ceiling will regulate the interior climate.
Customizing Aesthetics and Integration
Beyond utility, personalize your shed’s appearance to complement your home and landscape.
- Door and Window Placement: While our plans provide standard placements, don’t be afraid to adjust. A wider double door might be ideal for moving in large equipment like a riding mower. Adding an extra window or repositioning existing ones can dramatically improve natural light and airflow, especially if your shed faces a particular view or receives morning sun.
- Exterior Finishes: The exterior is your canvas. Matching your shed’s siding and paint color to your main house creates a cohesive look. Alternatively, choose a contrasting color for a charming garden shed aesthetic. Explore various siding options like traditional wood, durable vinyl, or rustic shiplap.
- Landscaping and Access: Integrate your shed into its surroundings. A simple gravel path leading to the door, a small flower bed alongside, or even trellises with climbing plants can soften its appearance and make it feel like a natural part of your yard. Consider a small ramp for easier access with wheeled equipment.
By thoughtful planning and incorporating these customization options, your 12×16 shed will not only be a practical structure but also a valuable and attractive asset to your property. To begin planning your personalized shed, download your free 12×16 shed plans with material list today.
Compare Our Free Shed Plans: 12×16 vs. Other Sizes
When embarking on a shed building project, one of the most crucial decisions you’ll face is determining the ideal size. While our featured 12×16 shed plans offer a fantastic blend of versatility and spaciousness, it’s worth exploring how this popular dimension stacks up against other common shed sizes. Understanding these differences will help you confirm if 12×16 is truly the best fit for your needs or if a smaller or larger option might be more appropriate.
Why 12×16 Often Hits the Sweet Spot
The 12×16 shed, providing 192 square feet of floor space, is frequently considered an optimal choice for many homeowners. Here’s why:
- Ample Storage: It offers significantly more storage than smaller sheds (e.g., 8×10 or 10×12), easily accommodating riding lawnmowers, multiple bicycles, gardening tools, seasonal decorations, and even a small workbench without feeling cramped.
- Versatile Functionality: Beyond just storage, a 12×16 shed is large enough to serve as a dedicated workshop, a potting shed, or even a modest home office or art studio. The extra width allows for better circulation and placement of equipment.
- Manageable Build: While larger than a compact shed, a 12×16 structure remains a highly achievable DIY project. The material list is extensive but not overwhelming, and the construction process, while requiring effort, is well within the capabilities of a determined builder.
- Property Footprint: It offers substantial utility without dominating a typical backyard, striking a good balance between size and available yard space.
Comparing 12×16 to Other Popular Sizes
Let’s look at how the 12×16 compares to other common shed dimensions:
- Smaller Sheds (e.g., 8×10, 10×12):
- Pros: Lower material costs, quicker build time, less demanding foundation work, ideal for tight spaces or minimal storage needs (e.g., hand tools, a push mower).
- Cons: Limited storage capacity, less versatile for multi-purpose use, can quickly become cluttered.
- Recommendation: Good for basic storage, but if you anticipate your needs growing or desire a functional workspace, you might quickly outgrow these.
- Larger Sheds (e.g., 12×20, 12×24, 16×20):
- Pros: Maximum storage and workspace potential, can easily house large equipment, multiple workbenches, or even serve as a small garage.
- Cons: Significantly higher material costs, longer and more complex build, requires a larger foundation, often necessitates more extensive permitting, and can feel imposing in smaller yards. A free shed plans 12×24 with material list might be appealing for those needing serious space, but be prepared for the increased commitment.
- Recommendation: Best for those with very specific, large-scale storage or workshop requirements and ample property space. Always check local zoning for maximum allowable accessory structure sizes.
Making Your Choice
Ultimately, the “best” shed size depends entirely on your individual needs, available space, budget, and building skill level.
- Consider your current and future storage needs: Will you be acquiring more tools or equipment? Do you need space for hobbies?
- Measure your available yard space carefully: Ensure there’s enough room for the shed itself, plus adequate clearance for maintenance and access.
- Check local building codes: Larger sheds often have stricter requirements for setbacks, height, and foundation.
For most homeowners seeking a robust, versatile, and manageable DIY project, the 12×16 shed strikes an excellent balance. It provides significant utility without the overwhelming scope or cost of much larger structures. Ready to dive into building a shed that perfectly fits your needs? You can download our comprehensive free 12×16 shed plans with material list today and start planning your perfect backyard addition.
User Testimonials and Expert Tips
Real-World Success: Hear From Our Builders
Don’t just take our word for it – countless DIY enthusiasts have successfully built sturdy, functional sheds using our plans. Their experiences highlight the clarity and completeness of our guides.
- “Seamless Build for a First-Timer!” – Mark T., Ohio: “I’ve never built anything this big before, but the step-by-step instructions were so clear. The material list was a lifesaver – no wasted trips to the hardware store! My 12×16 shed is now perfect for storing all my gardening tools.”
- “Professional Results on a Budget” – Sarah L., California: “We needed extra storage but didn’t want to spend a fortune. These free plans were incredibly detailed. We saved thousands compared to buying a pre-built shed, and it looks fantastic in our backyard. The foundation guide was particularly helpful.”
- “Customization Made Easy” – David R., Texas: “While the plans are excellent, I wanted to add a small window. The modular nature of the design made it easy to incorporate my own touches without compromising structural integrity. Plus, the expert tips on weatherproofing were invaluable for our climate.”
Expert Insights: Build Smarter, Not Harder
Building a shed, even with comprehensive plans, benefits from a few seasoned tips. Avoid common pitfalls and ensure a smooth, successful project.
- Double-Check Everything, Twice: Before making any cut, measure again. Before fastening, ensure alignment. This simple practice, emphasized by seasoned builders, prevents costly mistakes and material waste. Recommendation: Use a reliable tape measure and a speed square for accuracy.
- Don’t Skimp on the Foundation: A stable, level foundation is the bedrock of your entire shed. Any shortcuts here will lead to problems down the road, from sticking doors to structural instability. Best Practice: Consider concrete piers or a gravel pad with treated skids for long-term durability, especially in areas with significant ground moisture.
- Organize Your Materials: Unloading all your lumber into one chaotic pile will slow you down. Sort materials by type and size as they arrive. This makes finding the right piece for each step much quicker and reduces frustration. Tip: Create a designated staging area for cut pieces to keep your workspace tidy and efficient.
- Safety First, Always: Remember to wear appropriate personal protective equipment (PPE) like safety glasses, gloves, and hearing protection. Familiarize yourself with all tools before use. Crucial Reminder: Never work alone when lifting heavy components or operating power tools that require two hands.
- Weather Considerations: Plan your build during a dry period. Lumber exposed to rain can swell, warp, and become harder to work with. If unavoidable, cover materials with tarps. Expert Advice: Apply a good quality exterior primer and paint or stain as soon as possible after construction to protect your shed from the elements.
By combining detailed plans with these practical insights from experienced builders, you’re well-equipped to construct a durable, functional, and aesthetically pleasing 12×16 shed. Ready to begin your project? Download your free 12×16 shed plans with material list today!
Get Started Today: Download Your Free 12×16 Shed Plans!
The journey to owning a custom-built, highly functional 12×16 shed is closer than you think! You’ve explored the benefits, understood the scope, and gained insights into every aspect of construction, from foundations to finishes. Now, it’s time to transform that knowledge into tangible action. This isn’t just about downloading a document; it’s about unlocking a comprehensive resource that empowers you to build with confidence and precision.
Your Blueprint for Success Awaits
Our free 12×16 shed plans aren’t merely diagrams; they are a complete, step-by-step guide meticulously crafted to ensure your building experience is as smooth and rewarding as possible. When you download them, you’ll gain immediate access to:
- Detailed Schematics: Clear, easy-to-read drawings from multiple angles, including floor plans, elevations, and sectional views. These plans are designed for both novice builders and experienced DIY enthusiasts.
- Comprehensive Material List: A precise breakdown of every lumber piece, fastener, roofing shingle, and hardware item you’ll need. This list helps you avoid multiple trips to the hardware store and accurately budget your project. For instance, it specifies not just “lumber” but “2x4x8 pressure-treated lumber (15 pcs)” or “3/4″ CDX plywood (8 sheets).”
- Cut Lists & Dimensions: Exact measurements for every component, minimizing waste and ensuring accurate cuts. This is crucial for structural integrity and a professional finish.
- Tool Recommendations: A handy checklist of essential tools, differentiating between “must-have” and “nice-to-have” items, along with safety gear suggestions.
- Foundational Guidance: Clear instructions on various foundation types suitable for a 12×16 shed, helping you choose the best option for your soil conditions and local climate.
Beyond the Initial Download: Future-Proofing Your Project
Your access to these plans extends beyond the initial download. We are committed to continually enhancing our resources to support your building endeavors. While the core plans provide immediate value, consider the potential for future updates and complementary resources that can further refine your shed project. This might include:
- Customization Ideas: New layouts for shelving, workbench designs, or window placements.
- Advanced Techniques: Tips for specific siding applications, insulation methods, or advanced roofing practices.
- Community Insights: Access to frequently asked questions or expert advice derived from other builders using these very plans.
Don’t let this opportunity pass you by. Take the definitive step towards building the shed you’ve always envisioned. Stop dreaming and start building. Download your comprehensive free 12×16 shed plans with material list today and embark on your rewarding DIY journey!
Thank you for reading our guide about free 12×16 shed plans with material list.
Frequently Asked Questions
Why should I choose free 12×16 shed plans instead of buying a pre-built shed?
Choosing free 12×16 shed plans offers significant benefits beyond just cost savings. When you build your own shed, you can expect to save 30-50% compared to buying a professionally built or store-bought alternative, which can easily cost upwards of $5,000. Beyond the financial aspect, these plans provide unparalleled customization. You can adapt the design to fit your specific needs, such as adding extra windows, reinforcing walls for heavy tools, or incorporating a workbench. This allows you to create a durable, functional, and aesthetically pleasing storage solution precisely tailored to your requirements, something often lacking in pre-fabricated options.
Are these 12×16 shed plans suitable for beginners with no prior construction experience?
Yes, absolutely! The free 12×16 shed plans with material list are meticulously crafted to be accessible for all skill levels, including ambitious beginners. The instructions are broken down into clear, manageable steps with detailed diagrams and explanations guiding you through each phase, from laying the foundation to installing the roof. They even include tips on common pitfalls to help you avoid mistakes. The comprehensive material list is also a huge advantage for beginners, as it eliminates guesswork and ensures you purchase exactly what you need, minimizing waste and extra trips to the hardware store.
What kind of savings can I expect by building a 12×16 shed myself using these plans?
By building your own 12×16 shed using these free plans and sourcing your own materials, you can expect substantial cost savings, typically ranging from 30% to 50% compared to purchasing a pre-built shed. For instance, if a comparable pre-built shed might cost $5,000 or more, a DIY project could significantly reduce that expenditure. The exact savings will depend on the materials you choose and local pricing, but the efficiency of the provided material list helps in purchasing only what’s necessary, further contributing to your budget-friendliness.
What is included in the comprehensive material list mentioned in the plans?
The comprehensive material list included with the free 12×16 shed plans is designed to eliminate guesswork and simplify your purchasing process. It specifies exact quantities of all necessary components, ensuring you acquire everything you need for the project. For example, it details quantities for lumber (like framing studs, rafters, and flooring joists), roofing shingles, various fasteners (nails, screws, bolts), siding materials, and other essential items. This detailed breakdown saves you significant planning time and helps prevent multiple trips to the hardware store, making the building process smoother and more efficient.


