
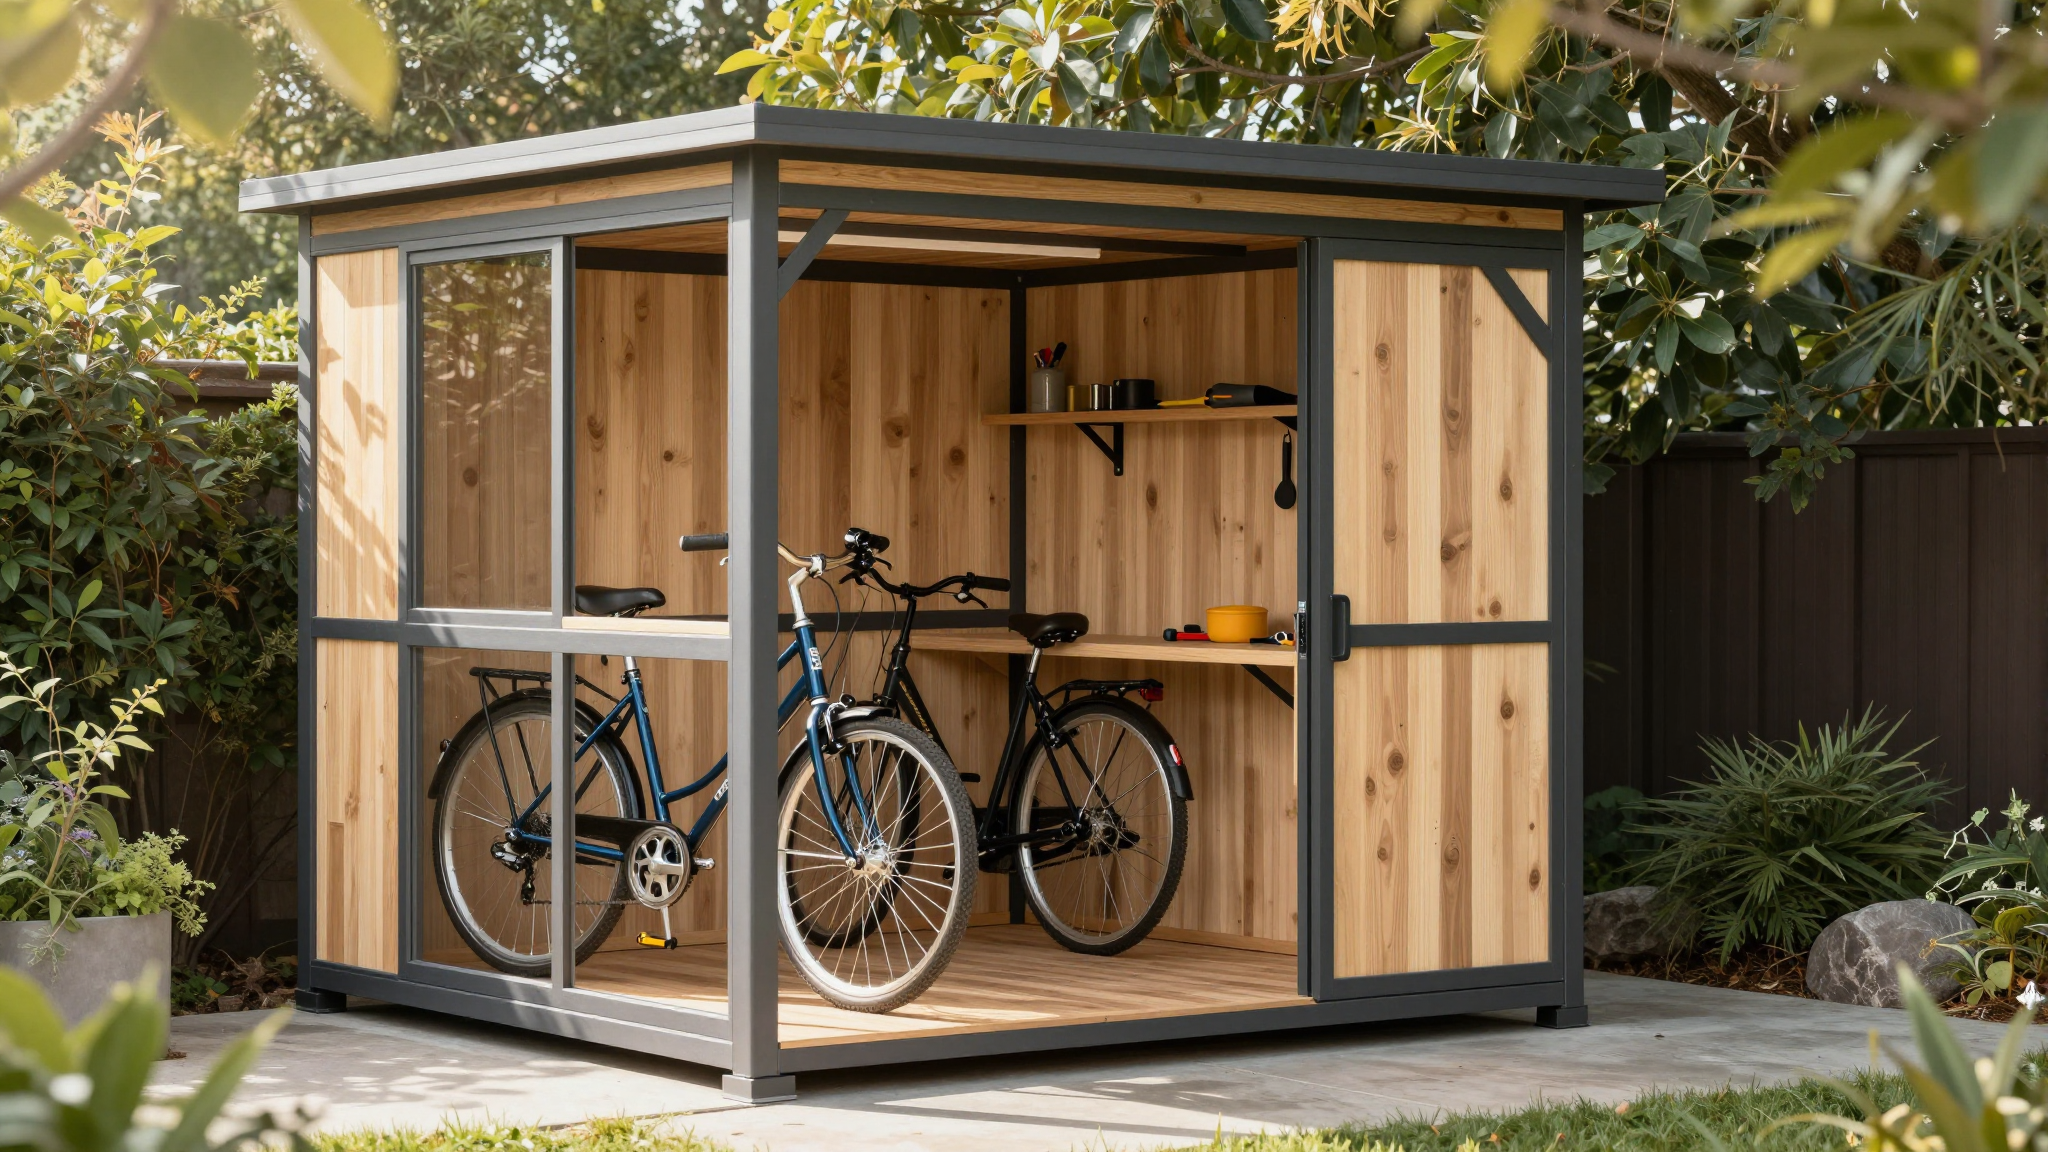
Are you tired of tripping over bikes in your garage or leaving them exposed to the elements? A DIY bike shed offers the perfect solution, providing secure, weather-protected storage while adding value and organization to your outdoor space. This comprehensive guide will walk you through everything you need to know to build your own custom bike shed, from choosing the right design to adding personalized touches. We’ll provide free, detailed plans, step-by-step instructions, and even interactive 3D models to help you visualize your project. Whether you’re a seasoned woodworker or a budding DIY enthusiast, our modular design approach ensures there’s an option for every skill level and budget. Get ready to transform your bike storage woes into a rewarding weekend project!
Why Build Your Own DIY Bike Shed? (Benefits & Considerations)
Building your own bike shed might seem like a significant undertaking, but the benefits often far outweigh the effort. This section explores the compelling reasons to embark on a DIY bike shed project, alongside crucial considerations to ensure your build is a success.
The Undeniable Advantages of a DIY Bike Shed
Opting to build your own bike shed offers a unique blend of practicality, personalization, and potential savings.
- Cost-Effectiveness: Pre-fabricated sheds, especially those designed specifically for bikes, can carry a hefty price tag. By building it yourself, you gain control over material selection and procurement. You can shop for deals, utilize reclaimed materials where appropriate, and completely eliminate labor costs. This often results in substantial savings, making a custom, high-quality storage solution more accessible.
- Tailored to Your Needs: This is perhaps the most significant advantage. Do you own a tandem, cargo bike, or an e-bike with specific charging requirements? Do you need integrated shelving for helmets, pumps, and tools, or a workbench for minor repairs? A DIY approach allows you to design a shed that perfectly accommodates your unique collection and usage patterns. Off-the-shelf options rarely offer this level of bespoke functionality.
- Enhanced Security: Protecting your valuable bikes from theft and vandalism is paramount. A custom-built shed can be constructed with robust materials, reinforced doors, and integrated locking mechanisms far superior to many mass-produced alternatives. You can choose heavy-duty hinges, hasps, and even incorporate ground anchors, significantly increasing resistance against forced entry.
- Aesthetic Integration: Unlike generic store-bought sheds, a DIY project empowers you to create a structure that complements your home and garden’s existing aesthetic. Choose materials, colors, and finishes that enhance your property’s curb appeal, turning a functional storage unit into an attractive garden feature rather than an eyesore.
- Bike Longevity and Protection: Exposure to the elements—rain, snow, harsh sunlight, and even persistent dampness—can accelerate wear and tear on your bikes. A dedicated, weather-tight shed protects your investment, extending the lifespan of components, reducing rust, and minimizing the need for frequent maintenance and costly repairs.
Key Considerations Before You Start
While the benefits are clear, a successful DIY project requires careful planning.
- Space Availability: Accurately measure the footprint you have available. Consider not just the shed’s dimensions but also clearance for doors to open fully, and access paths.
- Local Regulations: Before you even draw a single line, check your local zoning laws and building codes. Some municipalities have restrictions on shed size, height, placement, and even require permits, especially for larger structures. Ignoring these can lead to costly rework or fines.
- Bike Inventory: List every bike you intend to store, noting their dimensions (length, height, handlebar width). Also, consider any accessories like child seats or trailers. This will directly influence the shed’s required size and internal layout.
- Skill Level & Tools: Honestly assess your DIY skills and the tools you have access to. While many bike shed plans are beginner-friendly, some designs require more advanced carpentry or construction knowledge.
Embarking on a DIY bike shed project is a rewarding endeavor that provides a custom, secure, and aesthetically pleasing storage solution. To get started on designing your perfect storage space, explore a variety of free shed plans with material lists to find the ideal fit for your needs.
Choosing the Right DIY Bike Shed Plan: Factors to Consider
Choosing the right DIY bike shed plan is the cornerstone of a successful build. This crucial step involves evaluating your specific requirements and constraints to ensure your new storage solution perfectly aligns with your needs.
1. Size, Capacity, and Location Considerations
Before you even think about cutting wood, envision your shed’s purpose.
- How many bikes? This is fundamental. A single road bike needs less space than a family’s collection of mountain bikes, e-bikes, and kids’ cycles. Consider future needs – will you acquire more bikes?
- Beyond bikes: Will you store helmets, pumps, repair stands, tools, cycling apparel, or even lawn equipment? Ensure your plan accounts for all items.
- Vertical vs. Horizontal: If your yard is small, a taller, narrower shed with vertical bike racks can be a game-changer. Conversely, if you have ample space, a wider, lower profile might be aesthetically preferable.
- Site specifics: Measure your available space precisely. Consider obstructions like fences, trees, or house walls. Will the shed be freestanding or lean against an existing structure? Access is key – ensure enough room to open doors and maneuver bikes comfortably.
2. Material Choices, Durability, and Maintenance
The materials you select will dictate your shed’s longevity, appearance, and the effort required to maintain it.
- Wood: A popular choice for its natural look and workability.
- Treated Pine: Affordable and resistant to rot/insects, but requires regular sealing or painting.
- Cedar/Redwood: Naturally resistant to decay and pests, beautiful, but more expensive.
- Plywood (Exterior Grade): Often used for sheathing, needs good weatherproofing.
- Recommendation: Always use exterior-grade lumber and apply a quality primer, paint, or stain.
- Metal: Galvanized steel or aluminum sheds are highly durable, low-maintenance, and fire-resistant. They can be less customizable and may condense moisture if not properly insulated.
- Resin/Plastic: Lightweight, inexpensive, and generally maintenance-free. However, they can be less robust than wood or metal and may degrade over time due to UV exposure.
- Recycled/Reclaimed: Pallets or salvaged timber can be eco-friendly and budget-conscious, but require careful selection to ensure structural integrity and often more preparation.
- Tip: Factor in local climate. High humidity or heavy rainfall areas demand more robust weatherproofing.
3. Foundation Type and Design Style
A solid foundation is non-negotiable for a long-lasting shed.
- Concrete Slab: The most durable and permanent option, offering excellent stability and moisture barrier. Ideal for larger, heavier sheds.
- Gravel Base with Pavers/Skids: A good compromise for smaller to medium sheds. Provides drainage and a level surface.
- Treated Skids on Ground: Suitable for light, portable sheds, ensuring direct contact with soil is minimized. Requires level ground.
- Design Aesthetics:
- Lean-to: Space-saving, often built against a house or garage.
- Gable Roof: Classic shed look, good for shedding snow and rain.
- Pent Roof (Sloping): Modern, often used for smaller sheds or where height restrictions apply.
- Access: Consider front-opening doors, side doors, or even lift-up lids for easy bike retrieval.
By carefully weighing these factors, you can confidently select the perfect DIY storage shed plans that meet your needs, budget, and aesthetic preferences, setting the stage for a successful build.
Step-by-Step Guide: Building Your Modular Bike Shed (Foundation to Finish)
Building your custom bike shed is a rewarding project, and our modular approach makes it manageable for any DIY enthusiast. This step-by-step guide walks you through the essential phases, from preparing your site to putting on the finishing touches.
1. Foundation: The Bedrock of Your Shed
A sturdy foundation is paramount for the longevity and stability of your bike shed.
- Site Preparation: Begin by selecting a level spot. Clear any debris, vegetation, or rocks. For optimal drainage and to prevent rot, slightly elevate the shed.
- Foundation Options:
- Gravel Bed with Skids: A popular choice for its drainage and affordability. Excavate 4-6 inches, lay down landscaping fabric, and fill with compacted gravel. Place pressure-treated 4×4 skids directly on the gravel.
- Paving Slabs: Ideal for smaller sheds or if you prefer a solid, level surface. Prepare a gravel base as above, then lay paving slabs on a bed of sand, ensuring they are perfectly level.
- Concrete Slab: The most durable option, offering maximum stability. Requires more effort but provides a permanent, rodent-proof base.
- Tip: Always ensure your foundation is perfectly level and square using a spirit level and measuring tape. This prevents issues with framing later on.
2. Framing & Sheathing: Structure and Enclosure
With the foundation set, it’s time to raise the skeleton of your shed.
- Floor Frame: Assemble the floor joists and rim joists as per your plans, typically using pressure-treated lumber. Securely attach the floor decking (e.g., 3/4-inch exterior-grade plywood) to this frame. You can find more details on this in wood shed floor plans.
- Wall Frames: Our modular designs often involve pre-assembling wall panels flat on your foundation. Cut studs, top plates, and sole plates according to the cutting list. Use wood screws or nails to create each wall section.
- Raising Walls: Carefully raise each pre-assembled wall section into position on the floor frame. Anchor them securely to the floor and to adjacent walls using hurricane ties or corner braces for added stability. Ensure walls are plumb (vertically straight) with a level.
- Roof Frame: Construct the roof rafters or trusses. For a simple lean-to or gable roof, this involves cutting angled rafters and attaching them to the top plates. Install fascia boards along the roof edges.
- Sheathing: Cover the wall frames with your chosen exterior sheathing (e.g., OSB, plywood). For the roof, use exterior-grade plywood or OSB, ensuring proper overhangs.
3. Roofing, Cladding & Finishing Touches
The final stages bring your shed to life, protecting your bikes from the elements.
- Roofing: This is crucial for weatherproofing. Apply roofing felt or a synthetic underlayment over the roof sheathing. Install your chosen roofing material – asphalt shingles are common, but metal roofing or EPDM rubber offer excellent durability. Follow manufacturer instructions for proper overlap and sealing.
- Exterior Cladding: Attach your chosen siding material to the wall sheathing. Options include:
- Wood Siding: Shiplap, tongue-and-groove, or T1-11 plywood. Ensure proper overlap and apply exterior caulk where needed.
- Metal Panels: Durable and low-maintenance, often screwed directly into the studs.
- Composite Siding: Offers the look of wood with enhanced weather resistance.
- Doors and Windows: Install the shed door(s) and any windows. For a secure bike shed, consider a robust, solid core door with heavy-duty hinges and a high-security lock. Our plans include detailed instructions for building and installing custom doors.
- Trim and Paint: Add trim around doors, windows, and corners for a finished look. Apply exterior-grade paint or stain to protect the wood from UV rays and moisture, enhancing its lifespan.
For comprehensive measurements, detailed cutting lists, and interactive 3D models of each step, download our full DIY garden shed plans.
Customization & Advanced Features for Your Bike Shed
The true advantage of building your own bike shed lies in the freedom to tailor it precisely to your needs and aesthetic preferences. Moving beyond the basic structure, this is where your shed transforms from a simple storage unit into a specialized hub for your cycling passion.
Maximizing Internal Space & Functionality
Once your shed walls are up, the interior offers a blank canvas for organization. Consider these enhancements:
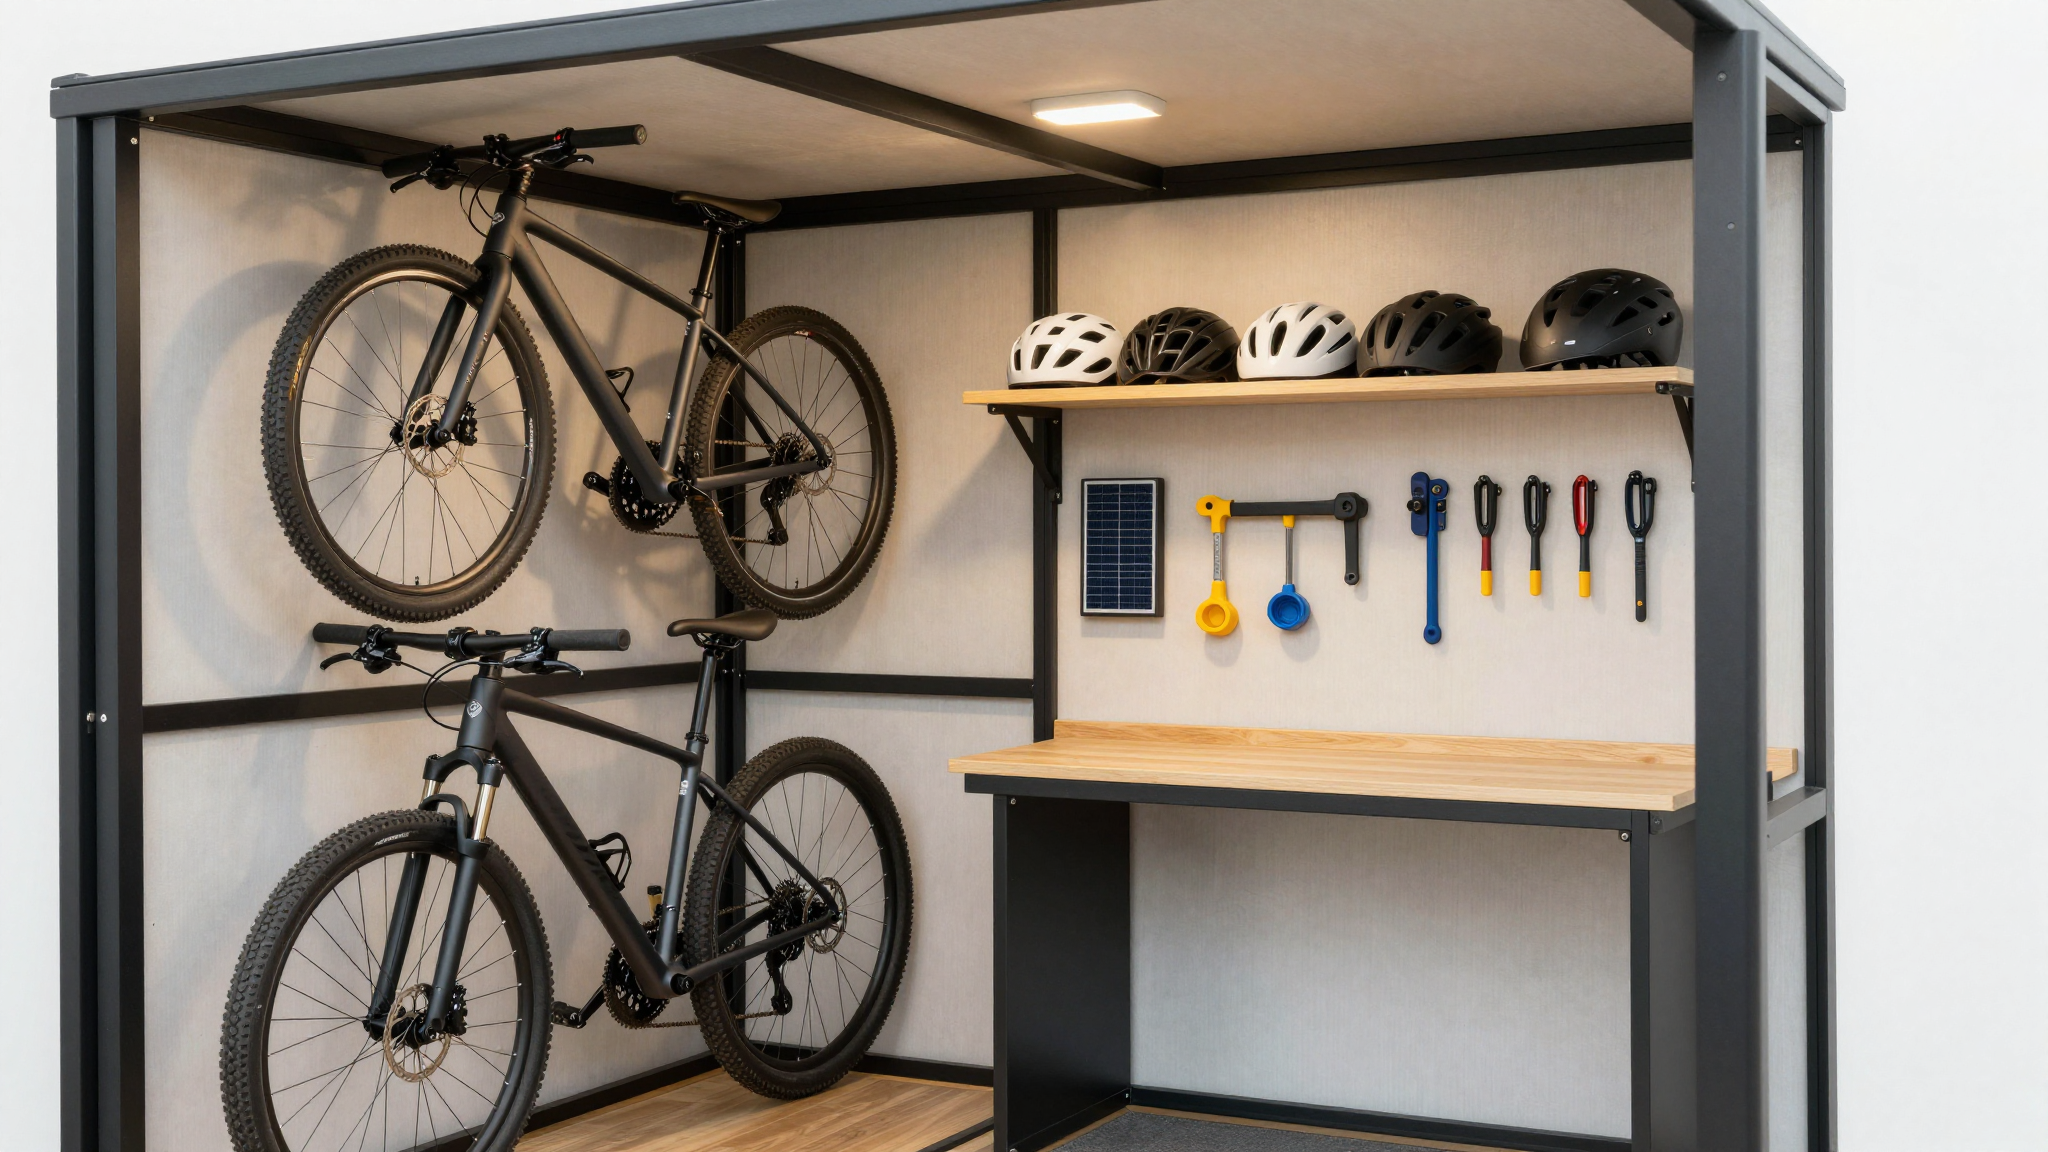
- Smart Storage Solutions:
- Hooks and Pegboards: Install heavy-duty hooks for helmets, jackets, and spare wheels. A pegboard system allows for flexible arrangement of tools, pumps, and cleaning supplies.
- Shelving Units: Add sturdy shelves for lubricants, repair kits, spare parts, and charging stations for e-bike batteries.
- Vertical Bike Racks: For smaller footprints, wall-mounted vertical racks are invaluable, allowing you to store multiple bikes without clutter.
- Small Workbench: A compact fold-down or fixed workbench with a vice can be a game-changer for minor repairs and maintenance.
- Integrated Power & Lighting:
- Solar Lighting: For an eco-friendly and wire-free solution, install solar-powered LED lights. They’re easy to fit and provide ample light for evening access.
- Electrical Outlets: If you need to charge e-bikes, power tools, or run a small compressor, consider having a qualified electrician install outdoor-rated wiring and outlets. Always prioritize safety and local electrical codes.
- Ventilation: Essential for preventing moisture buildup, mold, and rust on your bikes. Install simple vents near the roofline, or a small louvered window, to ensure good airflow.
Aesthetic Upgrades & Eco-Friendly Additions
Beyond practicality, customize your shed’s exterior to complement your garden or home.
- Green Roof: A living roof, planted with sedum or other low-maintenance plants, not only looks beautiful but also provides insulation, reduces rainwater runoff, and supports local biodiversity.
- Rainwater Harvesting: Connect a guttering system to a rain barrel. This collects water for garden use, reducing your water bill and environmental impact.
- Finishing Touches: Paint or stain your shed in a color that harmonizes with your outdoor space. Add decorative hardware, window boxes, or even a small porch light to enhance its curb appeal.
- Security Features: Reinforce doors with heavy-duty hinges and padlocks. Consider motion-sensor lights or a simple alarm system for added peace of mind.
Before you even start cutting wood, visualize your ideal setup. Our interactive 3D models allow you to experiment with different customization options, from internal layouts to exterior finishes, ensuring every detail is perfect for your needs. For comprehensive guidance on building and customizing your ideal storage, explore our detailed DIY Garden Shed Plans.
Maintenance, Security & Maximizing Your Bike Shed’s Lifespan
To ensure your bespoke DIY bike shed provides years of reliable service and robust protection for your valuable cycles, proactive maintenance and comprehensive security are paramount.
Sustaining Your Shed: Essential Maintenance Tips
Regular upkeep is crucial for maximizing your shed’s lifespan. Consider these points for long-term durability:
- Annual Exterior Inspection: Dedicate time once a year to thoroughly inspect your shed’s exterior. Look for:
- Wood Rot & Cracks: Pay close attention to corners, baseplates, and areas exposed to consistent moisture. Address small cracks with exterior wood filler before they worsen.
- Peeling Paint/Stain: If your shed is painted or stained, reapply a fresh coat every 2-3 years, or as needed, to protect the wood from UV degradation and moisture ingress. This acts as a critical barrier.
- Roofing Integrity: Check for loose, cracked, or missing shingles, tears in felt, or any signs of water pooling. Promptly repair any damage to prevent leaks that can compromise the shed’s structure and contents. For detailed roofing repair guides, check manufacturer resources for your specific material.
- Clearance and Ventilation:
- Keep it Clear: Ensure the area around your shed is free of overgrown vegetation, debris, and leaf litter. This promotes airflow, reduces moisture buildup, and deters pests like termites and rodents.
- Ventilation Checks: If your shed has vents, ensure they are unobstructed. Good airflow prevents condensation, which can lead to mold and rot inside the shed.
- Hardware and Fasteners: Periodically check all hinges, latches, and fasteners for rust or looseness. Tighten or replace as necessary to maintain structural integrity and security.
Fortifying Your Fortress: Advanced Security Measures
Protecting your bikes from theft requires a multi-layered approach. Implement these security enhancements:
- Robust Door & Locking System:
- Solid Construction: Start with a sturdy door, ideally made from solid wood or reinforced plywood.
- Reinforcement: Consider adding anti-jemmy strips around the door frame to prevent forced entry with pry tools. These metal strips make it significantly harder to lever the door open.
- High-Quality Lock: Invest in a heavy-duty, weather-resistant padlock (e.g., a closed shackle padlock) or a multi-point locking system for superior security.
- Internal Anchoring for Bikes: This is perhaps the most critical step.
- Ground or Wall Anchors: Install robust ground anchors (bolted securely into a concrete foundation) or heavy-duty wall anchors (into studs or concrete blocks) inside your shed. For larger storage needs, consider exploring affordable large shed plans.
- Secure Chaining: Use a high-quality, thick chain (e.g., hardened steel with a protective sleeve) and a strong D-lock or U-lock to secure your bikes directly to these anchors. This prevents thieves from simply walking away with your bikes, even if they breach the shed.
- Deterrents & Visibility:
- Motion-Sensor Lighting: Install an external motion-activated light near the shed. This can startle potential intruders and draw attention.
- Battery-Powered Alarm: A simple battery-operated shed alarm with a loud siren can act as a significant deterrent.
- Strategic Placement: If possible, position your shed in a visible location from your home or a neighbor’s property, making it less attractive to opportunistic thieves who prefer secluded spots.
By dedicating a little time to both maintenance and security, you’re not just protecting your bikes; you’re safeguarding your investment and extending the functional life of your custom-built storage solution. For more detailed guides and customizable designs, explore our comprehensive DIY Garden Shed Plans to perfectly match your needs and enhance your outdoor space.
Building your own DIY bike shed is a rewarding project that offers numerous benefits, from cost savings and customizability to enhanced security and prolonged bike lifespan. By following our comprehensive plans and step-by-step instructions, even those with basic to intermediate DIY skills can create a functional and attractive storage solution. Remember to consider your specific needs, choose appropriate materials, and don’t shy away from adding personal touches to make your shed truly unique. With proper maintenance and security measures, your custom bike shed will provide years of reliable service, keeping your bikes safe, dry, and ready for your next adventure. Dive into our free 10×12 shed plans and start building your dream bike storage today!


