
DIY Metal Shed Plans: Build Your Durable Storage Solution
Embarking on a DIY project can be incredibly rewarding, and building your own storage solution with DIY metal shed plans is no exception. This comprehensive guide equips you with the knowledge and practical steps needed to construct a durable, cost-effective metal shed right in your backyard. Whether you’re a seasoned DIY enthusiast or a homeowner tackling a new challenge, our expert advice walks you through every stage. This includes selecting the perfect plans to the final touches of customization. We’ll address common hurdles, offer smart solutions, and highlight the numerous benefits of choosing metal for your shed. Get ready to transform your outdoor space and gain valuable storage with a project you can be proud of.
What are DIY Metal Shed Plans and Why Choose Them?
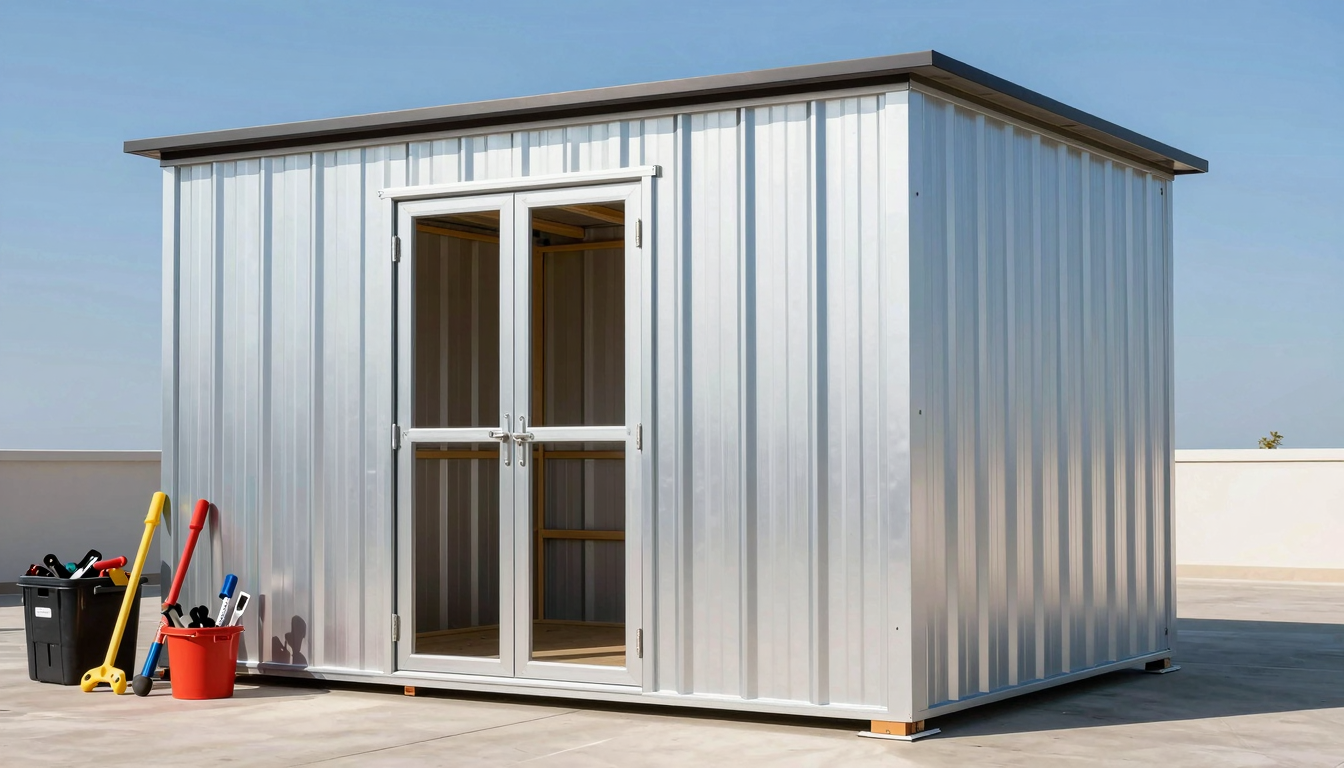
DIY metal shed plans are comprehensive blueprints and instructional guides. They empower homeowners to construct a storage shed primarily using metal components. These plans typically detail everything from foundation requirements to roof assembly. For example, they might specify gauge steel for framing or aluminum for sheeting. They also include crucial elements like material lists, precise cutting guides, and step-by-step assembly instructions. This detailed guidance allows individuals to build a robust and customized storage solution. Moreover, it often comes at a fraction of the cost of pre-built options or professional installation.
Why Opt for DIY Metal Shed Plans?
Choosing DIY metal shed plans offers numerous compelling advantages.
- Exceptional Durability and Longevity: Metal sheds are renowned for their strength. Unlike wood, metal is immune to common issues such as rot, insect infestations (like termites), and significant weather damage. Consequently, they demand minimal maintenance over their extensive lifespan. Furthermore, metal structures offer superior fire resistance, providing enhanced protection for your stored valuables.
- Cost-Effectiveness: Building your own metal shed can lead to substantial savings. By sourcing materials directly and investing your own labor, you effectively cut out contractor fees and pre-fabrication markups. This makes a high-quality storage solution more accessible budget-wise.
- Enhanced Security: Metal sheds inherently provide excellent security. Their solid construction, often combined with robust locking mechanisms, acts as a strong deterrent against theft and vandalism, safeguarding your tools and equipment.
- Versatility and Customization: Metal’s inherent properties allow for incredible design flexibility. You can find or adapt metal shed plans to perfectly suit your specific needs and available space. Whether you require a compact utility shed or a sprawling workshop, there’s a metal shed design to fit. This adaptability ensures your storage solution is truly tailored.
In conclusion, opting for metal shed plans provides a powerful blend of durability, affordability, security, and customization. Ready to start building your own robust storage solution? Explore a wide range of DIY metal shed plans today.
Choosing the Right DIY Metal Shed Plans for Your Needs
Selecting the right DIY metal shed plans is crucial for a successful build. This choice impacts everything from functionality to your overall satisfaction. Therefore, careful consideration of your specific needs is essential before you even pick up a tool.
Defining Your Shed’s Purpose and Size
Firstly, consider the primary use of your metal shed. Will it be a simple storage unit for garden tools, a dedicated workshop, or perhaps a place to store recreational vehicles? For example, a workshop requires more headroom and potentially electrical access, whereas a basic storage shed can be more compact. Moreover, the intended purpose directly influences the necessary size. Measure the largest items you plan to store. Is it a riding lawnmower, a workbench, or several bicycles? This will help determine the shed’s footprint and height. For instance, a 10×12 shed offers ample space for most homeowner storage needs, while a smaller 6×8 might suffice for basic gardening tools.
Next, accurately assess the available space in your yard. Measure the exact area where you intend to build. Remember to account for setbacks from property lines, fences, and existing structures, as these are often dictated by local zoning regulations. In addition, always check with your local municipality regarding building permits and any specific requirements for outbuildings. Ignoring these can lead to costly delays or even necessitate dismantling your shed. For more information on local building codes, you can consult resources like Wikipedia’s article on building codes.
Budget, Skill Level, and Design Considerations
Your budget significantly influences the type of metal shed plans you can choose. More elaborate designs with features like insulation, multiple windows, or specialized roofing will naturally incur higher material costs. For instance, galvanized steel is generally more affordable than aluminum, but aluminum offers superior corrosion resistance. Consider the long-term value versus the initial outlay.
Furthermore, honestly evaluate your DIY skill level. Some plans are designed for beginners, featuring straightforward construction and basic tools. Conversely, others require more advanced building techniques and specialized equipment like welding gear. Look for plans that offer clear, step-by-step instructions and detailed diagrams. Many reputable providers offer plans with varying difficulty levels. For example, a simple gable roof design is often easier for a novice than a complex gambrel roof.
Consider other design elements as well. What type of foundation will best suit your climate and soil conditions? Options include concrete slabs, gravel pads, or treated timber skids. Moreover, think about the roofing style – gable, lean-to, or flat – and its impact on drainage and aesthetics. Wall construction, whether single-skin or insulated, also plays a role in the shed’s durability and suitability for different uses. Researching different types of metal sheds and reading reviews of various DIY metal shed plans can provide invaluable insights to help you make an informed decision.
Essential Tools and Materials for Your DIY Metal Shed Project
Before embarking on your DIY metal shed project, a thorough understanding of the necessary tools and materials is paramount. Your specific DIY metal shed plans will detail exact requirements, however, here’s a general guide to help you prepare. Gathering everything in advance ensures a smooth and efficient build, minimizing delays and frustration.
Essential Tools for Your Metal Shed Project
Having the right tools significantly impacts the ease and quality of your shed construction. Consider these categories:
- Measuring and Marking Tools: Accuracy is crucial for metalwork. Therefore, a reliable tape measure (at least 25 feet), a carpenter’s square, and a spirit level (both short and long) are indispensable. A chalk line will help you mark precise long cuts, and a permanent marker is great for marking metal.
- Cutting Tools: Metal requires specialized cutting tools. For instance, an angle grinder fitted with metal cutting discs is excellent for larger cuts and trimming. Manual or electric metal shears are ideal for thinner gauge sheeting. For any framing components, a chop saw with a metal-cutting blade will ensure clean, straight cuts.
- Drilling and Fastening Tools: A cordless drill/driver is a workhorse, essential for drilling pilot holes and driving screws. An impact driver provides more torque for stubborn fasteners. You’ll need various metal-specific drill bits, nut drivers, and wrenches. A rivet gun is also frequently required for attaching metal panels.
- Safety Gear: Never compromise on safety. Consequently, heavy-duty work gloves, impact-resistant safety glasses, and ear protection are non-negotiable. A dust mask is important when cutting or grinding metal, and sturdy work boots protect your feet.
Foundation Tools and Other Necessities
If your plans call for a concrete slab foundation, you’ll also need tools like a shovel, rake, wheelbarrow, and possibly a concrete mixer. A tamper will help compact the base layer. Investing in quality tools not only makes the job easier but also contributes to a more professional finish. Consider renting specialized tools if you don’t anticipate frequent use.
Key Materials for Your Durable Storage Solution
Your DIY metal shed plans will outline specific materials, but here’s a general list:
- Framing Materials: Typically, this includes galvanized steel studs, C-channels, or square tubing. Galvanized steel offers superior corrosion resistance, vital for outdoor structures.
- Sheeting: Corrugated or flat metal panels (e.g., galvanized steel or aluminum) form the walls and roof. The gauge of the metal determines its strength and durability.
- Fasteners: You’ll need a range of self-tapping screws, rivets, bolts, nuts, and washers. Crucially, all fasteners must be corrosion-resistant to match the lifespan of your metal shed.
- Foundation Materials: For a concrete slab, expect to need gravel, concrete mix, rebar for reinforcement, and a vapor barrier.
- Roofing Accessories: Ridge caps, trim pieces, and sealants are necessary to ensure a weather-tight roof. Flashing is also used around openings and seams.
- Doors and Windows: Depending on your design, you might use pre-fabricated metal shed doors or window kits. Alternatively, you could source materials to build custom frames.
- Weatherproofing: High-quality silicone sealant and weather stripping are essential for sealing joints and preventing water intrusion.
Always double-check your specific list of materials against your chosen DIY metal shed plans for exact quantities and specifications.
Step-by-Step Guide to Building with DIY Metal Shed Plans
Building your own metal shed with DIY metal shed plans transforms raw materials into a functional storage solution. This guide outlines the essential steps, ensuring a smooth construction process. Remember, referring constantly to your specific plans is crucial for accuracy.
Preparing Your Site and Foundation
First, proper site preparation is paramount. Clear the chosen area of all debris, rocks, and vegetation. Level the ground thoroughly; this prevents future structural issues. Consider the drainage. Water should flow away from your shed site, not towards it. Next, lay your chosen foundation. A gravel base offers good drainage and is relatively easy to install. However, for maximum stability and a solid floor, a concrete slab is often preferred. Follow your metal shed plans meticulously for foundation dimensions and material specifications. This initial phase sets the stage for the entire project.
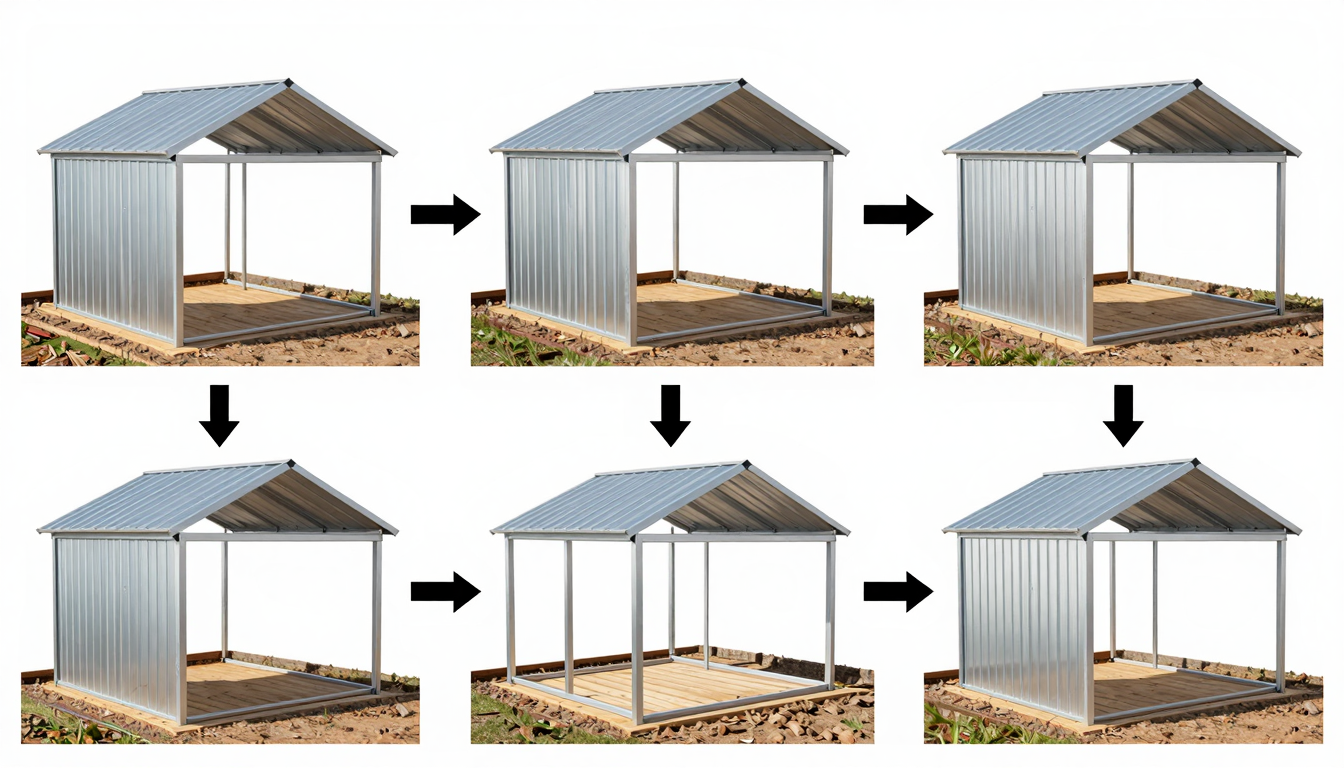
Assembling the Frame and Walls
Once your foundation is ready, begin assembling the base frame. Cut the metal components according to your plans. Lay them out on the prepared foundation. Securely join these pieces using self-tapping screws, bolts, or rivets. Ensure all corners are perfectly square and the frame is level before proceeding. Subsequently, erect the wall frames. Attach vertical studs to the base frame. These must be perfectly plumb. Connect the tops of these studs with horizontal top plates. This creates the robust wall frames. Brace them as necessary for stability during construction.
Next, install the wall panels. Start from a corner and carefully attach the metal sheeting to the erected frames. Overlap panels as specified in your plans. Use appropriate fasteners. As you go, cut out openings for doors and windows. Reinforce these edges for added durability.
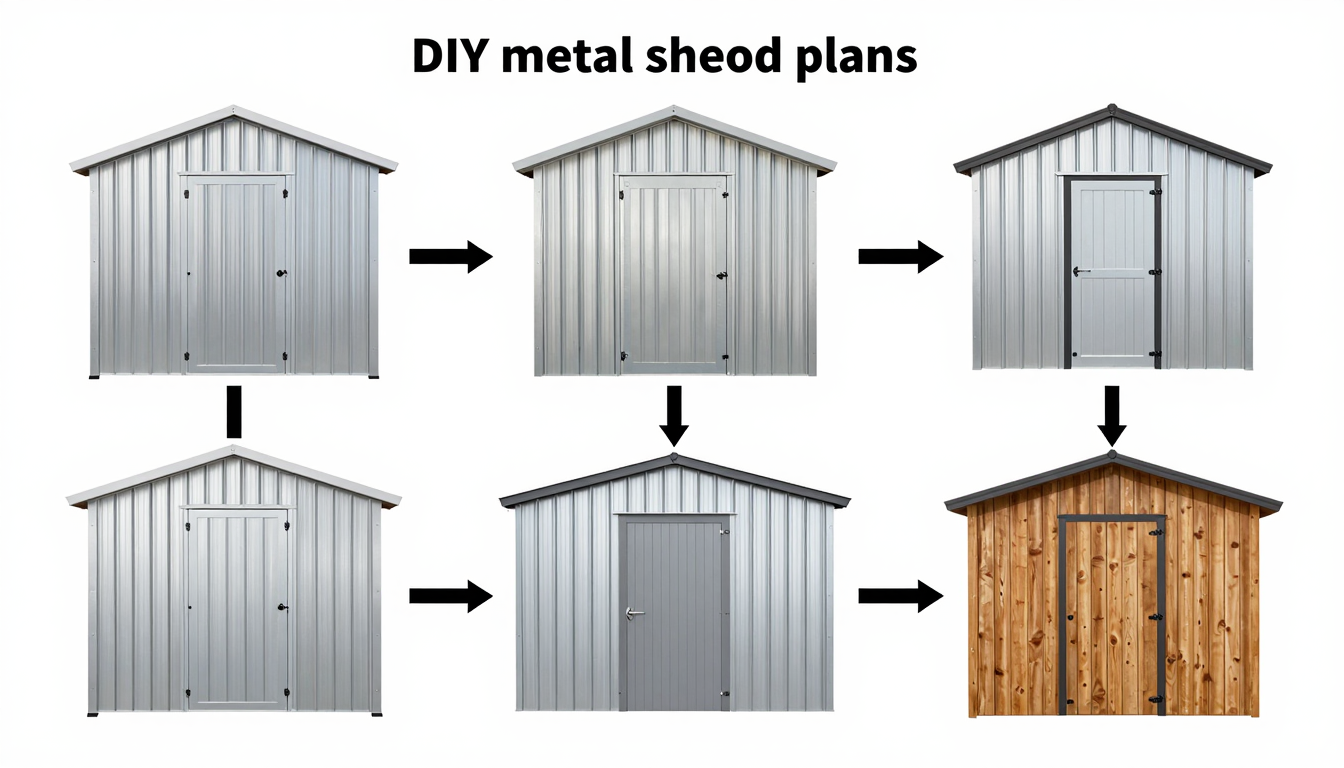
Roof Construction and Finishing Touches
The roof is the next critical component. Assemble the roof trusses or rafters on the ground if your plans allow. Then, lift and secure them to the top plates of the wall frames. Ensure the correct pitch for efficient water drainage. Attach the metal roof panels, starting from the eaves and working towards the ridge. Overlap and fasten them securely. Apply sealants as recommended by your plans. Install ridge caps, eave trim, and any necessary flashing to prevent water intrusion. This ensures your shed remains watertight.
Finally, install doors and windows. Mount their frames into the openings. Hang the doors with hinges. Install the windows, checking they operate smoothly and seal properly. For the finishing touches, apply silicone sealant to all seams, joints, and around windows and doors. This weatherproofing step is vital. Securely anchor the shed to its foundation. This prevents uplift in strong winds, a critical safety measure. Consider adding interior features like shelving or workbenches. These enhance the shed’s functionality. For comprehensive guidance and detailed instructions, explore a variety of DIY metal shed plans tailored to your specific needs.
Customizing and Maintaining Your DIY Metal Shed
Once your DIY metal shed stands proudly, the journey shifts from construction to personalization and preservation. Customizing your shed not only boosts its utility but also ensures it complements your property’s aesthetic. Moreover, regular maintenance, though minimal for metal structures, is crucial for guaranteeing its long-term durability.
Elevating Your Shed’s Functionality and Style
Transforming your basic metal shell into a highly functional and attractive space is straightforward. For instance, shelving and storage solutions are paramount. Consider installing heavy-duty shelving units to maximize vertical space. Pegboards are excellent for organizing tools, while overhead racks can store seasonal items. In addition, modular systems offer flexibility as your storage needs evolve. Improving lighting is another key upgrade. Interior battery-powered LED lights provide ample illumination without complex wiring. For security and convenience, exterior motion-sensor lights are highly recommended.
Furthermore, proper ventilation is vital. Adding vents or a small exhaust fan prevents condensation, especially if you store chemicals or use the shed as a workshop. Consequently, this helps protect your stored items from moisture damage. If temperature control is a concern, insulation is a wise investment. Rigid foam insulation in walls and ceilings maintains a more stable interior climate, which is ideal for workspaces or sensitive equipment. While a concrete slab is robust, enhancing the flooring with rubber mats, vinyl, or an epoxy coating improves comfort, aesthetics, and ease of cleaning. Finally, consider exterior touches like painting with rust-inhibiting metal paint to match your home or adding decorative trim. These details significantly boost curb appeal.
Ensuring Longevity: Essential Maintenance Practices
Maintaining your DIY metal shed is generally simple, yet consistent effort will greatly extend its lifespan. Firstly, regular cleaning is essential. Periodically wash the exterior with mild soap and water to remove dirt, grime, and environmental buildup. This prevents corrosion and preserves its appearance. Secondly, annual inspections are critical. Check for any loose fasteners, damaged panels, or early signs of rust. Address these issues promptly by tightening screws, replacing compromised sections, or applying rust-inhibiting primer and paint.
Moreover, pay close attention to sealants. Inspect all caulking around seams, windows, and doors to ensure they remain watertight. Reapply sealants as needed to prevent moisture intrusion. If your shed incorporates gutters, clear them regularly of leaves and debris. This ensures proper water drainage and prevents overflow that could damage the shed’s exterior or foundation. Lastly, routinely check the foundation for stability, cracks, or erosion. Addressing foundation issues early prevents more significant structural problems down the line. By following these simple steps, your DIY metal shed, built with meticulous attention to your DIY metal shed plans, will remain a valuable and durable asset for decades to come.


