
Welcome to our comprehensive guide about diy plans for storage shed.
Introduction: Why Build Your Own Storage Shed?
Are you tired of clutter overflowing from your garage, attic, or even your living space? Perhaps you dream of a dedicated workshop, a secure place for gardening tools, or a cozy hideaway in your backyard. Building your own storage shed offers a fantastic solution. Moreover, it’s a rewarding project that provides numerous benefits beyond just extra space.
Why DIY Your Storage Shed?
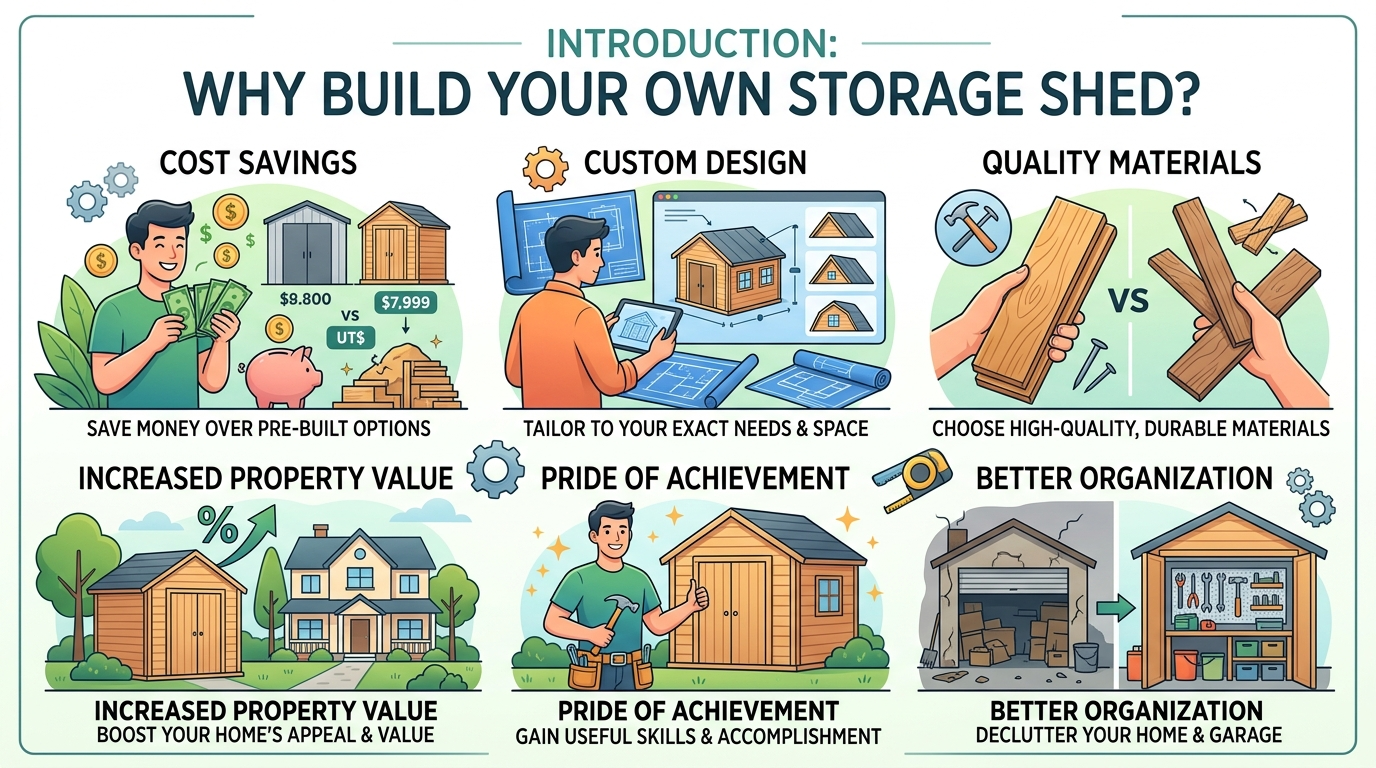
Opting for a do-it-yourself approach to building a storage shed presents compelling advantages. Firstly, significant cost savings are often the primary motivator. Purchasing a pre-built shed can be surprisingly expensive, especially for larger or custom sizes. By building it yourself, you save on labor costs. For example, a comparable shed built by a contractor might cost thousands more than a DIY project. Secondly, unparalleled customization allows you to design a shed that perfectly fits your specific needs and aesthetic preferences. Do you need extra-tall walls for long tools? Want a specific window placement for natural light? Building it yourself means you dictate every detail. Consequently, your shed will be truly unique.
Furthermore, the satisfaction of creating something with your own hands is immense. There’s a profound sense of accomplishment in seeing your vision transform into a tangible structure. This project also offers a valuable opportunity to learn new skills, from basic carpentry to roofing techniques. In addition, you gain a deeper understanding of construction principles. Many homeowners find the process empowering.
Our comprehensive guide provides everything you need to embark on this journey. We offer free diy plans for storage shed projects, complete with material lists. You will also find expert tips and essential resources. Moreover, we cover everything from foundation options to maintenance advice. This ensures your shed stands strong for years to come. Ultimately, building your own storage shed is a smart investment in your home and your lifestyle.
Choosing the Right DIY Plans for Storage Shed for Your Needs
Selecting the ideal diy plans for storage shed is crucial for a successful project. Consider several factors before committing to a design. This initial planning prevents frustration and ensures your shed meets its intended purpose.
Determining Your Shed’s Purpose and Size
First, define what you’ll store or do in your shed. This dictates its necessary size and type. For instance, a small tool shed (6×8 feet) is perfect for gardening implements. Conversely, a large workshop (12×20 feet) requires ample space for benches and power tools. Think about future needs as well. Will you accumulate more items over time? A garden shed might house lawnmowers and seasonal decorations. An office shed, moreover, needs enough room for a desk and chair, plus insulation. Therefore, clearly outlining its function is your first step.
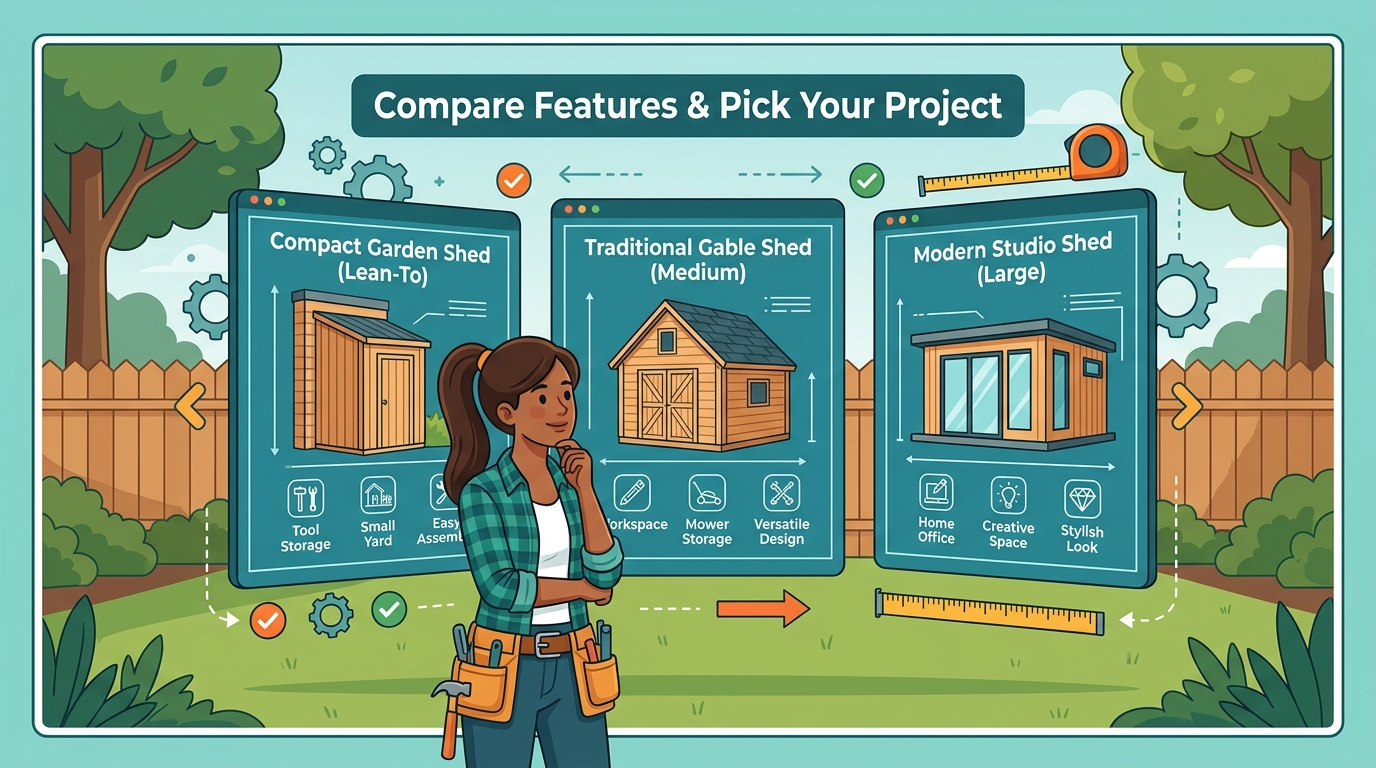
Choosing the Right Shed Style
Next, explore various shed styles. Each offers distinct advantages and aesthetics.
- Gable Shed: This is the most common design. It features a traditional inverted V-shaped roof. Gable sheds offer good headroom and are relatively easy to build. They blend well with most home styles.
- Lean-to Shed: This simple design attaches directly to an existing structure. It’s ideal for small spaces. Lean-to sheds are often economical to build.
- Gambrel Shed (Barn Style): Characterized by a two-sloped roof on each side, a gambrel shed maximizes overhead storage. This style is often chosen for its classic barn look. It provides excellent loft space.
- Modern Shed: These sheds feature clean lines and minimalist designs. They often incorporate large windows. Modern sheds are perfect for contemporary homes.
Material Considerations and Environmental Factors for Your DIY Storage Shed
The materials you choose significantly impact durability and maintenance. Wood, for example, offers a classic look. It’s also highly customizable. However, it requires regular sealing or painting. Metal sheds are durable and low-maintenance. They are also resistant to pests. Plastic sheds are lightweight and easy to assemble. They resist rot and rust. Consider your local climate as well. In snowy regions, a steeper roof pitch helps shed snow. High winds necessitate robust anchoring. Furthermore, ensure the chosen materials can withstand your specific environmental challenges.
Legal Requirements and Your Skill Level
Always check local zoning laws and building codes. Permits are often required for structures exceeding a certain size. Failing to obtain permits can lead to fines or demolition. Therefore, research these regulations early in the process. Finally, assess your DIY experience. Some diy plans for storage shed are beginner-friendly. They often involve simpler cuts and fewer complex joints. More elaborate designs, however, demand advanced carpentry skills. Be realistic about your capabilities. Choosing a plan that matches your skill level prevents frustration and ensures a quality build.
Free Shed Plans with Material List: Our Top Picks
Finding the perfect diy plans for storage shed doesn’t have to break the bank. Many excellent resources offer free, detailed blueprints, often complete with material lists. These plans save you money and simplify the building process. We’ve curated some top picks across various sizes and styles to help you get started.
Our Top Free Shed Plan Picks
Small & Compact Shed Plans: Ideal for limited spaces or basic storage needs, these plans are perfect for beginners.
- 6×8 Utility Shed: This common size is great for garden tools, a lawnmower, or seasonal items. Many free plans for this dimension offer a simple gable roof design, making construction straightforward. Furthermore, they often include cut lists for all lumber and plywood.
- 8×10 Lean-to Shed: A lean-to design is space-efficient as it can be built against an existing wall or fence. Consequently, it requires fewer materials for one side. These plans are excellent for firewood, bikes, or smaller outdoor equipment. Look for options that provide step-by-step instructions and clear diagrams.
Medium-Sized & Versatile Shed Plans: These offer more storage capacity without overwhelming your yard. They are suitable for workshops or larger equipment.
- 8×12 Gable Shed: This is a popular choice for its balance of size and ease of construction. Many free 8×12 shed plans PDF downloads are available, often detailing framing, roofing, and door installation. In addition, they typically include a comprehensive material list.
- 10×12 Gambrel (Barn-Style) Shed: If you need overhead storage, a gambrel roof provides significantly more headroom. These plans are slightly more complex but offer substantial storage volume. Therefore, they are great for those needing a small workshop or ample garden tool storage.
Specialty Shed Plans and Accessing Resources
Large & Multi-Purpose Shed Plans: For serious storage or a dedicated workspace, larger sheds are the answer.
- 12×16 Workshop Shed: These plans often feature larger doors, multiple windows, and even suggestions for interior shelving. Free shed plans 12×24 with material list are also available if you need even more space, providing blueprints for ambitious projects. However, be prepared for a larger material and time commitment.
- Firewood Sheds: Specifically designed for ventilation and wood protection, these plans are crucial for anyone burning wood. They often feature open sides or slatted designs. Moreover, they are generally simpler to build than fully enclosed sheds.
Accessing Free Plans:
- Many reputable DIY websites and lumber suppliers offer free downloadable plans.
- Look for “free shed plans with materials list PDF” for the most convenient format.
- Always review the plans thoroughly before starting. Ensure they match your skill level and local building codes.
When selecting your diy plans for storage shed, consider your exact storage needs and available space. A detailed material list is invaluable; it helps you budget accurately and avoid multiple trips to the hardware store.
Essential Tools and Materials for Your Shed Project
Building your own storage shed is a rewarding project. However, careful preparation is key to success. Gathering the right tools and materials upfront saves time and prevents frustration. This section outlines the essential items you’ll need for your DIY shed project.
Essential Tools for Shed Construction
Firstly, a good set of tools is indispensable. You’ll need both hand tools and power tools.
Basic Hand Tools:
- Tape Measure: Crucial for accurate measurements. For example, a 25-foot tape measure is ideal.
- Hammer: For driving nails. A claw hammer is versatile for both driving and removing nails.
- Level: Ensures your shed is plumb and level. A 2-foot and a 4-foot level are useful.
- Utility Knife: For cutting roofing felt or shingles.
- Pencil and Chalk Line: For marking cuts and straight lines.
- Framing Square and Speed Square: Essential for ensuring 90-degree angles.
Power Tools:
- Circular Saw: For cutting lumber quickly and precisely. A cordless model offers greater flexibility.
- Cordless Drill/Driver: For drilling pilot holes and driving screws. Therefore, a good battery life is important.
- Impact Driver: Excellent for driving long screws into tough materials.
- Jigsaw: Useful for making curved cuts or intricate openings.
- Nail Gun (Optional but Recommended): Significantly speeds up framing and sheeting. Both pneumatic and cordless options are available.
- Miter Saw (Optional): Provides highly accurate crosscuts for framing.
Safety First: Protective Gear for Building Your Storage Shed
Safety should always be your top priority. Consequently, investing in appropriate protective gear is non-negotiable.
- Safety Glasses/Goggles: Protect your eyes from debris. Always wear them when operating power tools.
- Work Gloves: Protect your hands from splinters, cuts, and abrasions.
- Hearing Protection: Muffs or earplugs are vital when using loud power tools like circular saws or nail guns.
- Dust Mask/Respirator: Protects your lungs from sawdust. This is especially important when cutting treated lumber.
- Sturdy Work Boots: Protect your feet from falling objects and nails.
Key Materials for Your DIY Shed
Understanding the materials required is just as important as having the right tools. Your specific diy plans for storage shed will detail exact quantities. However, here’s a general overview.
- Lumber: The backbone of your shed.
- Framing Lumber: Typically 2x4s or 2x6s for walls, floor joists, and roof rafters. Pressure-treated lumber is recommended for any wood in contact with the ground.
- Plywood/OSB: For flooring, wall sheathing, and roof decking. For example, 3/4-inch plywood is common for flooring, while 1/2-inch OSB works well for walls and roof.
- Roofing Materials: Protects your shed from the elements.
- Roofing Felt: An underlayment layer.
- Shingles: Asphalt shingles are a popular and cost-effective choice. Metal roofing is another durable option.
- Drip Edge: Channels water away from the fascia.
- Fasteners: Holds everything together.
- Nails: Common sizes include 16d for framing, 8d for sheathing.
- Screws: Exterior-grade screws are excellent for structural connections and decking. Deck screws are particularly good for flooring.
- Hurricane Ties/Connectors: For securing roof rafters to wall plates, especially in windy areas.
- Other Essential Materials:
- Siding: Options include T1-11 plywood, vinyl, or wood clapboard.
- Windows and Doors: Purchase pre-built units or build your own.
- Paint or Stain: For protecting and finishing the exterior.
- Caulk/Sealant: For sealing gaps and preventing water intrusion.
By having these essential tools and materials ready, you’ll be well-prepared to tackle your shed-building project confidently. This preparation ensures a smoother construction process and a durable, functional storage shed. Therefore, take the time to gather everything before you begin.
Foundation Options for Your DIY Storage Shed
A solid foundation is crucial for any lasting structure, and your DIY storage shed is no exception. It prevents moisture damage, keeps your shed level, and ensures stability. Consequently, choosing the right foundation for your project is a vital first step. Consider your local climate, soil type, and budget when making this decision.
Popular Foundation Types for DIY Sheds
1. Skid Foundation (Runners)
This is perhaps the simplest and most common foundation for smaller sheds. Skids are essentially pressure-treated timbers that sit directly on the ground. The shed frame then attaches to these skids.
- Pros:
- Cost-effective: It uses fewer materials, thus saving money.
- Easy to install: Requires minimal site preparation.
- Portable: You can move your shed later if needed.
- Good for uneven terrain: Skids can be shimmed to level the shed.
- Cons:
- Less stable: Not ideal for very large or heavy sheds.
- Moisture risk: Direct ground contact can lead to rot over time.
- Pest access: Animals might nest underneath.
- Best for: Small to medium-sized sheds, temporary structures, or areas with good drainage. For example, a 6×8 garden shed often uses this method.
Tip: Always use pressure-treated lumber for skids to resist rot and insects. Furthermore, place them on a gravel bed for improved drainage.
2. Concrete Block Foundation (Pier Foundation)
This foundation uses individual concrete blocks placed at strategic points under the shed’s perimeter and joists. Therefore, it lifts the shed off the ground, promoting airflow.
- Pros:
- Improved airflow: Reduces moisture buildup and rot risk.
- Relatively inexpensive: More affordable than a full concrete slab.
- Adjustable: You can easily level the blocks.
- Pest deterrent: Makes it harder for rodents to nest.
- Cons:
- More labor-intensive: Requires precise leveling of each block.
- Less sturdy: Not as robust as a full slab for very heavy items.
- Can shift: Blocks might settle over time, especially in unstable soil.
- Best for: Medium-sized sheds, areas with moderate moisture, or where you need to elevate the structure. Many diy plans for storage shed incorporate this option.
Advanced Foundation Options for Your DIY Storage Shed
3. Gravel Pad Foundation
A gravel pad involves digging out a shallow area, laying down landscape fabric, and filling it with compacted gravel. The shed then sits directly on this level, well-draining surface.
- Pros:
- Excellent drainage: Prevents water accumulation under the shed.
- Stable: Provides a firm, level base.
- Relatively easy: Simpler than pouring concrete.
- Pest control: Less appealing to burrowing animals.
- Cons:
- Requires excavation: More site preparation than skids or blocks.
- Material cost: Gravel can be expensive, especially for large pads.
- Not portable: Difficult to move once established.
- Best for: Most shed sizes, especially in areas with heavy rainfall or poor drainage. This option offers a great balance of stability and moisture protection.
4. Concrete Slab Foundation
This is the most durable and permanent foundation. It involves pouring a reinforced concrete slab directly on a prepared base. Consequently, it creates a solid, watertight floor for your shed.
- Pros:
- Maximum durability: Extremely strong and long-lasting.
- Pest and moisture proof: No direct ground contact, sealed base.
- Requires no floor framing: The slab acts as the shed floor.
- Adds property value: A permanent, sturdy addition.
- Cons:
- Most expensive: High material and labor costs.
- Complex installation: Requires specialized tools and skills.
- Permanent: Cannot be moved once poured.
- Requires permits: Often needs local building permits.
- Best for: Large, heavy-duty sheds, workshops, or sheds storing valuable equipment. If you’re looking for the ultimate in stability for your diy plans for storage shed, a concrete slab is ideal.
Recommendation: Always check local building codes before starting your foundation work. Some areas have specific requirements for shed foundations, especially for larger structures.
Step-by-Step Guide to Building Your Storage Shed
Preparing Your Site and Laying the Foundation
Before any construction begins, proper site preparation is crucial. First, clear the chosen area of all debris, rocks, and vegetation. Next, level the ground meticulously; a slight slope for drainage is often beneficial. For example, you might use a string level and stakes to ensure an even surface. After leveling, you’ll need to lay your chosen foundation. If you opted for a concrete slab, you’ll pour and cure it at this stage. Alternatively, for a skid or pier foundation, position the skids or concrete blocks accurately according to your diy plans for storage shed. Consequently, a solid foundation prevents future structural issues and ensures longevity. Always double-check measurements before committing to any permanent steps.
Framing the Floor and Walls for Your DIY Storage Shed
With the foundation in place, the next step involves framing the floor. This typically entails cutting and assembling floor joists, then securing them to the perimeter boards. Use galvanized screws or nails for superior corrosion resistance. Moreover, ensure all corners are square using a framing square; this precision is vital for the entire structure. Once the floor frame is complete, you’ll attach the plywood decking. Next, move on to constructing the walls. This process generally involves:
- Cutting studs: Measure and cut vertical studs, horizontal top plates, and bottom plates.
- Assembling panels: Build each wall panel flat on the floor, securing studs between the top and bottom plates.
- Adding headers: Install headers above future door and window openings to bear the load.
In addition, brace the walls temporarily once they are stood upright to prevent them from toppling.
Building the Roof Structure and Finishing Touches
After the walls are securely erected, the roof framing begins. This usually involves cutting and installing rafters or trusses. For example, many diy plans for storage shed will specify a gable roof, requiring precise angle cuts for the rafters. Secure these to the top plates of the walls and connect them at the ridge. Afterward, sheath the roof with plywood or OSB panels, leaving a small gap between sheets for expansion. Consequently, this creates a solid surface for your roofing material.
Finally, it’s time for the finishing touches.
- Install doors and windows: Carefully fit and secure pre-hung doors and windows into their respective openings. Ensure they operate smoothly.
- Apply siding: Choose your desired siding material, such as T1-11, vinyl, or wood clapboard, and attach it to the wall studs. Overlap panels correctly to prevent water intrusion.
- Add trim: Install fascia boards, corner trim, and door/window trim for a polished look.
- Paint or stain: Protect your shed from the elements by applying a high-quality exterior paint or stain. This step significantly extends the life of your shed.
Therefore, meticulous attention to these final details will not only enhance the aesthetic appeal but also the durability of your new storage shed.
Cost Breakdown: What to Expect When Building a Shed
Building your own storage shed can be a rewarding project, but understanding the financial commitment is crucial. A detailed cost breakdown helps prevent surprises. The total expense varies significantly based on several factors.
Material Costs: The Core Investment for Your DIY Storage Shed
The largest portion of your budget will typically go towards materials. For example, a basic 8×10 foot shed might cost $800-$1,500 for lumber, roofing, siding, and fasteners. Larger sheds, like a 10×12 or 12×16 foot structure, can easily push material costs to $1,500-$3,000+. Specialty materials also impact the price. For instance, using cedar siding instead of treated plywood will increase expenses. Similarly, metal roofing is often more durable but pricier than asphalt shingles. Therefore, carefully reviewing your chosen diy plans for storage shed and their material lists is essential.
Tooling Up: Rent or Buy?
Consider your tool inventory. If you already own a circular saw, drill, and measuring tape, your tool costs will be minimal. However, for more specialized equipment like a miter saw or pneumatic nail gun, you have options. Renting these tools for a weekend project can cost $50-$150 per day. Alternatively, purchasing them might be worthwhile if you anticipate future DIY projects. A basic cordless drill kit, for example, typically runs $100-$200. Assess your long-term needs before making a decision.
Unforeseen Expenses and Smart Budgeting
Don’t overlook potential hidden costs. Transportation of materials, for instance, can add $50-$200 depending on distance and order size. Local building permits, if required, might cost $25-$100. Additionally, consider finishes like paint, stains, or shelving. These can easily add $100-$300 to your budget. Moreover, soil conditions might necessitate more expensive foundation solutions. Therefore, always allocate an extra 10-15% of your total estimated cost as a contingency fund. This buffer helps cover unexpected expenses and keeps your project on track. By planning carefully, you can build your dream shed without breaking the bank.
Maintaining Your Storage Shed for Longevity
A well-maintained storage shed lasts for decades. Regular care protects your investment. Furthermore, it ensures your shed remains a functional and attractive asset.
Essential Maintenance Practices for Your DIY Shed
Weatherproofing and Sealing
Weather is a primary enemy of any outdoor structure. Therefore, proper weatherproofing is crucial.
- Inspect roofing annually: Look for missing or damaged shingles. Repair these promptly. Additionally, check for any cracks or holes.
- Seal cracks and gaps: Use exterior-grade caulk to seal around windows, doors, and corner joints. This prevents water intrusion.
- Apply protective finishes: Reapply paint or stain every few years. This protects wood from UV damage and moisture. For example, a good quality exterior paint can add years to your shed’s life.
- Check flashing: Ensure all flashing around the roofline and any vents is secure. Loose flashing can lead to leaks.
Regular Inspections and Repairs
Proactive inspections catch small problems before they become major issues. Consequently, this saves time and money.
- Examine the foundation: Look for any shifts, cracks, or signs of settling. Address these immediately.
- Check for rot or decay: Pay particular attention to the bottom plates and any areas prone to moisture. Replace damaged wood sections promptly.
- Inspect hardware: Tighten loose screws, hinges, and latches. Lubricate moving parts to ensure smooth operation.
- Clean gutters: If your shed has gutters, keep them free of leaves and debris. Clogged gutters can cause water to overflow and damage the shed’s walls or foundation.
Pest Control and Optimal Interior Organization for Your DIY Storage Shed
Pests and clutter can also shorten your shed’s lifespan. Implementing effective strategies helps.
Pest Control Tips
Pests can cause significant damage to your shed’s structure and contents. Therefore, prevention is key.
- Seal entry points: Close off any gaps or holes in the walls, foundation, or around pipes. Mice, for instance, can squeeze through very small openings.
- Keep vegetation clear: Trim bushes and trees away from the shed walls and roof. This reduces easy access for rodents and insects.
- Store food properly: Never store open food containers in your shed. This attracts pests.
- Consider natural deterrents: Peppermint oil or cedar blocks can deter some insects and rodents.
Interior Organization for Optimal Storage
A well-organized interior prevents damage to your belongings and the shed itself. Moreover, it makes using your shed more enjoyable.
- Use shelving and hooks: Maximize vertical space. This keeps items off the floor, reducing moisture exposure and creating more usable area.
- Store items in containers: Use clear, airtight bins for smaller items. This protects them from dust, moisture, and pests.
- Avoid overcrowding: Do not overfill your shed. Good air circulation prevents mold and mildew growth.
- Label everything: Clearly label containers and shelves. This makes finding tools and materials much easier.
By following these maintenance tips, your diy plans for storage shed will provide reliable service for many years.
Customer Success Stories and Testimonials
Real-Life Shed Success: Our Community’s Achievements with DIY Plans for Storage Shed
There’s nothing more inspiring than seeing a vision come to life. Here, we celebrate the incredible achievements of individuals who used our diy plans for storage shed to build their perfect outdoor structures. These stories highlight the versatility of our guides and the satisfaction of a job well done. For example, Sarah from Oregon, a first-time builder, successfully constructed a charming 8×10 garden shed. She followed our detailed instructions, and consequently, her shed now stores all her gardening tools neatly. Her experience proves that even novices can achieve professional results with the right guidance. Moreover, Mark, a handyman from Texas, adapted our 10×12 utility shed plans to create a dedicated workshop. He appreciated the clear material lists and step-by-step instructions. He noted that the flexibility of the plans allowed him to customize shelving and workbench space.
These testimonials are a testament to the clarity and comprehensiveness of our resources. Building your own shed can seem daunting at first. However, our users consistently report feeling empowered and confident throughout the process.
Inspiring Builds and Builder Insights
Many of our community members have shared their completed projects, offering valuable insights. For instance, David from Florida built a lean-to shed against his garage. He emphasized the importance of double-checking measurements, especially when dealing with existing structures. His shed now provides convenient storage for his lawnmower and seasonal decorations. In addition, Emily, a busy mom, constructed a small 6×8 shed for her children’s outdoor toys. She found our “Free Shed Plans with Material List” particularly helpful. She mentioned that having a complete list upfront saved her numerous trips to the hardware store.
- Tip from Sarah: “Don’t be afraid to ask for help! My neighbor offered an extra pair of hands for lifting the roof trusses, which was a huge help.”
- Recommendation from Mark: “Always pre-drill pilot holes for screws, especially near the edges of boards, to prevent splitting.”
- Best Practice from David: “Invest in good quality tools. They make the job safer and more efficient.”
These stories are just a glimpse into the thriving community of DIY shed builders. They showcase not only the finished products but also the personal growth and satisfaction gained from tackling such a project. Moreover, seeing these diverse applications of our diy plans for storage shed encourages others to embark on their own building journey. Consequently, our community continues to grow, sharing tips and celebrating each other’s successes.
Frequently Asked Questions About DIY Shed Building
Common Questions Answered for Your DIY Shed Project
How long does it typically take to build a DIY storage shed?
Building a DIY storage shed can vary significantly in duration. For instance, a small 6×8 utility shed might take a dedicated individual or a pair of helpers a weekend (16-24 hours of work) to complete. However, a larger 10×12 shed with more complex features, such as windows or a specific roofing style, could easily extend to several weekends or even a full week of consistent effort. Your skill level, the complexity of the chosen diy plans for storage shed, and the number of people assisting will all influence this timeline. Therefore, always factor in extra time for unexpected challenges or weather delays.
Do I need a building permit for my new storage shed?
In most areas, yes, a building permit is often required for sheds. The specific regulations, however, vary widely by municipality and even by neighborhood. Typically, sheds exceeding a certain size (e.g., 100 or 120 square feet) or those with permanent foundations almost always require a permit. For example, a small 4×6 lean-to shed might be exempt, whereas a 12×16 gambrel shed will definitely need one. It is crucial to check with your local zoning department or building authority before you begin any construction. Failing to secure a permit can lead to fines, demolition orders, or difficulties when selling your property.
Permits, Ease of Build, and Beginner-Friendly Options for DIY Plans for Storage Shed
What is the easiest type of shed to build for a beginner?
For beginners, a simple gable or lean-to shed is generally the easiest to construct. These designs feature straightforward rooflines and minimal complex cuts. For example, a basic 8×8 gable shed with a standard door and no windows offers a great learning experience without overwhelming tasks. Furthermore, many free shed plans, particularly those designed for smaller structures, prioritize simplicity. Look for plans that include:
- Clear, step-by-step instructions: These are vital for those new to carpentry.
- Minimal cutting angles: Straight cuts are much easier than complex bevels.
- Common lumber sizes: Using readily available materials simplifies your shopping and construction.
Consequently, selecting a design that avoids intricate framing or advanced roofing techniques will significantly boost a beginner’s confidence and success.
Can a complete beginner successfully build a storage shed?
Absolutely! Many complete beginners have successfully built their own storage sheds. The key to success lies in careful planning and choosing the right project. Firstly, select simple diy plans for storage shed that are specifically labeled as “beginner-friendly.” Secondly, dedicate time to understanding each step before you start. Moreover, consider watching online tutorials or videos that demonstrate specific techniques like framing or roofing. Finally, don’t be afraid to ask for help from friends or family who have some construction experience. Starting with a smaller shed, such as a 6×8, allows you to gain confidence and skills for future projects.
Where can I find reliable free shed plans with a materials list?
There are numerous reputable sources for free shed plans that often include comprehensive materials lists. Many woodworking and DIY websites offer free downloads. For example, sites like Tuff Shed (for ideas, not free plans), Ana White, or even some lumberyard websites frequently provide detailed blueprints. When searching, look for plans that specify:
- Detailed cut lists: This saves you time and reduces waste.
- Hardware requirements: Knowing what screws, nails, and connectors you need upfront is very helpful.
- Clear dimensions and diagrams: Visual aids are essential for accurate construction.
Therefore, thoroughly reviewing the plan’s completeness before committing is highly recommended to ensure you have all the necessary information.
Conclusion: Start Building Your Dream Shed Today!
The journey to building your own storage shed culminates here. You’ve explored the benefits, understood the planning process, and gathered insights into construction. Now, it’s time to transform those ideas into a tangible asset for your home. Building a shed is more than just a construction project; it’s an investment in organization, property value, and personal satisfaction.
Reaping the Rewards of Your DIY Project
Consider the numerous advantages you gain from a DIY storage shed. First, you achieve unparalleled customization. For instance, if you need extra-tall walls for storing kayaks, you can design them. Second, you save a significant amount of money compared to purchasing a pre-built shed. This can often be hundreds, if not thousands, of dollars. Moreover, the sense of accomplishment you’ll feel when stepping back to admire your handiwork is truly priceless. Many DIY builders report increased confidence and a desire to tackle more home improvement projects. For example, one builder shared how their shed project inspired them to build a new deck. Consequently, your new shed will provide a dedicated space for tools, gardening equipment, or even an outdoor workshop, decluttering your garage and home.
Final Tips for a Successful Build
As you embark on this exciting endeavor, keep a few final recommendations in mind.
- Double-Check Everything: Before cutting, always measure twice. This simple practice prevents costly mistakes and wasted materials. For example, ensure your foundation measurements perfectly match your chosen diy plans for storage shed.
- Safety First: Always wear appropriate personal protective equipment (PPE). This includes safety glasses, gloves, and ear protection. Remember, a safe builder is an effective builder.
- Don’t Rush: Take your time with each step. Rushing can lead to errors and frustration. Therefore, establish a realistic timeline for your project.
- Seek Help When Needed: Don’t hesitate to ask a friend or family member for an extra set of hands, especially when lifting heavy components like wall sections. In addition, online forums and communities offer a wealth of advice from experienced builders.
Building your dream shed is an achievable goal. With the right resources, a clear plan, and a bit of determination, you can create a durable and functional structure that serves your needs for years to come. Consequently, you’ll enjoy a more organized home and a renewed sense of pride in your DIY capabilities. Are you ready to take the next step and bring your vision to life? Get started. See the offer.
Thank you for reading our guide about diy plans for storage shed.
Frequently Asked Questions
Why should I consider building my own storage shed instead of buying a pre-built one?
Building your own storage shed offers several significant advantages. Firstly, it allows for substantial cost savings by eliminating labor costs associated with pre-built options. Secondly, DIY building provides unparalleled customization, enabling you to design a shed that perfectly fits your specific needs and aesthetic preferences, from dimensions to window placement. Furthermore, it offers immense personal satisfaction from creating something with your own hands and provides a valuable opportunity to learn new carpentry and construction skills.
What is the most important first step when choosing DIY plans for a storage shed?
The most important first step is to determine your shed’s purpose and the necessary size. Clearly define what you intend to store or do in the shed. For example, a small 6×8 foot shed might suffice for gardening tools, while a larger 12×20 foot structure would be needed for a workshop with power tools. Considering future needs also helps ensure your shed remains functional over time. This initial planning prevents frustration and ensures the shed meets its intended purpose effectively.
What kind of benefits can I expect from building a storage shed myself?
Beyond solving clutter issues, building your own storage shed offers numerous benefits. You can achieve significant cost savings compared to purchasing a pre-built shed, as you save on labor. You also get complete customization, allowing you to tailor the shed’s size, design, and features to your exact requirements. The project provides a profound sense of accomplishment and teaches valuable new skills in carpentry and construction. Ultimately, it’s a smart investment that adds practical space and value to your home and lifestyle.
Does this guide provide resources for someone new to DIY shed building?
Yes, the comprehensive guide is designed to support both novices and experienced builders. It offers everything you need to embark on your shed-building journey, including free DIY plans for storage shed projects, complete with detailed material lists. Additionally, it provides expert tips, essential resources, and covers every step from choosing foundation options to maintenance advice, ensuring your shed stands strong for years to come. The goal is to empower users to successfully build their dream shed.


