
Embarking on a DIY storage shed project begins with a solid plan for storage shed. Whether you’re a seasoned builder or picking up a hammer for the first time, having a detailed blueprint is the cornerstone of a successful and satisfying build. A well-thought-out plan not only guides you through each step of construction but also helps you visualize the final product, ensuring it meets your specific needs for storage, aesthetics, and functionality. This comprehensive guide is designed to be your ultimate resource, providing you with everything you need to know, from selecting the perfect small shed design plans to the final nail. We’ll walk you through the entire process, offering expert advice, practical tips, and resources to help you construct a durable and attractive storage solution that adds value to your home.
What is a Plan for Storage Shed and Why Do You Need One?
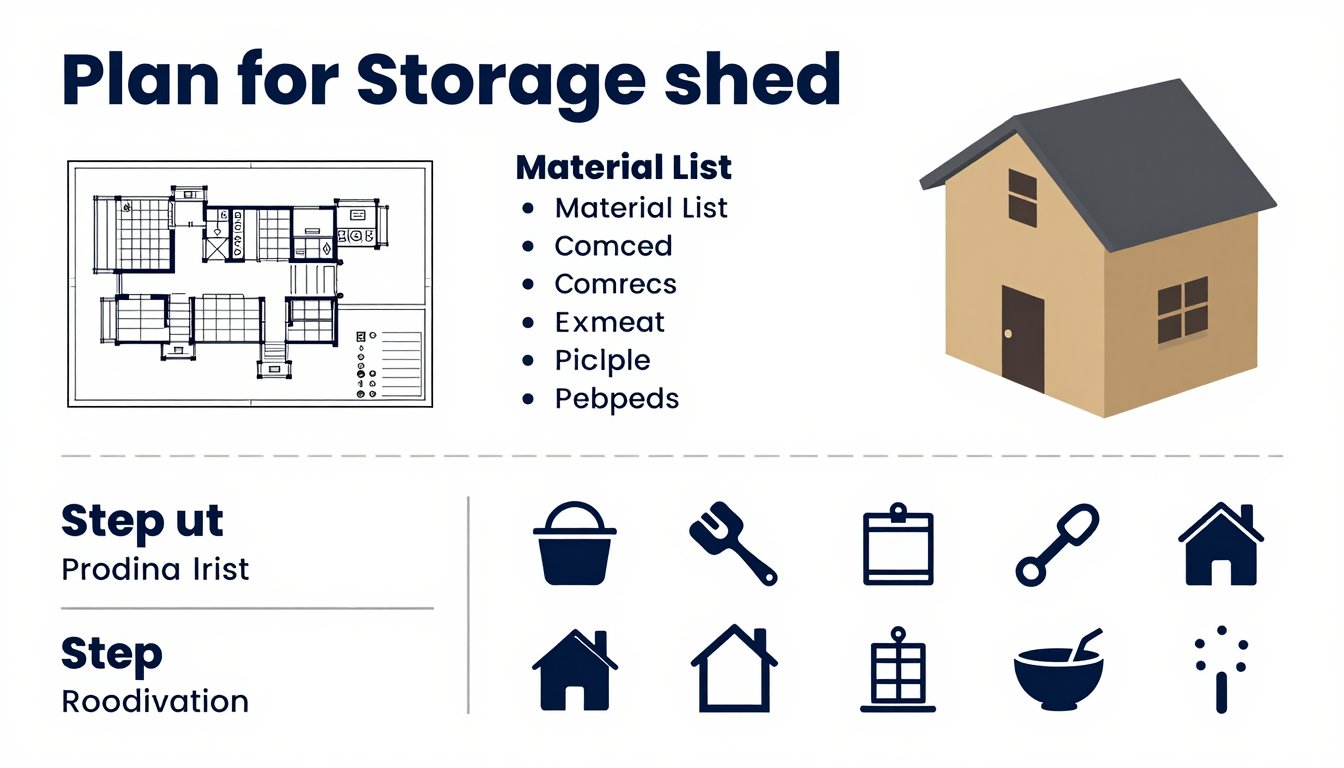
A plan for storage shed is far more than a simple sketch; it’s the architectural blueprint and strategic roadmap for your entire DIY construction project. Essentially, it translates your vision into actionable steps. This comprehensive guide includes detailed drawings, precise material lists, cutting diagrams, and step-by-step instructions. Without a well-defined plan, you risk costly errors, material waste, and a finished shed that falls short of your expectations. Our goal is to be your ultimate one-stop resource, offering everything from free plan downloads to premium designs, alongside expert advice.
Why a Plan for Storage Shed is Indispensable
Investing in a good plan for storage shed is the most crucial first step. It transforms a potentially daunting task into a manageable and enjoyable endeavor. Here’s why it’s non-negotiable:
- Clarity and Direction: A detailed plan eliminates guesswork. For example, it specifies exact measurements for each cut and the order of assembly. Consequently, this provides immense confidence, especially for first-time builders, and significantly reduces frustration.
- Budget Control: Comprehensive material lists are a cornerstone of any good plan. Therefore, you can accurately estimate costs before purchasing. This prevents unexpected expenses and allows for smarter procurement decisions on lumber, roofing, and hardware. We even provide affiliate links to recommended tools and materials to help you get the best deals.
- Time Efficiency: With a clear sequence of steps, you can work much more efficiently. This minimizes downtime and avoids backtracking, which ultimately speeds up the entire construction process. Moreover, knowing exactly what comes next saves valuable time.
- Safety and Structural Integrity: Plans often incorporate crucial safety recommendations and structural considerations. For instance, they might detail proper foundation techniques or bracing requirements. This ensures your shed is not only functional but also safe, stable, and built to last.
- Compliance with Regulations: Many plans are designed with common building codes and structural integrity in mind. As a result, using a well-vetted plan helps you construct a shed that meets local regulations, preventing potential issues down the line.
- Foundation for Customization: Even if you start with a standard plan, it provides a solid foundation. You can easily adapt dimensions, add windows, or alter roofing styles once you understand the basic structure. For more unique designs, consider our premium plans, which offer advanced features and customization options.
Ready to start building your dream shed? Explore our extensive collection of plans, including free downloads and exclusive premium designs, to find the perfect plan for storage shed that fits your needs and skill level.
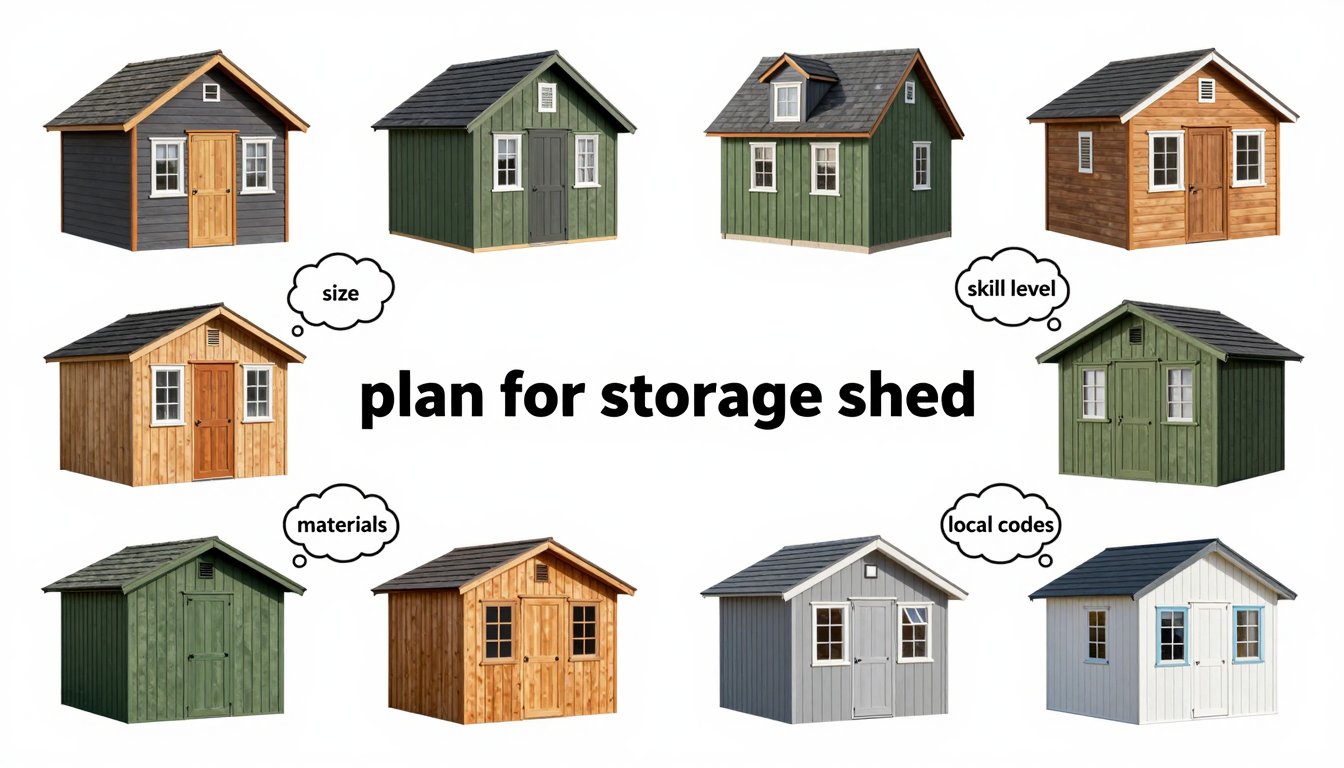
Choosing the Right Plan for Storage Shed: Factors to Consider
Selecting the ideal plan for storage shed is crucial for a successful DIY project. This decision impacts functionality, aesthetics, and overall cost. Therefore, careful consideration of several factors is essential.
Assessing Your Storage Needs and Desired Functionality
First, consider what you intend to store. Will it be garden tools, a lawnmower, bicycles, or seasonal decorations? Measure your largest items to ensure they fit. In addition, think about future needs; a small shed might suffice now, but will it be adequate in five years? For example, if you plan to acquire more gardening equipment, choose a slightly larger design. Moreover, define the shed’s primary purpose. Is it solely for storage, or will it double as a workshop, potting shed, or even a small home office? This objective dictates the required layout and features, such as windows for natural light or a sturdy workbench.
Matching Design to Your Home and Skill Level
The shed’s design and style should complement your existing home and landscaping. Consider styles like gable, gambrel, lean-to, or modern flat-roof designs. For instance, a rustic wooden shed might perfectly suit a farmhouse-style home. Aesthetics play a significant role; do you prefer a classic, contemporary, or traditional look? Our diverse range of plans offers various options. Furthermore, evaluate your DIY skill level. Beginners should seek plans labeled “easy” or “beginner-friendly,” which typically feature straightforward cuts and minimal complex joinery. Conversely, intermediate or advanced builders might tackle more intricate designs, larger structures, or custom features like built-in shelving or a ramp. Many premium plans offer detailed instructions suitable for various skill sets.
Material Choices and Site Considerations
Material selection greatly influences durability and maintenance. Wood, such as pine or cedar, is common, versatile, and aesthetically pleasing. Treated lumber, for example, offers enhanced resistance to rot and insects. Alternatively, metal or vinyl sheds are low-maintenance but often less customizable. Consider the long-term investment; high-quality materials might cost more upfront but save on maintenance and repairs. In addition, carefully assess your chosen site. Measure your yard accurately to ensure the shed won’t obstruct pathways or views. Ensure there’s enough space around the shed for construction and future access. Good drainage is also critical to prevent moisture issues, thereby extending the shed’s lifespan.
Navigating Local Regulations and HOA Rules
Before purchasing any materials, always check with your local municipality for building codes and permit requirements. These regulations often specify maximum shed size, height, setbacks from property lines, and foundation types. For example, a 10×12 shed might require a permit, while a smaller 6×8 shed might not. Ignoring these rules can lead to costly fines or forced demolition. If you live in a community with a Homeowners Association (HOA), review their specific guidelines for outbuildings. They may have restrictions on materials, colors, or overall design. Therefore, understanding these rules beforehand helps you choose a compliant plan for storage shed, preventing potential headaches down the line.
Essential Tools and Materials for Your Storage Shed Project
Building your own storage shed is a rewarding project. However, success hinges on having the right tools and materials. Proper preparation ensures safety, efficiency, and a high-quality finished product. While our comprehensive plan for storage shed documents include detailed lists, here’s a general overview to get you started.
Essential Tools for a Smooth Build
Having the correct tools makes all the difference. For instance, precise measurements prevent costly errors.
- Measuring & Marking Tools: You’ll need a reliable tape measure (at least 25 ft) for accurate dimensions. A carpenter’s square and speed square are crucial for marking straight lines and angles. Moreover, a level (2 ft and 4 ft) is indispensable for ensuring everything is plumb and level. Don’t forget a chalk line for long, straight marks and a pencil for general marking.
- Cutting Tools: A circular saw is fundamental for cutting lumber quickly and efficiently. For more precise or repetitive cuts, a miter saw is highly recommended. Consequently, a jigsaw comes in handy for intricate cuts or curves. A basic handsaw is also useful for quick adjustments.
- Drilling & Fastening Tools: A powerful cordless drill/driver with a variety of bits is essential for assembling components. An impact driver further aids in driving long screws with ease. Of course, a hammer is a classic for nailing. For larger projects, a nail gun (framing and roofing) can significantly speed up construction.
- Safety Gear: Safety is paramount. Always wear safety glasses to protect your eyes. Work gloves prevent splinters and cuts. Furthermore, ear protection is vital when operating loud power tools. A dust mask should be used when cutting wood to avoid inhaling sawdust.
- Miscellaneous: A utility knife is useful for various tasks, from opening packages to trimming felt. A pry bar helps in correcting mistakes or dismantling temporary structures. A caulk gun is needed for sealing gaps, and various clamps hold pieces together while fasteners are applied. Finally, a sturdy step ladder provides safe access to higher areas.
Key Materials for Your Storage Shed Project
The quality of your materials directly impacts the shed’s durability. Therefore, choose wisely.
- Foundation Materials: Depending on your plan for storage shed, you might use concrete blocks or pour a concrete slab. For wooden foundations, pressure-treated lumber (for skids and joists) is essential to resist rot and insects. Gravel often forms a stable base beneath.
- Framing Lumber: This forms the skeleton of your shed. You’ll need dimensional lumber, such as 2x4s and 2x6s, for walls, floor joists, and rafters. Always select straight, defect-free pieces for structural integrity.
- Flooring & Sheathing: For the floor, 3/4-inch plywood or OSB (oriented strand board) is common, pressure-treated if exposed to moisture. For walls and roof sheathing, 1/2-inch or 7/16-inch plywood or OSB provides structural rigidity.
- Siding & Roofing: The exterior finish protects your shed and defines its look. Options include T1-11, cedar shingles, vinyl siding, or lap siding. For the roof, consider tar paper/underlayment followed by asphalt shingles, metal roofing, or corrugated panels.
- Fasteners & Hardware: You’ll need a variety of nails (common, framing, roofing) and screws (deck screws, wood screws). Hurricane ties are crucial in windy areas for securing the roof. Hinges, latches, and handles are necessary for doors and windows.
- Doors, Windows, & Trim: Decide if you’ll use pre-hung doors and windows or build your own. Fascia boards, corner trim, and door/window trim provide a finished look.
- Finishing Touches: Paint or stain protects the wood and adds aesthetic appeal. Caulk and sealants prevents water intrusion.
Pro Tip: It’s always wise to purchase 5-10% more material than calculated. This accounts for mistakes, damaged pieces, or future repairs. Our detailed plan for storage shed options often include convenient affiliate links for purchasing these tools and materials, making us your one-stop resource for your DIY shed project.
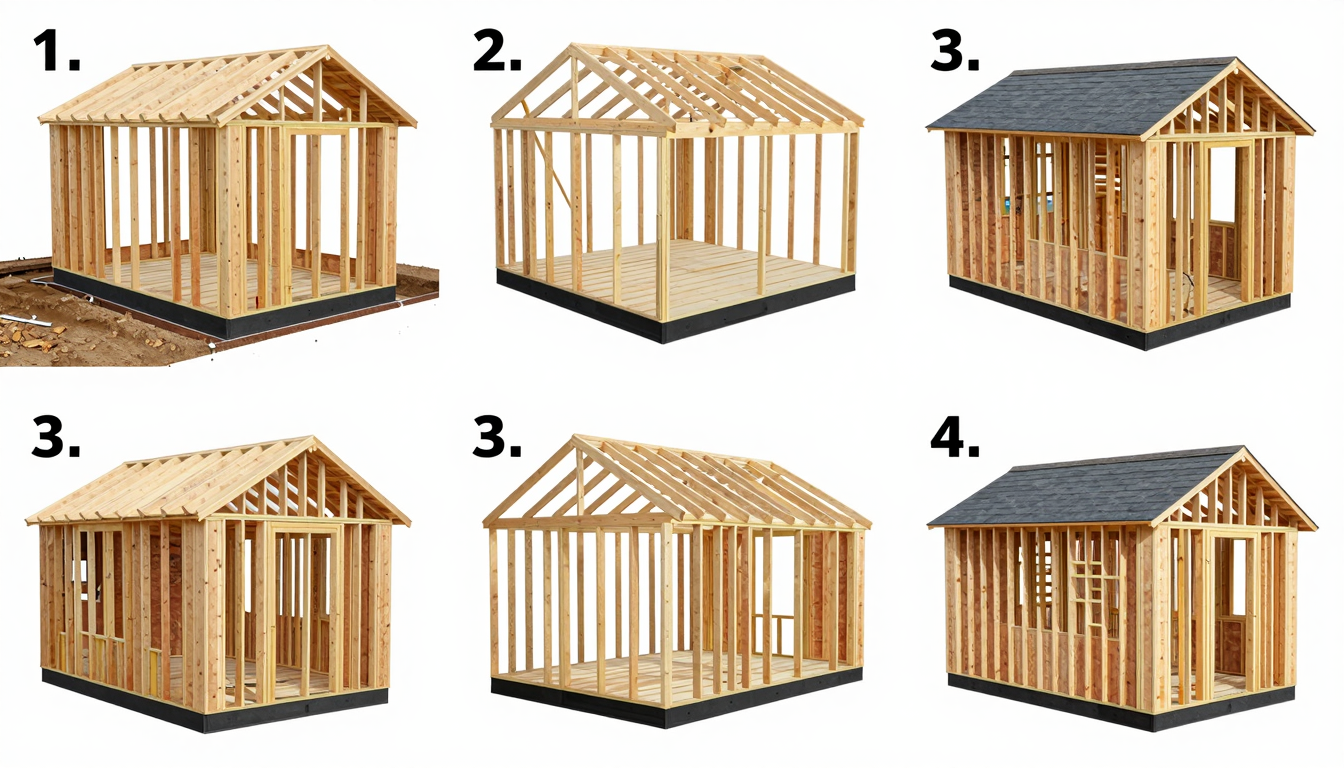
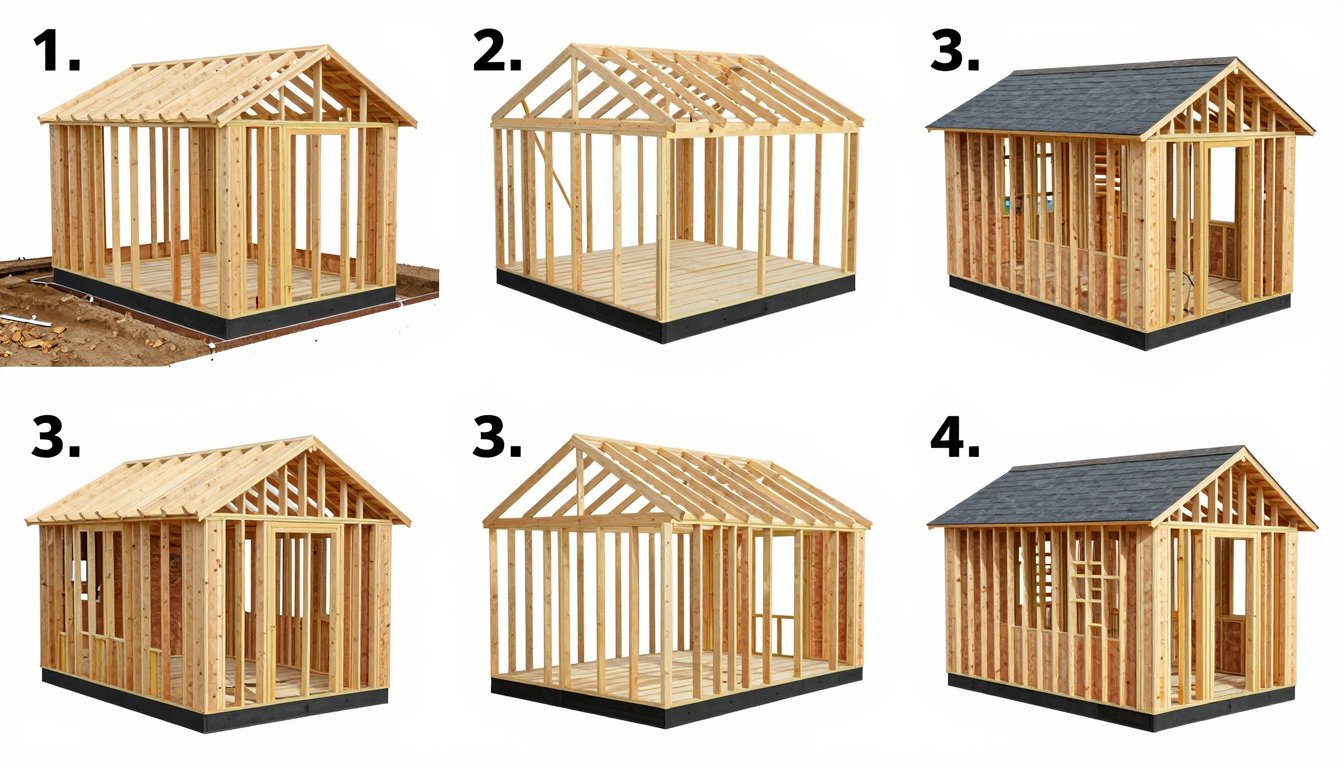
Step-by-Step Guide to Building Your Storage Shed
Building a storage shed transforms from a daunting task into a rewarding project with a clear roadmap. This step-by-step guide outlines the general construction sequence. However, always consult your specific plan for storage shed for precise measurements and detailed instructions.
Step 1: Site Preparation and Foundation
First, prepare your chosen site. Clear away all debris, rocks, and vegetation. It’s crucial to level the ground. Furthermore, ensure proper drainage away from your shed to prevent water damage. For example, a slight slope can direct water away effectively.
Next, establish a solid foundation. This is vital for the shed’s stability and longevity. Common options include a concrete slab, a gravel pad with pressure-treated skids, or concrete piers. Many DIY plan for storage shed designs recommend a simple gravel pad with skids for smaller sheds. This method offers good drainage and is relatively straightforward. For larger or heavier sheds, a concrete slab provides maximum stability.
Step 2: Floor Framing and Decking
With the foundation set, begin the floor framing. Assemble the perimeter frame according to your plan. Then, install the floor joists at the specified intervals. Use appropriate fasteners, such as galvanized screws or nails, to secure everything. Consequently, ensure the entire frame is perfectly square and level before proceeding.
After framing, install the floor decking. Lay down plywood or OSB panels, securing them firmly to the joists. Leave small expansion gaps between panels as recommended by the manufacturer. This prevents buckling due to moisture changes. Moreover, using exterior-grade plywood or OSB is essential for durability.
Step 3: Wall Framing
Now, construct the wall sections. It’s often easier to build each wall (front, back, and two sides) flat on the ground. These sections include studs, top plates, bottom plates, and headers for any door or window openings. Also, remember to incorporate corner posts for structural integrity.
Once assembled, raise each wall section with assistance. Temporarily brace them to hold them upright. Plumb and square each wall using a level and a framing square. Finally, permanently secure them to the floor frame and to each other at the corners. This creates a robust and stable structure.
Step 4: Roof Framing
Roof framing is a critical stage. Depending on your plan for storage shed, you will either cut and install individual rafters or use pre-built trusses. Ensure accurate spacing and secure them firmly to the top plates of your walls. If using rafters, install the ridge board at the very peak. This provides a central anchor point.
Consider adding fascia and soffit boards at this stage. These elements provide a finished look and offer additional protection to the roof edges. Consequently, they contribute to the shed’s overall weather resistance.
Step 5: Sheathing and Siding
Next, apply the sheathing. Install plywood or OSB panels onto the roof rafters or trusses, leaving small gaps for expansion. Similarly, attach plywood or OSB to the wall studs. This wall sheathing significantly enhances the structural rigidity of your shed.
Finally, apply your chosen siding material. Options range from T1-11 plywood to vinyl or wood lap siding. Work from the bottom up, overlapping panels as necessary to ensure weatherproofing. For example, ensure all seams are properly sealed.
Step 6: Roofing
Protect your shed from the elements by installing the roofing. First, lay down tar paper or synthetic underlayment over the roof sheathing. This provides a crucial moisture barrier. Then, install drip edge along the eaves and gables; this directs water away from the fascia.
Afterward, apply your main roofing material. This could be asphalt shingles, metal panels, or another option specified in your plan. Follow the manufacturer’s instructions precisely for proper installation and longevity.
Step 7: Doors, Windows, and Trim
Install any doors and windows next. For pre-hung units, follow the manufacturer’s instructions carefully. If your plan involves building custom doors or windows, ensure they fit snugly and operate smoothly.
Finally, add all the exterior trim. This includes corner trim, door and window casings, and fascia boards. Trim not only enhances the aesthetic appeal but also protects exposed edges from weather damage.
Step 8: Finishing Touches
Complete your shed with finishing touches. Apply paint or stain to the exterior. This protects the wood from UV rays and moisture. For instance, a good quality exterior paint can significantly extend the life of your shed.
Inside, consider adding shelves, workbenches, or tool racks to maximize storage efficiency. Lastly, caulk and seal any remaining gaps or joints. This prevents moisture intrusion and helps insulate your new storage shed. Remember, patience and attention to detail are your best assets throughout this project.
Advanced Tips and Customization for Your Plan for Storage Shed
Once you’ve built the basic structure, consider enhancing your storage shed with advanced features. These upgrades can significantly boost its functionality and aesthetic appeal. Our premium shed plans often include detailed instructions for these customizations. They transform a simple shed into a highly efficient and attractive extension of your home.
Optimizing Interior Space and Functionality
Maximizing the internal layout is key for any plan for storage shed. Firstly, consider robust shelving systems. Adjustable shelves, for instance, offer incredible versatility for various items. Built-in cubbies are perfect for smaller tools or supplies, while overhead storage can free up floor space. Secondly, pegboards and tool racks are invaluable for keeping hand tools organized and easily accessible. Moreover, integrating a sturdy workbench provides a dedicated space for projects. Ensure it has drawers or cabinets underneath for extra storage. Finally, for sheds with ample height, a small loft can offer invaluable storage for seasonal items or less frequently used equipment.
Enhancing Comfort and Durability
For a truly versatile storage shed, improved comfort and durability are essential. Electrical wiring, for example, allows for lighting, power tools, or even heating. However, this is a job for a qualified electrician for safety reasons. Furthermore, insulation in walls, floor, and ceiling helps maintain temperature control. This makes your shed comfortable for year-round use, especially if it doubles as a workshop. Adequate ventilation is also crucial. Adding vents or a small exhaust fan prevents moisture buildup. This is particularly important for a plan for storage shed housing chemicals. In addition, installing windows and skylights increases natural light and improves air circulation. Consider double-pane windows for better insulation.
Exterior Upgrades and Security Features
A well-designed exterior integrates your shed seamlessly into your landscape. Landscaping with surrounding plantings or a small pathway can significantly enhance curb appeal. Rainwater harvesting, via gutters and a rain barrel, offers an eco-friendly way to collect water for gardening. For easy access with heavy equipment, building a sturdy ramp is highly recommended. Decorative elements like window boxes, decorative hinges, or a weathervane can further personalize your shed.
Security is paramount, especially if storing valuable items. Invest in high-quality padlocks or deadbolts for doors. For windows, consider bars or reinforced glass. Simple, battery-operated alarm systems can also deter intruders effectively. Finally, smart material choices ensure longevity. Upgrading to metal roofing or architectural shingles provides extended durability. Using rot-resistant composite materials for trim work reduces maintenance. Fiber cement siding offers a low-maintenance, fire-resistant, and highly durable exterior option.
Always consult local building codes before undertaking significant structural changes or adding electrical components. Our detailed resources provide specific instructions and recommendations for these advanced features. Learn more here: Get started.
Building your own storage shed is a rewarding project that adds significant value and functionality to your home. By following a comprehensive plan for storage shed, you transform a complex undertaking into a series of manageable steps. This guide has equipped you with the foundational knowledge, from understanding the necessity of a detailed plan and choosing the right small shed design plans, to gathering essential tools and materials, and navigating the step-by-step construction process. We’ve also explored advanced tips and customization options to help you create a shed that perfectly meets your unique needs and aesthetic preferences. Remember, patience, attention to detail, and adherence to your chosen plan are key to a successful build. Don’t hesitate to utilize our free and premium resources, which offer even more in-depth instructions, material lists, and expert advice. Start your shed-building journey today with confidence, and enjoy the satisfaction of a job well done!


