
Embarking on a shed building project using shed DIY plans can be an incredibly rewarding experience, offering both practical storage solutions and a sense of accomplishment. Whether you’re a seasoned DIY enthusiast or a first-time builder, the right set of plans can transform a daunting task into an achievable goal. This comprehensive guide is designed to walk you through every stage of your shed construction journey, from understanding the basics of shed DIY plans to successfully nailing down the last shingle. We’ll equip you with the knowledge and confidence to select the perfect plan, gather your tools, and overcome common challenges, ensuring your new shed stands strong for years to come. Get ready to build the shed of your dreams!
What Are Shed DIY Plans and Why Build Your Own?
Shed DIY plans are comprehensive instruction sets. They guide you through building a storage shed yourself. These plans often include detailed material lists. You’ll also find cutting diagrams and step-by-step assembly instructions. Some even feature 3D renderings. Essentially, they are your blueprint for a successful shed construction project. They empower individuals to build without professional help. This avoids the expense of hiring builders or buying pre-assembled kits. Consequently, shed DIY plans are an invaluable resource for any aspiring shed builder.
Why You Should Build Your Own Shed
Building your own shed using shed DIY plans offers numerous advantages. First, it is significantly more cost-effective. You save substantially on labor costs. Moreover, you can often source materials more affordably. This directly impacts your budget positively. Second, it provides unparalleled customization. You can choose the exact size, style, and features. These choices perfectly match your specific needs. They also align with your aesthetic preferences. This level of personalization is rarely available with off-the-shelf options. For instance, you might need a small garden shed. Or, perhaps a robust workshop. The possibilities are truly vast with proper shed DIY plans.
Third, there’s immense satisfaction in creating something with your own hands. It’s a tangible achievement. This enhances your property’s value and functionality. Furthermore, it boosts your sense of accomplishment. Finally, understanding the construction process through shed DIY plans empowers you. You gain valuable building skills. These skills can then be applied to future home improvement projects. Therefore, building your own shed is a rewarding endeavor.
Tips for Getting Started:
- Assess Your Needs: Before looking at plans, consider what you’ll use the shed for. This helps narrow down your options.
- Check Local Regulations: Always verify building codes and permits in your area. This avoids future complications.
- Budget Wisely: Factor in materials, tools, and any potential unexpected costs.
Ready to explore your options? Download our Shed Project Checklist today for a comprehensive guide to getting started!
Choosing the Right Shed DIY Plans for Your Needs
Selecting the perfect shed DIY plans is crucial. This step ensures your new shed meets all your needs. First, consider the shed’s purpose. Will it store garden tools, serve as a workshop, or become a potting shed? This decision directly impacts the required size and internal layout. For example, a workshop needs more space and perhaps a workbench. A storage shed might only need shelves.
Furthermore, assess your available space carefully. Measure the exact area where you plan to build. Remember to account for property line setbacks and distances from other structures. Local zoning laws often dictate these requirements. For instance, some areas require sheds to be at least five feet from property lines. Ensuring compliance avoids future complications.
Style, Codes, and Skill Level
Next, think about the aesthetic. What style best complements your home? Common options include a traditional gable, a space-saving lean-to, or a classic gambrel. A modern flat-roof design also offers a contemporary look. Choose a style that enhances your landscape, too. This integration makes your shed feel like a natural extension of your property.
Crucially, always check local building codes and permits. Many municipalities have specific regulations. These cover shed size, height, and placement. Consult your local planning department before finalizing any shed DIY plans. Ignoring these rules can lead to fines or even requiring you to dismantle your structure.
Finally, evaluate your own skill level. Some shed DIY plans cater to beginners. Others demand intermediate or advanced carpentry skills. Look for plans with clear, detailed instructions. They should also provide comprehensive material lists and helpful diagrams. A good set of plans will specify the foundation type. Options include a concrete slab, a gravel pad, or skids. Similarly, roofing materials will be clearly outlined. Our comprehensive comparison table below will help you navigate these choices. Moreover, download our free checklist to ensure you don’t miss any critical steps.
Essential Tools and Materials for Your Shed DIY Plans Project
Before embarking on your shed DIY plans project, gathering the correct tools and materials is crucial. A well-prepared workspace prevents frustration and ensures a safer, more accurate build. Moreover, having everything on hand streamlines the construction process.
Essential Hand Tools for Your Shed Build
You don’t need a professional workshop to build a shed. However, some basic hand tools are indispensable. For instance, a tape measure is vital for accurate cuts and layouts. A carpenter’s square ensures your corners are perfectly angled. Furthermore, a level (at least 2-foot, preferably 4-foot) is critical for straight walls and a flat foundation. A hammer will drive nails with ease, while a utility knife is handy for various tasks. A chalk line helps mark long, straight cuts quickly. Always prioritize safety; therefore, safety glasses and work gloves are non-negotiable. They protect against splinters and flying debris.
Power Tools to Expedite Your Shed DIY Plans
Power tools significantly reduce build time and improve precision. A circular saw is essential for cutting lumber to size. It handles most framing and sheathing cuts efficiently. Consequently, a miter saw (or chop saw) makes achieving precise angle cuts for rafters and trim much easier. A cordless drill/driver is invaluable for fastening screws and drilling pilot holes. Its versatility makes it a cornerstone of any shed DIY plans project. For intricate shapes or window openings, a jigsaw proves very useful. If your plans include roofing, consider renting or purchasing a roofing nailer for faster, more secure shingle installation.
Materials: The Building Blocks of Your Shed
Your specific shed DIY plans will detail all necessary materials. Nevertheless, some common items include:
- Treated lumber: This is crucial for the foundation, protecting your shed from moisture and pests.
- Framing lumber: Typically 2x4s or 2x6s, these form the shed’s skeleton.
- Plywood or OSB: Essential for flooring and wall/roof sheathing, providing structural rigidity.
- Siding material: Options range from classic wood and durable vinyl to T1-11, offering both protection and aesthetics.
- Roofing materials: Shingles or metal roofing will keep your shed watertight.
- Fasteners: A variety of nails and screws are needed for different connections.
- Hardware: Don’t forget hinges and a latch for the door, and possibly windows.
- Finishing: Paint or stain will protect your shed and enhance its appearance.
Tip: Always purchase about 10-15% extra of each material. This accounts for mistakes or unexpected needs, preventing frustrating delays.
For a comprehensive list tailored to common shed DIY plans, download our Shed Building Material Checklist here. This checklist ensures you don’t miss any crucial components.
Step-by-Step Guide to Executing Your Shed DIY Plans
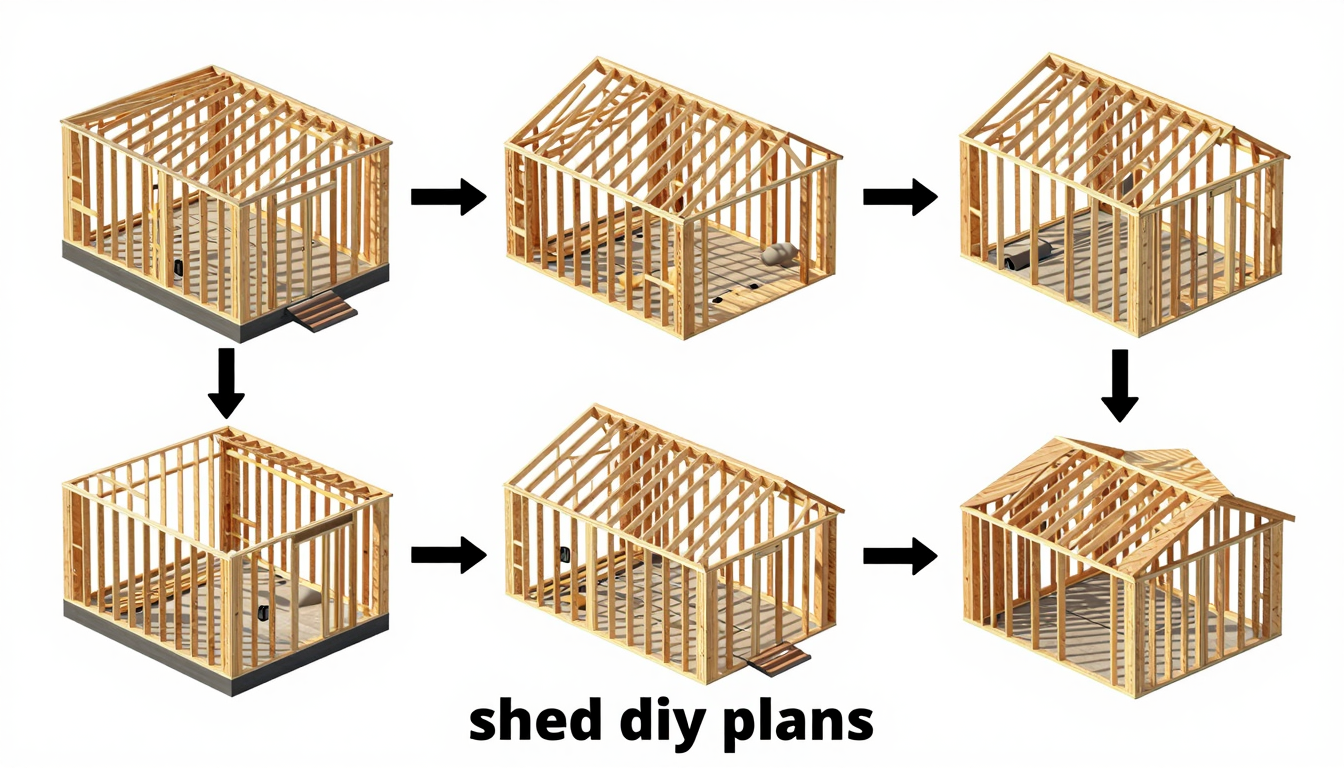
Executing your shed DIY plans effectively transforms a pile of materials into a functional structure. This systematic approach ensures success, even for first-time builders. Remember, patience and precision are your best tools.
Preparing Your Site and Laying the Foundation
First, site preparation is crucial. Clear the chosen area of all debris, rocks, and vegetation. For example, you might need to remove an old bush or level uneven ground. Next, mark out the shed’s precise footprint using stakes and string. This step helps visualize the final structure.
Choose your foundation type based on your shed DIY plans and local regulations.
- Concrete Slab: Offers maximum stability and longevity. Pouring a slab requires careful formwork and proper curing.
- Gravel Pad with Skids: A popular, more flexible option. Lay down a weed barrier, then a thick layer of compacted gravel. Treated lumber skids then sit on top.
- Concrete Blocks: Ideal for smaller sheds. Place blocks directly on a level gravel base, ensuring they are perfectly aligned.
In any case, ensure your foundation is perfectly level and square. This prevents future structural issues. Use a long level and a tape measure for accuracy. Consequently, a solid foundation guarantees a stable shed.
Framing the Structure: Floor, Walls, and Roof
Once your foundation is ready, you’ll move to framing. This is where your shed truly begins to take shape.
Building the Floor and Walls
Start with the floor framing. Assemble the perimeter joists first, typically using pressure-treated lumber. Then, install the interior floor joists at the specified intervals. For example, your shed DIY plans might call for 16-inch on-center spacing. Finally, attach the plywood or OSB flooring panels using appropriate screws or nails. This creates a sturdy base.
Next, wall framing involves building each wall section flat on the ground. This method is safer and more efficient. Assemble the bottom plate, top plate, studs, and headers for any doors or windows. For instance, a standard wall might have studs every 16 or 24 inches. Carefully raise each framed wall section into position. Brace them temporarily to prevent tipping. Securely attach the walls to the floor frame and to each other using fasteners specified in your shed DIY plans. Double-check for plumb and square.
Constructing the Roof
The roof framing is the next major step. If your shed DIY plans include pre-built trusses, lift and secure them to the top plates. Otherwise, construct individual rafters and a ridge board. For example, you might build a simple gable roof. Install collar ties for added strength. After the frame is complete, attach the roof sheathing (plywood or OSB). This provides the base for your roofing material. Therefore, accurate roof framing is essential for weather protection.
Finishing Touches and Final Inspection
With the main structure complete, focus on the exterior and interior details.
Siding, Roofing, Doors, and Windows
Apply your chosen siding material. This could be wood, vinyl, or engineered wood. Install corner trim, fascia boards, and any other decorative elements as per your shed DIY plans. These details enhance the shed’s appearance and weather resistance.
For roofing, first install roofing felt or an underlayment. This provides an additional layer of protection. Then, apply shingles or metal roofing, ensuring proper overlap and sealing. Consequently, this prevents water intrusion.
Install your doors and windows. Pre-hung units are generally easier to install. However, some shed DIY plans might require building custom doors. Add all necessary hardware, such as hinges, latches, and handles.
The Final Steps
Finally, move to the finishing touches. Apply paint or stain to protect the wood from the elements and enhance its aesthetic appeal. Consider adding interior features like shelving, pegboards, or a workbench. These additions maximize the shed’s utility. Clean up the site thoroughly, removing all construction debris.
Don’t forget to download our comprehensive Shed Building Checklist to ensure you haven’t missed any vital steps. This checklist is an invaluable resource throughout your project. By following these steps carefully, you’ll successfully build a durable and functional shed.
Troubleshooting Common Issues with Shed DIY Plans
Even the most meticulously crafted shed DIY plans can present unexpected challenges. Knowing how to efficiently troubleshoot these common issues will save you significant time, money, and frustration, ensuring your project stays on track.
Addressing Foundation and Framing Woes
A solid foundation is paramount for any shed. If your foundation isn’t perfectly level, your entire structure will suffer. For example, with a concrete slab, minor level discrepancies can often be rectified by strategically placing shims made of composite material or treated lumber under your sill plate. Conversely, for skid or block foundations, you might need to adjust the height of individual supports using a spade or by adding gravel, consistently checking with a long level. Moreover, always verify diagonal measurements to ensure your foundation is perfectly square before proceeding.
When it comes to wall construction, achieving plumb (vertically straight) and square (90-degree corners) is critical. If your walls aren’t true, doors and windows won’t fit properly, and the shed’s structural integrity could be compromised. Therefore, frequently use a 4-foot level and a large carpenter’s square during assembly. Temporary bracing, such as diagonal 2x4s, can help hold walls plumb until they are securely fastened to each other and the floor. Furthermore, if a wall is slightly off, a gentle nudge combined with immediate fastening can often correct minor deviations.
Sealing and Roofing Challenges
Gaps in sheathing or siding are not merely cosmetic issues; they invite moisture, pests, and compromise insulation. Consequently, precision cutting and careful alignment of all panels are essential. Any unavoidable small gaps, particularly around window and door frames, should be sealed with high-quality exterior caulk. In addition, proper overlapping of siding, following the specific instructions in your shed DIY plans, is crucial for effective water shedding.
A leaky roof is arguably the most critical issue to address promptly. Therefore, pay close attention to the installation of your roofing felt or underlayment, ensuring adequate overlap and proper fastening. Shingles must be laid correctly, with consistent exposure and secure nailing patterns. Specifically, flashing around any vents, skylights, or chimneys requires meticulous attention to detail and proper sealant application to prevent water intrusion. If you’re using metal roofing, ensure all seams are properly crimped, sealed, and fastened according to manufacturer specifications.
Finally, dealing with warped lumber can be frustrating. Always try to select the straightest pieces available at the lumberyard. If you do encounter slightly warped boards, consider using them for shorter sections or non-load-bearing components where minor imperfections are less critical. Sometimes, fastening a slightly warped board will pull it straight, but avoid forcing severely twisted pieces, as this can lead to structural stress or splitting. For more detailed solutions and expert advice on tackling these and other construction hurdles, See the offer.
Building your own shed using shed DIY plans is a journey that, while requiring effort and precision, culminates in a highly functional and personalized addition to your property. By carefully selecting the right plans, gathering the necessary tools and materials, diligently following each construction step, and being prepared to troubleshoot common issues, you can successfully bring your vision to life. Remember, patience and attention to detail are your best allies. We hope this guide has empowered you with the knowledge and confidence to tackle your shed project. Don’t forget to explore our premium resources for even more detailed plans and expert tips. Happy building!


