
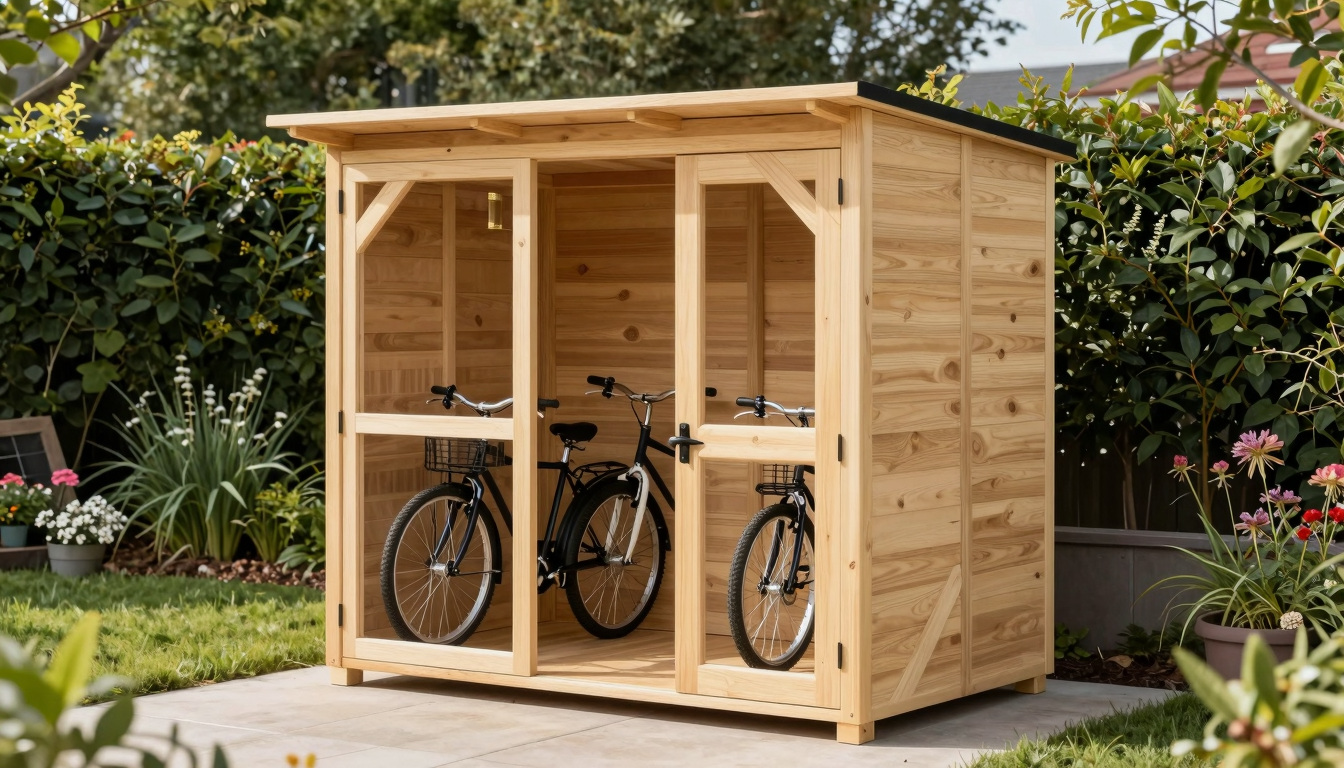
Embark on a rewarding journey to build your own bicycle storage solution with our comprehensive DIY bike shed plans. Whether you’re a seasoned DIY enthusiast or a beginner eager to learn, this guide provides everything you need to construct a robust, secure, and aesthetically pleasing shed for your bikes. Building your own bike shed not only saves you money compared to purchasing a pre-made unit but also allows for complete customization to fit your specific needs and aesthetic preferences. Say goodbye to cluttered garages and bikes left exposed to the elements. Our detailed instructions, expert tips, and visual aids will empower you to create a durable storage solution that protects your valuable bicycles and enhances your outdoor space. Let’s dive into the world of DIY bike shed plans and transform your vision into reality.
What are DIY Bike Shed Plans and Why Build One?
DIY bike shed plans are detailed blueprints and comprehensive instructions. They guide you through constructing a dedicated storage unit for your bicycles. These plans typically include material lists, precise cutting guides, and step-by-step assembly instructions. Some even offer 3D renderings for better visualization. Essentially, they provide a complete roadmap for building your own bike storage shed from the ground up. By using diy bike shed plans, you gain control over every aspect of the build. This ensures the final shed perfectly meets your needs.
Why Invest Time in DIY Bike Shed Plans?
There are numerous compelling reasons to consider building your own bike shed. Firstly, cost savings are a significant factor. Purchasing a pre-built shed can be surprisingly expensive. Conversely, sourcing materials and constructing it yourself often results in substantial savings. For instance, you could save hundreds of dollars compared to a retail option. Moreover, you can often find reclaimed materials, further reducing costs.
Secondly, customization is a key benefit. Off-the-shelf sheds rarely fit your exact space or aesthetic preferences. With diy bike shed plans, however, you can tailor dimensions precisely. You can also customize materials and features to your exact requirements. Consider adding shelves for helmets and shoes, hooks for gear, or even an integrated workbench. This level of personalization is simply not possible with pre-fabricated solutions. Furthermore, you can match the shed’s style to your existing home or garden.
Thirdly, a well-built shed offers superior security and protection. Your bikes will be shielded from harsh weather elements. This includes rain, sun, and snow, which can cause rust and premature wear. A sturdy, lockable shed deters theft far more effectively than leaving bikes exposed. It also beats storing them in an easily accessible garage. Consequently, your valuable investment remains safe and pristine. For example, a robust latch and a good padlock add significant security.
Finally, there’s immense satisfaction in a DIY project. Building something with your own hands is incredibly rewarding. It enhances your property, protects your investments, and boosts your DIY skills. As a result, you gain a sense of accomplishment. This tangible outcome is a testament to your effort and ingenuity. Ready to start? Therefore, explore our range of diy bike shed plans today!
Choosing the Right DIY Bike Shed Plans: Design Considerations
Selecting the right DIY bike shed plans is the bedrock of a successful project. Before you even gather your tools, careful consideration of various design aspects will ensure your shed perfectly meets your needs and complements your space.
Assessing Your Storage Needs and Available Space
First, accurately determine the size and quantity of bikes you intend to store. Do you own road bikes, bulkier mountain bikes, electric bikes with batteries, or smaller children’s bikes? Their dimensions directly influence the required footprint and height of your shed. For instance, an e-bike often requires more head clearance than a standard road bike. Moreover, consider future expansion; you might acquire more bikes over time. Therefore, planning for a little extra space is always a wise decision.
Next, meticulously evaluate the available area in your yard or property. Measure the site carefully, taking into account any existing obstacles like trees, fences, or property lines. Furthermore, consider access points. Will the shed be a standalone structure or will it lean against an existing building? The orientation of the shed and its doors is crucial for ease of use. For example, double doors on the front are excellent for multiple bikes, whereas a side-access design might fit better in a narrower garden path.
Material Choices and Aesthetic Integration
The choice of materials is another significant factor in your DIY bike shed plans. Wood is a popular option due to its natural aesthetics and workability. However, you must consider its durability and ongoing maintenance. Cedar, for instance, offers natural resistance to rot and insects, making it a good, albeit pricier, choice. Other options include metal or plastic sheds, each presenting their own advantages and disadvantages concerning cost, longevity, and overall appearance. Metal sheds, for example, are often very secure but can be prone to condensation.
Finally, think about how your shed will integrate visually with your home and garden. Do you prefer it to blend seamlessly into the background or to stand out as a feature? Consider various roof styles, such as a simple lean-to, a classic gable, or a modern pent roof. Additionally, explore different siding options and paint colors to match your home’s exterior. Our comprehensive DIY bike shed plans offer diverse customization possibilities to help you achieve both the perfect look and optimal functionality. This thoughtful planning ensures your shed is not just practical, but also aesthetically pleasing.
Step-by-Step Guide to Building Your DIY Bike Shed Plans
Building your own bike shed with DIY bike shed plans is a rewarding project. This step-by-step guide will walk you through the construction process. Remember to always consult your specific plans for precise details and measurements.
Preparing Your Site and Laying the Foundation
First, choose a level spot for your shed. A stable foundation is crucial for longevity. Consequently, if your ground isn’t perfectly flat, you’ll need to level it. For example, you might opt for a simple gravel base. Alternatively, a concrete slab offers maximum stability. Many DIY bike shed plans also suggest pressure-treated timber skids. These elevate the shed, thus preventing moisture issues. Ensure your chosen foundation type aligns with your local building codes.
Next, you will assemble the floor frame. Most DIY bike shed plans specify pressure-treated lumber for this. Cut your joists and rim joists as per your plan. Then, secure them firmly with screws or nails. It’s essential to check that the frame is perfectly square and level. This prevents future structural problems. Finally, attach the floor decking. Plywood or OSB are common choices. Secure them to the joists, leaving small expansion gaps if recommended.
Erecting Walls and Installing Siding
With the floor complete, it’s time to construct the wall frames. Cut and assemble the studs, top plates, and bottom plates for each side. Pay close attention to door and window openings. These measurements are critical. Stand each wall frame up carefully. Temporarily brace it to ensure stability. Afterward, permanently secure it to the floor frame and to adjacent walls. This creates a robust structure.
Installing the siding follows. Your DIY bike shed plans will specify the material. Common options include plywood, T1-11, or cedar planks. Start from the bottom edge. Work your way upwards, ensuring each piece is level. Furthermore, fasten it securely according to the plan’s instructions. This protects the interior from the elements.
Roofing and Finishing Touches
The roof structure comes next. Typically, this involves rafters and a ridge board. Some designs also include collar ties for added strength. If practical, assemble these components on the ground. Then, lift and secure them onto the wall’s top plates. It’s vital to ensure the correct roof pitch. This guarantees effective water runoff. Subsequently, attach plywood or OSB sheathing to the rafters. Apply a waterproof barrier like tar paper or roofing felt. Finally, install your chosen roofing material. Shingles, metal panels, or EPDM rubber are popular choices.
Now, install your doors and windows. Follow your DIY bike shed plans for construction and installation. Ensure doors open and close smoothly. They should also be securely latched. Windows, if included, add light and ventilation. Finally, add the finishing touches. Install trim around doors, windows, and corners. Apply paint, stain, or a weather-resistant finish. This protects the wood and enhances appearance. Install hardware such as hinges, latches, and handles. In addition, consider interior organization. Hooks and shelves are practical additions. Consequently, your new shed will be both functional and attractive. Always prioritize safety during every step. Wear appropriate protective gear. Use tools correctly to avoid injury.
Materials, Tools, and Cost Breakdown for Your DIY Bike Shed Plans

Building your own bike shed from DIY bike shed plans is an exciting project. However, successful execution hinges on having the right materials and tools. This section will guide you through the essentials, helping you prepare and budget effectively.
Essential Materials for Your Bike Shed
The specific materials needed will vary with your chosen DIY bike shed plans. Nevertheless, a core set of components forms the foundation of most sheds.
- Lumber: This is the backbone of your shed.
- Pressure-Treated Wood: Crucial for the base or skids that contact the ground. It resists rot and insects. For example, 2x4s or 4x4s are common.
- Framing Lumber: Typically 2x4s or 2x6s for walls, roof rafters, and floor joists. The dimensions depend on the shed’s size and structural requirements.
- Plywood or OSB: Use for flooring and roof sheathing. Choose exterior-grade plywood (CDX) or OSB for durability against moisture.
- Siding Material: This protects your shed from the elements and defines its look. Options include T1-11 plywood, cedar planks, or treated exterior-grade plywood. Consider your aesthetic preferences and budget.
- Roofing Materials: Essential for weatherproofing.
- Underlayment: Roofing felt or tar paper provides an additional moisture barrier.
- Top Layer: Asphalt shingles are a popular, cost-effective choice. Alternatively, metal roofing offers excellent longevity and durability. EPDM rubber is another option, especially for low-slope roofs.
- Fasteners: These hold everything together.
- Wood Screws: Various lengths are needed for framing, sheathing, and attaching trim. Exterior-grade screws resist rust.
- Nails: Framing nails for structural connections, and roofing nails for shingles.
- Bolts: Use for anchoring the shed or for critical structural connections, especially if your DIY bike shed plans include heavy-duty elements.
- Hardware: For functionality and security.
- Hinges: Heavy-duty hinges for the door(s).
- Latching Mechanism: A sturdy latch and a padlock for security.
- Handles: For easy opening and closing.
- Other: If your plans include windows, you’ll need appropriate hardware.
- Finishing Supplies: For protection and aesthetics.
- Exterior Paint or Stain: Protects the wood from UV rays and moisture, enhancing its lifespan.
- Wood Preservative: Especially important for cut ends of pressure-treated lumber.
- Caulk: Seals gaps and joints, preventing water intrusion.
- Flashing: Metal or plastic strips to divert water away from critical areas, like around doors or roof edges.
- Foundation Materials (if applicable):
- Gravel: Provides a stable, well-draining base.
- Concrete Blocks: For pier foundations, lifting the shed off the ground.
- Concrete Mix & Rebar: If pouring a concrete slab, which is a more permanent option.
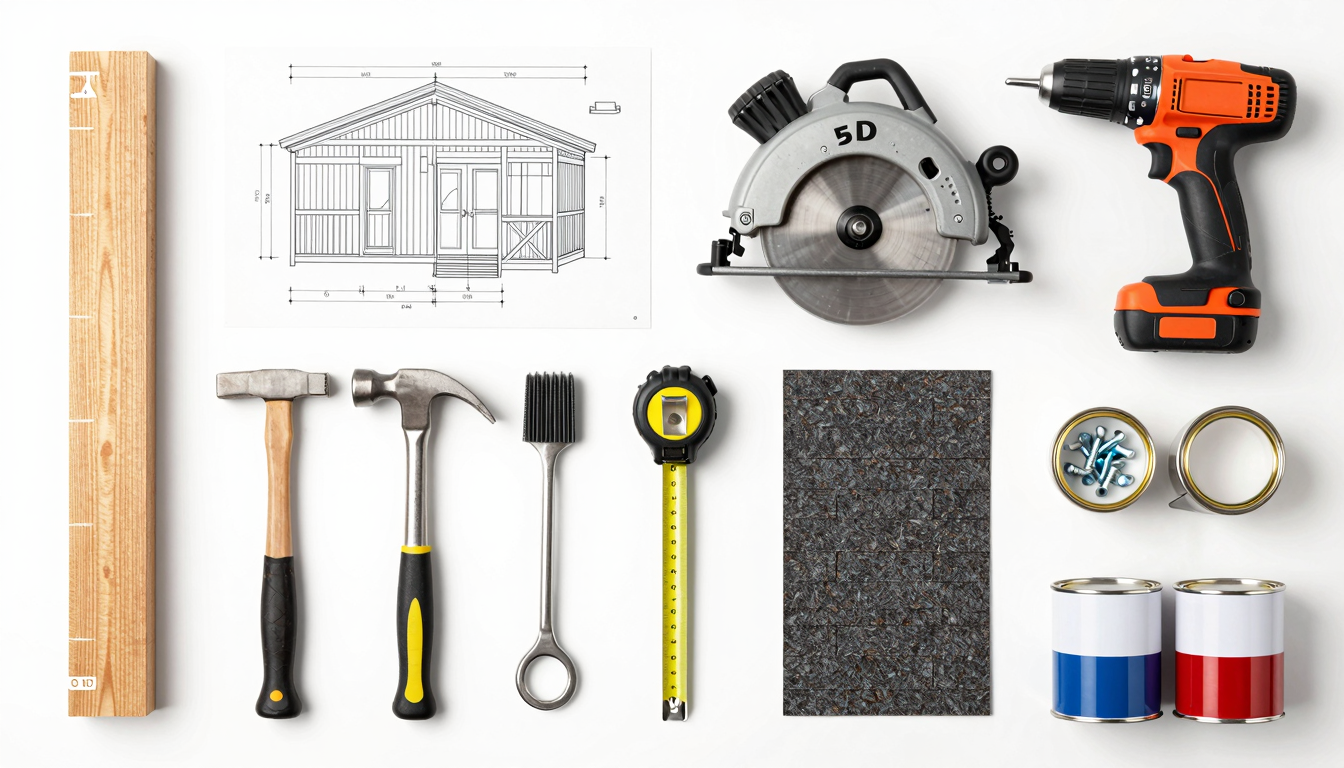
Essential Tools for Construction
Having the right tools makes the building process smoother and safer.
- Measuring & Marking: Precision is key.
- Tape Measure: A 25-foot tape measure is standard.
- Carpenter’s Square & Speed Square: For accurate 90-degree and other angle markings.
- Pencil & Chalk Line: For marking cuts and long straight lines.
- Cutting Tools:
- Circular Saw: Indispensable for cutting lumber and plywood.
- Miter Saw: Highly recommended for precise, repeatable miter and cross-cuts, especially for framing.
- Jigsaw: Useful for intricate cuts or curves, though less frequently used for basic shed construction.
- Handsaw: Good for quick, small cuts or when power isn’t available.
- Fastening Tools:
- Cordless Drill/Driver: Absolutely essential for driving screws and drilling pilot holes. An impact driver is even better for driving long screws efficiently.
- Hammer: For nails and general assembly.
- Nail Gun (Optional): Speeds up framing and sheathing significantly if you have access to one.
- Safety Gear: Never skimp on safety.
- Safety Glasses: Protect your eyes from debris.
- Work Gloves: Prevent splinters and cuts.
- Ear Protection: Crucial when using power tools.
- Dust Mask: Protects your lungs from wood dust.
- Other Useful Tools:
- Level (2-foot and 4-foot): Ensures your shed is plumb and level.
- Caulk Gun: For applying caulk neatly.
- Utility Knife: For cutting roofing felt or other materials.
- Pry Bar: For adjustments or disassembling mistakes.
- Clamps: To hold pieces in place while fastening.
Cost Breakdown Estimation
Estimating the exact cost for your DIY bike shed plans can be challenging. Local material prices fluctuate, and specific design choices impact expenses. However, this general breakdown will help you budget.
- Lumber (40-60%): This will likely be your largest expense. Pressure-treated lumber, while more costly, is non-negotiable for ground contact. Quality of framing lumber and siding choice also play a big role.
- Roofing Materials (10-20%): The material you choose makes a difference. Asphalt shingles are generally more affordable than metal roofing systems.
- Hardware & Fasteners (5-10%): Screws, nails, hinges, and latches add up. Buying in bulk can sometimes save money.
- Foundation Materials (5-15%): This is highly variable. A simple gravel base with concrete blocks will be less expensive than pouring a full concrete slab.
- Finishing Materials (5-10%): Paint, stain, caulk, and brushes are necessary for protection and appearance. Consider higher-quality exterior paints for better longevity.
For a basic 4×8 to 6×8 foot bike shed, expect material costs to range from $400 to $1200+. This depends heavily on material quality, local prices, and the complexity of your chosen DIY bike shed plans. It’s always wise to add an extra 10-15% to your budget for unforeseen expenses or mistakes. Shopping around, comparing prices at different lumber yards, and looking for sales can significantly reduce your overall expenditure. Consequently, careful planning at this stage will save you time and money during construction.
Finishing Touches and Maintenance for Your New Bike Shed
Once the primary construction of your DIY bike shed plans is complete, it’s time to focus on the essential finishing touches. These steps are crucial for enhancing both the aesthetics and durability of your new structure. Moreover, proper maintenance will ensure your shed protects your bikes effectively for many years.
Protecting Your Investment: Finishing Touches
1. Weatherproofing for Longevity:
- Exterior Painting/Staining: Apply a high-quality exterior paint or wood stain to all exposed wooden surfaces. This acts as a vital barrier against moisture, UV rays, and insect damage. For instance, a dark stain can beautifully complement your garden while offering robust protection.
- Caulking and Sealing: Use exterior-grade caulk to seal any gaps around windows, doors, and seams. Consequently, this prevents water intrusion, which is a common cause of rot and structural damage.
- Roof Integrity: Double-check that your chosen roofing material is securely installed and properly flashed. This prevents leaks, which otherwise could damage your bikes and the shed’s interior.
2. Essential Ventilation:
Proper airflow is paramount for any enclosed outdoor space. Install small, screened vents near the top and bottom of your shed. This cross-ventilation system helps prevent condensation, mold, and mildew buildup, thereby protecting your bikes from rust.
3. Enhancing Security Measures:
Safeguarding your valuable bicycles is a top priority.
- Robust Locks: Equip your shed door with a heavy-duty padlock or a secure deadbolt.
- Internal Anchors: Consider installing ground anchors inside the shed. You can then chain your bikes to these anchors for an extra layer of security. This makes it significantly harder for thieves to remove your bikes.
4. Optimized Interior Organization:
Maximize the functionality of your DIY bike shed plans with smart storage solutions.
- Wall Hooks: Install hooks for helmets, backpacks, and cycling apparel.
- Shelving Units: Add shelves for tools, lubricants, and spare parts.
- Bike Racks: Utilize vertical bike racks to keep bikes upright and off the floor, freeing up valuable space. This also makes it easier to access individual bikes.
Ongoing Care for Your Bike Shed
Regular maintenance is key to extending the life of your bike shed. Therefore, establishing a routine will save you time and money in the long run.
1. Annual Inspection:
Once a year, conduct a thorough inspection of your shed. Look for any signs of wear and tear, such as loose shingles, cracked siding, or foundation issues. Early detection of problems allows for prompt and less costly repairs.
2. Repainting or Restaining:
Depending on your local climate and the product used, you may need to reapply paint or stain every 3 to 5 years. This maintains the protective barrier and keeps your shed looking new.
3. Gutter Maintenance:
If your shed includes gutters, ensure they are free of leaves and debris. Clean gutters properly divert rainwater away from the shed’s foundation, preventing water damage.
4. Lubrication:
Periodically lubricate door hinges, latches, and any moving parts. This ensures smooth operation and prevents rust from forming on critical hardware. Following these steps will help you enjoy your secure and organized bike storage for years to come. For more detailed instructions and expert tips on building and maintaining your ideal bike storage, Learn more here.
Congratulations! You’ve now explored the comprehensive journey of creating your own bicycle storage solution using detailed DIY bike shed plans. From understanding the myriad benefits of building your own shed to meticulously following step-by-step construction, and finally, adding those crucial finishing touches, you are well-equipped to undertake this rewarding project. Remember, building a bike shed is more than just a construction task; it’s an investment in protecting your bicycles, decluttering your space, and enhancing your property’s value and aesthetics. Our guide has provided the blueprint, the expert tips, and the encouragement needed to transform raw materials into a functional and beautiful storage unit. Embrace the challenge, enjoy the process, and take pride in the durable, custom-built bicycle haven you’ve created. Your bikes (and your wallet) will thank you!


